
Homemade Garlic Herb Delight Bread Recipe Everyone Will Love
Nothing beats the aroma of freshly baked garlic herb delight bread wafting through your kitchen on a lazy weekend afternoon.
Warm, golden-brown loaves packed with fragrant herbs and roasted garlic promise a mouthwatering experience that elevates any meal.
The combination of soft, pillowy dough and intense herbal notes creates a sensory symphony that beckons everyone to the table.
Each slice offers a delightful blend of rustic charm and gourmet sophistication.
Kneading the dough becomes a therapeutic ritual that connects you to centuries-old baking traditions.
This recipe transforms simple ingredients into a culinary masterpiece that will have everyone asking for seconds.
Dive into this delectable journey and let the irresistible flavors of homemade bread delight your senses.
Quick Recipe Overview
Garlic Herb Bread Ingredient Guide
For Bread Base:For Flavor Enhancers:For Binding and Richness:For Fresh Garnish:Tools for Making Garlic Herb Bread
How to Bake Garlic Herb Bread
Get your oven ready by heating it to a toasty temperature that will transform your bread into a crispy delight.
Slice your French loaf carefully, keeping the bottom intact so the flavors can mingle beautifully.
Crush fresh garlic cloves with a pinch of salt, creating a fragrant paste that will infuse your bread with incredible flavor.
Whip together softened butter with the garlic paste, creating a creamy mixture that will coat each slice with deliciousness.
Generously spread the garlic butter across every slice, ensuring no corner is left untouched.
Slide the bread into the hot oven and let it bake until the edges turn a beautiful golden brown and the aroma fills your kitchen.
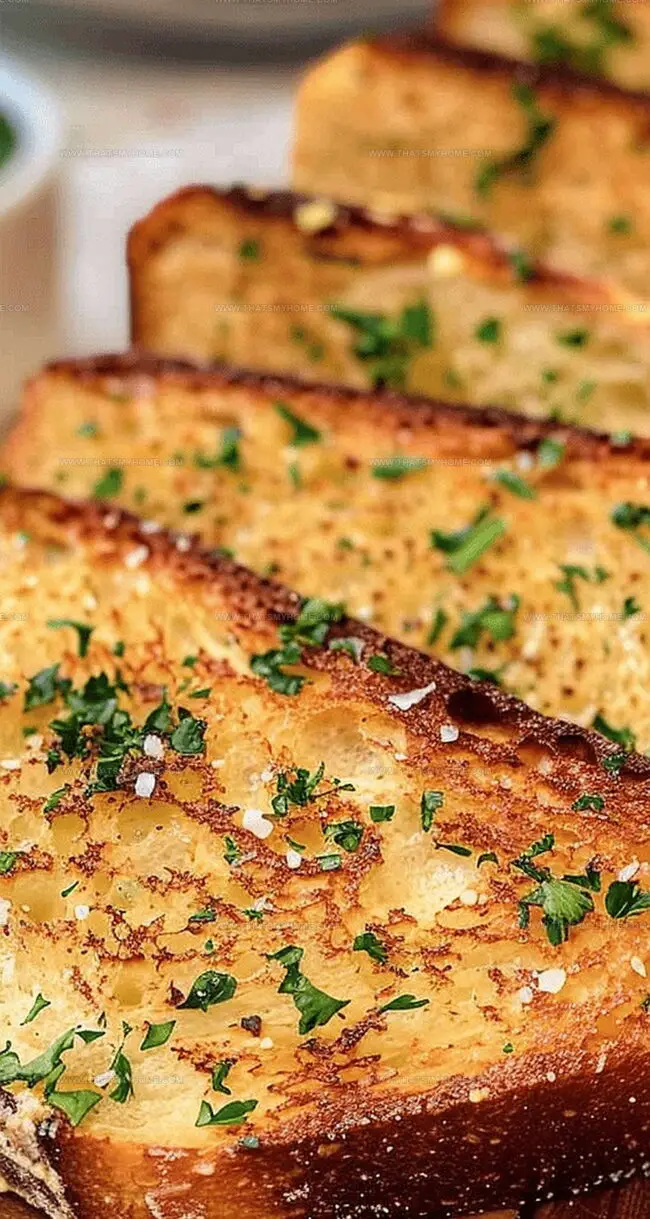
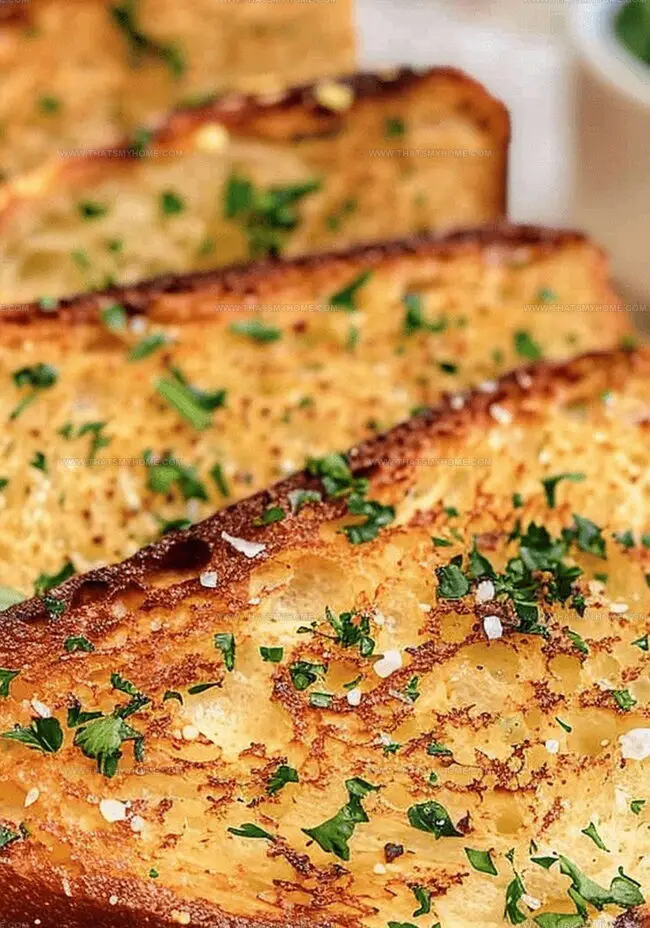
Sprinkle fresh herbs over the hot bread, adding a burst of color and a fresh finish to your mouthwatering creation.
Flavor Boost Tips for Garlic Herb Loaf
Ways to Serve Garlic Herb Bread
Garlic Bread Storage Made Easy
Print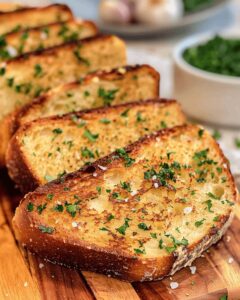
Aromatic Garlic Herb Bread Recipe
- Total Time: 25 minutes
- Yield: 9 1x
Description
Garlic herb delight bread combines rich Mediterranean flavors with aromatic herbs and golden crust. Home bakers can quickly create this rustic loaf that promises comfort and deliciousness with simple ingredients and straightforward techniques.
Ingredients
- 1 French loaf (large)
- ¼ cup butter (softened, 57 g)
- 2 garlic cloves (minced)
- ¼ cup fresh parsley (chopped)
- 2 tbsps garlic powder
- 2 tbsps water
- Salt flakes (to taste)
Instructions
- Preparation: Preheat the oven to 180 degrees Celsius (350 degrees Fahrenheit), positioning the rack in the center for even heat distribution.
- Bread Modification: Slice the French loaf horizontally while keeping the base intact, creating a connected, fan-like structure for optimal butter absorption.
- Garlic Transformation: Crush fresh garlic cloves with sea salt using a knife’s broad side, creating a smooth, intense aromatic paste that will infuse the bread with robust flavor.
- Flavor Fusion: Combine softened butter with the garlic paste, garlic powder, and water, whisking until a harmonious, creamy mixture emerges that will coat each bread crevice.
- Butter Infiltration: Meticulously spread the herbed butter mixture between each bread slice, ensuring complete flavor penetration and even distribution from base to tip.
- Baking Brilliance: Place the prepared loaf in the preheated oven, baking for 12-15 minutes until the edges transform into a crisp, golden-brown masterpiece with enticing aromatics.
- Finishing Touch: Immediately after removing from the oven, sprinkle finely chopped fresh parsley across the surface, adding a vibrant, herbaceous dimension and elegant visual appeal.
Notes
- Slice Strategically: Keep the bread base intact while cutting to maintain the loaf’s structure and ensure even herb butter distribution.
- Garlic Crushing Technique: Use knife’s broad side to crush garlic with salt, creating a smoother, more intense flavor paste that blends seamlessly into butter.
- Butter Blending Mastery: Ensure butter is fully softened at room temperature for easier mixing and more uniform flavor integration with garlic and herbs.
- Golden Crisp Timing: Watch bread closely during final 3-5 minutes of baking to achieve perfect golden edges without burning, as ovens can vary in heat intensity.
- Prep Time: 10 minutes
- Cook Time: 15 minutes
- Category: Snacks, Appetizer, Breakfast
- Method: Baking
- Cuisine: American
Nutrition
- Serving Size: 9
- Calories: 210
- Sugar: 1 g
- Sodium: 150 mg
- Fat: 10 g
- Saturated Fat: 6 g
- Unsaturated Fat: 4 g
- Trans Fat: 0 g
- Carbohydrates: 26 g
- Fiber: 1 g
- Protein: 4 g
- Cholesterol: 25 mg
Michael Rivera
Co-Founder & Culinary Instructor
Expertise
Education
The French Culinary Institute (now part of the International Culinary Center)
Michael Rivera is a seasoned chef and culinary instructor based in San Francisco, CA. Trained in Classic Culinary Arts at The French Culinary Institute, he refined his skills in Michelin-starred kitchens, mastering classic French techniques and artisanal bread baking.
Passionate about making gourmet methods accessible, Michael co-founded thatsmyhome.com to share his expertise through interactive online lessons and innovative, plant-based recipes. He loves blending traditional techniques with modern ideas, encouraging home cooks to enjoy the art of cooking in a relaxed, fun environment.