The Best Cheesy Garlic Bread Recipe You’ll Crave Every Day
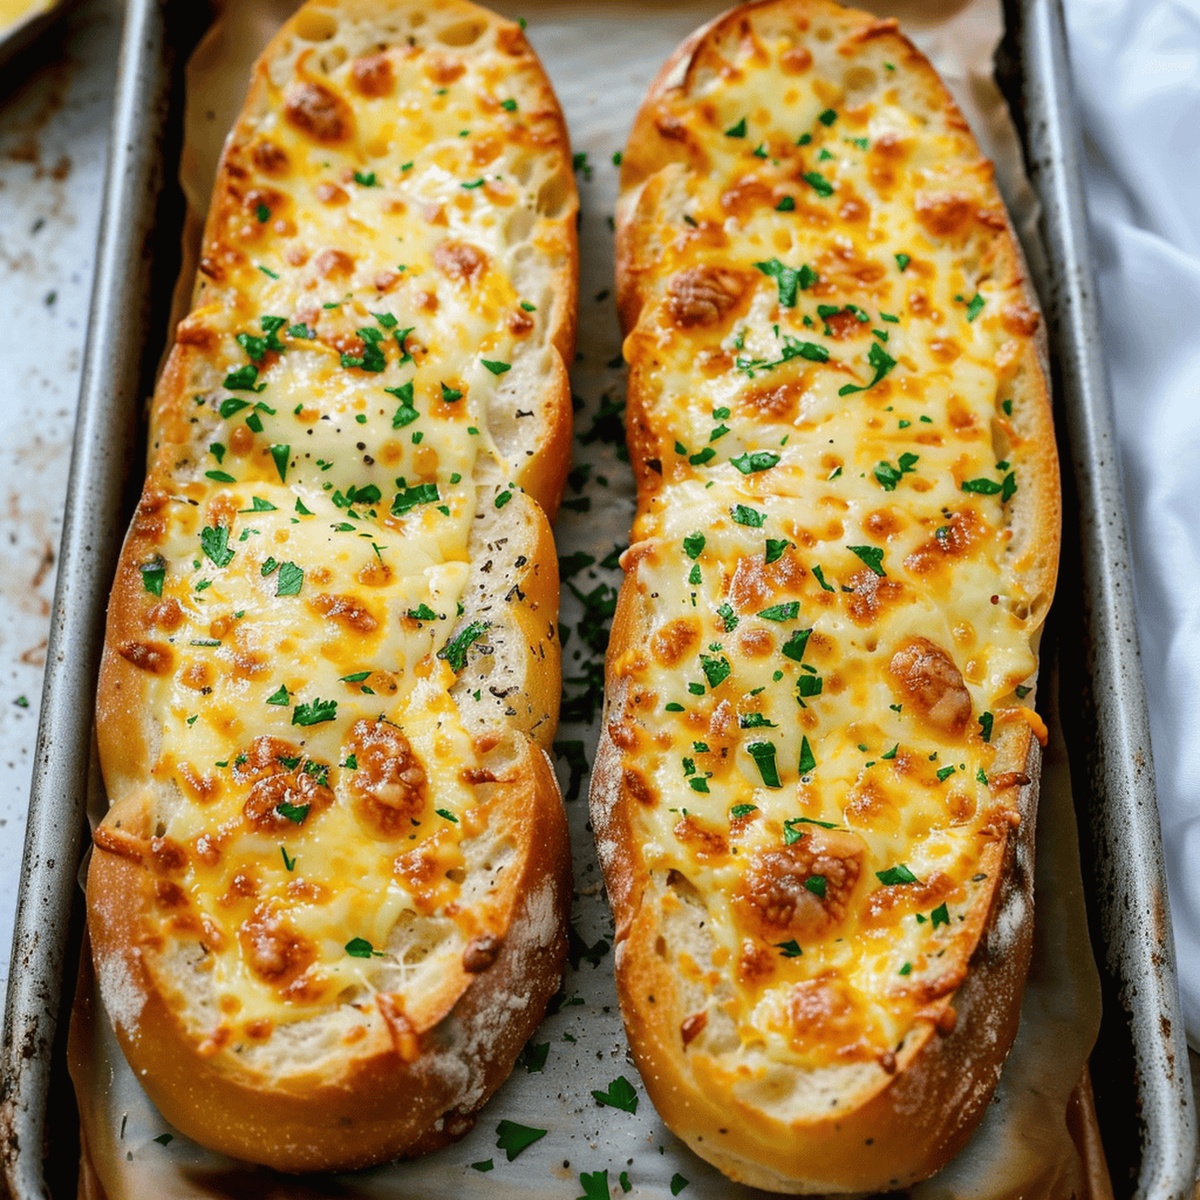
Garlic bread refines ordinary bread into a mouthwatering sensation that instantly elevates any meal.
This irresistible side dish combines rich, bold flavors that dance across your palate with remarkable intensity.
Crispy edges give way to a soft, buttery center that melts in your mouth.
Aromatic garlic infuses each slice with a robust, comforting essence that beckons hungry diners.
The melted cheese creates a golden, bubbling layer that adds depth and indulgence to every bite.
Simple ingredients merge into a culinary masterpiece that feels both familiar and extraordinary.
Prepare to fall in love with a classic crowd-pleaser that never disappoints.
Easy Cheesy Garlic Bread: A Quick and Tasty Side Dish
Key Ingredients for Easy Cheesy Garlic Bread
Bread Base:Flavor Enhancers:Cheese Topping:Garnish:How to Make Easy Cheesy Garlic Bread

Step 1: Warm Up The Oven
Crank your oven to 400°F and grab a baking sheet. Slice the French bread loaf right down the middle lengthwise, creating two perfect halves.
Step 2: Create Flavor-Packed Butter Mixture
In a small bowl, blend together:Spread this amazing mixture evenly across both bread halves, making sure every inch gets covered.
Step 3: Add Cheese Goodness
Generously sprinkle these delicious cheeses over the buttered bread:Step 4: Bake To Melty Perfection
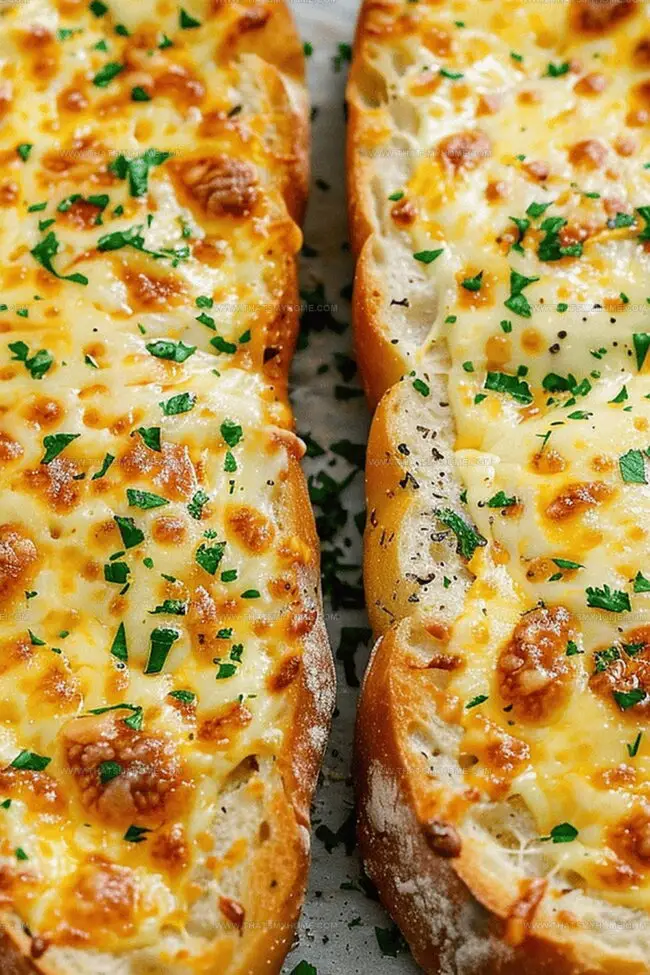
Pop the baking sheet into the preheated oven. Bake for 12-15 minutes until the cheese transforms into a bubbly, golden masterpiece. For an extra crispy top, switch to broil for 1-2 minutes at the end.
Step 5: Garnish And Serve
If you want to add a fresh touch, sprinkle some chopped fresh parsley over the top. Slice into strips and serve hot, watching everyone’s eyes light up with excitement.
Tips for Perfect Easy Cheesy Garlic Bread
Storing and Reheating Easy Cheesy Garlic Bread
Pairing Easy Cheesy Garlic Bread with Pastas and Soups
Creative Variations of Easy Cheesy Garlic Bread
Print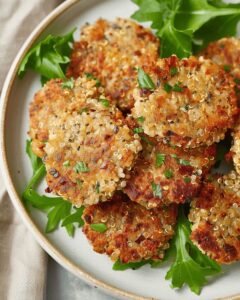
Quinoa Patties Recipe
- Total Time: 35 minutes
- Yield: 10 1x
Description
Quinoa Patties blend Mediterranean herbs with protein-packed quinoa, creating a delightful vegetarian dish perfect for any meal. Crisp edges and a hearty center make these patties a satisfying choice that will delight both plant-based eaters and traditional recipe enthusiasts.
Ingredients
Main Proteins:
- 2 eggs
- 1 cup cooked quinoa
- ½ cup mozzarella cheese
Base/Binding Ingredients:
- 1 cup panko breadcrumbs
Seasonings and Additional Ingredients:
- ½ teaspoon oregano
- ½ teaspoon garlic powder
- ½ teaspoon salt
- ½ teaspoon black pepper
- ¼ cup finely minced red onion
- 4 tablespoons (60 milliliters) avocado oil, divided
Instructions
- Thoroughly combine cooked quinoa with eggs, oregano, garlic powder, salt, and black pepper in a medium mixing bowl, ensuring an even distribution of seasonings.
- Gently fold in mozzarella cheese and finely minced red onion to enhance the flavor profile of the quinoa mixture.
- Carefully sprinkle panko breadcrumbs over the mixture, allowing them to rest for 2-3 minutes to absorb moisture and help bind the ingredients together.
- Using a measuring cup, portion out the quinoa mixture and shape into uniform patties with slightly moistened hands to prevent sticking.
- Prepare a large non-stick skillet by heating of avocado oil over medium heat until the surface shimmers slightly.
- Carefully place half of the quinoa patties into the heated skillet, cooking for approximately 3-4 minutes on each side until they develop a crispy, golden-brown exterior.
- Transfer the first batch of cooked patties to a paper towel-lined plate to drain excess oil, then repeat the cooking process with the remaining patties using the remaining oil.
- Serve the quinoa patties warm as a protein-rich appetizer or light meal, optionally accompanied by a fresh herb garnish or light dipping sauce.
Notes
- Cheese and herbs elevate these protein-packed patties with surprising Mediterranean-inspired flavors.
- Mixing wet and dry ingredients creates a binding texture that helps patties hold together perfectly during cooking.
- Water on hands prevents sticky mixture from clinging while shaping uniform quinoa rounds for consistent cooking.
- Medium heat ensures crispy golden exterior without burning delicate quinoa protein surfaces.
- Leftover patties refrigerate beautifully, making them ideal for quick meal prep or next-day lunch options.
- Prep Time: 15 minutes
- Cook Time: 20 minutes
- Category: Lunch, Dinner, Snacks
- Method: Frying
- Cuisine: Mediterranean
Nutrition
- Serving Size: 10
- Calories: 250 kcal
- Sugar: 1 g
- Sodium: 300 mg
- Fat: 14 g
- Saturated Fat: 3 g
- Unsaturated Fat: 9 g
- Trans Fat: 0 g
- Carbohydrates: 30 g
- Fiber: 2 g
- Protein: 8 g
- Cholesterol: 100 mg
Mary Ellen
Founder, Pastry Chef & Recipe Developer
Expertise
Education
Savannah Technical College
Mary Ellen is the heart and soul of thatsmyhome.com. As the founder, pastry chef, and recipe developer, she refined her skills at Savannah Technical College with an Associate of Applied Science in Culinary Baking & Pastry Arts.
Mary blends classic techniques with modern twists to make artisanal breads, beautifully crafted pastries, and desserts full of unique flavor. Her passion is evident in every recipe, and she enjoys sharing her expertise through hands-on pastry workshops and insightful articles in local culinary magazines.