
Irresistible Cheesy Hawaiian Roll Garlic Bread Recipe
Cheesy Hawaiian roll garlic bread crafts ordinary dinner rolls into an irresistible culinary delight that sparks instant excitement.
Soft, pillowy rolls become a canvas for bold, aromatic flavors that dance across your palate.
Butter and herbs mingle, creating a symphony of taste that elevates simple ingredients into something extraordinary.
Each piece promises a mouthwatering experience that blends comfort with gourmet flair.
The combination of melted cheese and garlic creates an addictive aroma that draws people together.
You’ll find this dish bridges the gap between casual snacking and impressive entertaining.
Prepare to wow friends and family with this simple yet sensational side.
Why You’ll Love Cheesy Hawaiian Roll Garlic Bread
Cheesy Hawaiian Roll Garlic Bread Ingredients
Main Ingredients:Seasonings and Cheese:Optional Garnish:Cheesy Hawaiian Roll Garlic Bread Instructions
Step 1: Warm Up the Oven
Crank your oven to 400°F (200°C) and get ready for some delicious magic.
Step 2: Prepare the Hawaiian Rolls
Grab your slider rolls and place them in a baking dish. Carefully slice gentle cuts into the tops of the rolls without cutting all the way through.
Step 3: Add Cheesy Goodness
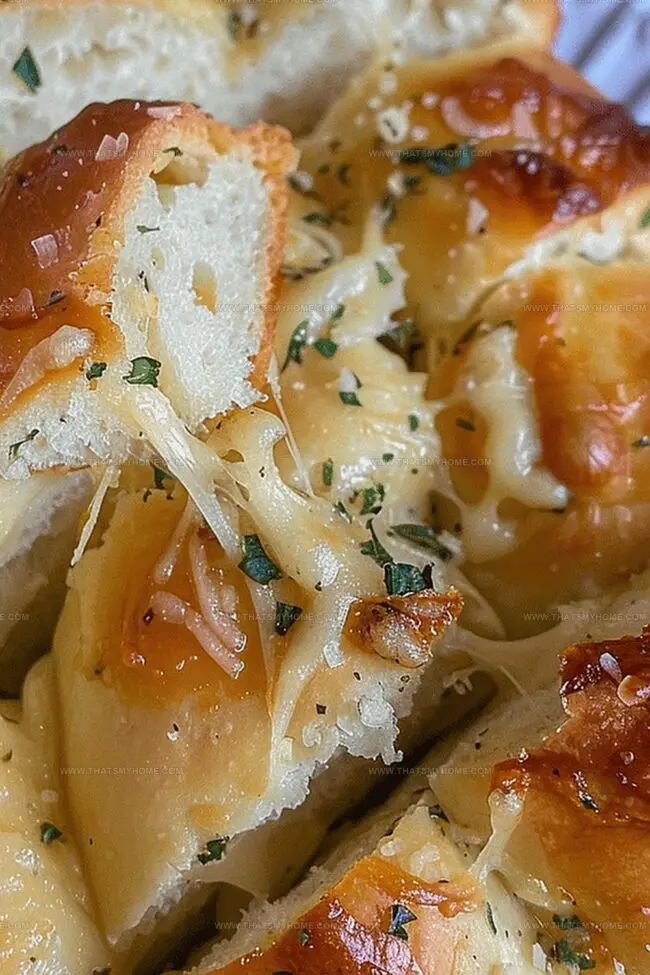
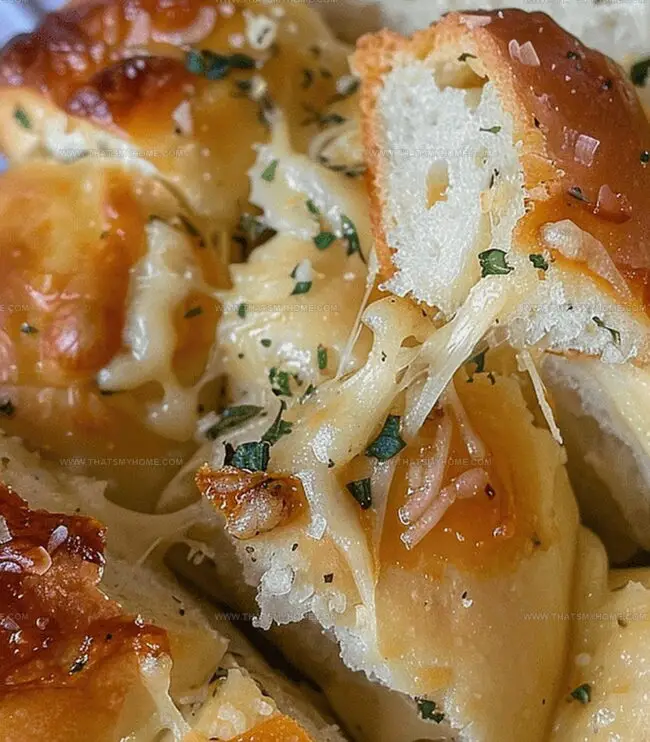
Tuck mozzarella cheese into each slit of the rolls. In a separate bowl, mix together:Spread this flavorful mixture generously over the top of the rolls.
Step 4: Bake to Perfection
Slide the baking dish into the preheated oven and bake for 9-11 minutes. Watch for the cheese to melt completely and the tops to turn a beautiful golden brown.
Step 5: Serve and Enjoy
Pull the rolls out of the oven and serve them warm. These cheesy garlic bread rolls are perfect for sharing and will disappear fast!
Cheesy Hawaiian Roll Garlic Bread Tips
How to Store and Reheat Leftovers of Cheesy Hawaiian Roll Garlic Bread
Cheesy Hawaiian Roll Garlic Bread Pairing Tips
Cheesy Hawaiian Roll Garlic Bread Variations
Print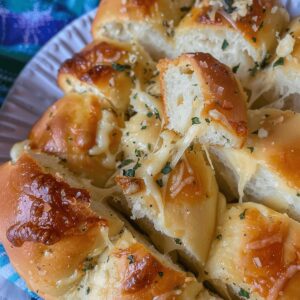
Cheesy Hawaiian Roll Garlic Bread Recipe
- Total Time: 20 minutes
- Yield: 12 1x
Description
Hawaiian Roll Garlic Bread delivers a mouthwatering fusion of buttery rolls and zesty garlic goodness. Melted cheese and herbal notes create an irresistible appetizer that brings comfort and excitement to your table, guaranteed to wow guests with its simple yet explosive flavor profile.
Ingredients
Main Cheese Ingredients:
- 1 cup mozzarella cheese
- 1 tablespoon (0.5 oz) grated Parmesan cheese
Dairy and Fat:
- ½ cup (4 oz or 8 tablespoons) butter, softened
Seasonings and Herbs:
- 2 teaspoons minced garlic
- 1 teaspoon garlic powder
- 1 teaspoon parsley
- ½ teaspoon sea salt
Base:
- 12 Hawaiian slider rolls
Instructions
- Prepare a clean baking dish and arrange the Hawaiian rolls side by side, ensuring they are positioned close together but not overlapping.
- Carefully create precise horizontal cuts through each roll, cutting approximately three-quarters of the way through without completely separating the bread sections.
- Insert thin slices of mozzarella cheese into each strategic slit, distributing the cheese evenly across all rolls to guarantee consistent melting.
- In a separate mixing bowl, combine softened unsalted butter, finely grated Parmesan cheese, minced garlic, dried oregano, and a pinch of kosher salt, whisking until the ingredients form a uniform, fragrant mixture.
- Generously spread the herbed butter compound across the top of the rolls, ensuring complete coverage and allowing the mixture to seep into the pre-cut slits.
- Position the prepared dish in a preheated oven at 400 degrees Fahrenheit (200 degrees Celsius) and bake for 10 to 12 minutes, monitoring until the cheese becomes completely melted and the roll tops develop a golden-brown, crispy exterior.
- Remove from the oven and let rest for 2-3 minutes to allow the cheese to set slightly, then serve immediately while warm for optimal flavor and texture.
Notes
- Elevate your slider rolls with this mouthwatering garlic cheese twist that transforms ordinary bread into a crowd-pleasing appetizer.
- Customize the cheese blend by mixing mozzarella with sharp cheddar or provolone for added depth of flavor.
- Prep rolls in advance and refrigerate before baking, making them perfect for last-minute gatherings or unexpected guests.
- Replace Parmesan with pecorino romano for a tangier cheese profile that complements the rich butter mixture.
- Store leftover rolls in an airtight container and reheat briefly in the oven to maintain their crispy exterior and gooey cheese center.
- Prep Time: 10 minutes
- Cook Time: 10 minutes
- Category: Appetizer
- Method: Baking
- Cuisine: American
Nutrition
- Serving Size: 12
- Calories: 210 kcal
- Sugar: 2g
- Sodium: 340mg
- Fat: 12g
- Saturated Fat: 7g
- Carbohydrates: 22g
- Fiber: 1g
- Protein: 6g
- Cholesterol: 30mg
Mary Ellen
Founder, Pastry Chef & Recipe Developer
Expertise
Education
Savannah Technical College
Mary Ellen is the heart and soul of thatsmyhome.com. As the founder, pastry chef, and recipe developer, she refined her skills at Savannah Technical College with an Associate of Applied Science in Culinary Baking & Pastry Arts.
Mary blends classic techniques with modern twists to make artisanal breads, beautifully crafted pastries, and desserts full of unique flavor. Her passion is evident in every recipe, and she enjoys sharing her expertise through hands-on pastry workshops and insightful articles in local culinary magazines.