
Easy Coffee Cake with Cappuccino Frosting Recipe: Sweet Morning Joy
Indulgent coffee cake with cappuccino frosting enhances ordinary moments into delightful culinary celebrations.
Soft, moist layers promise a sensory journey that awakens your taste buds with rich, aromatic complexity.
Baker’s passion radiates through each carefully crafted crumb, blending traditional comfort with modern sophistication.
Sweet undertones dance gracefully alongside intense coffee notes, creating a harmonious flavor profile that captivates dessert enthusiasts.
Subtle hints of warmth and depth emerge from strategic ingredient combinations, elevating this cake beyond standard sweet treats.
Delicate textures invite you to savor every nuanced bite, promising a memorable experience that lingers pleasantly.
Sophisticated yet approachable, this recipe bridges home baking and professional pastry artistry.
Why Coffee Cake with Cappuccino Frosting Deserves a Spot on Your Table
What Goes into a Perfect Coffee Cake with Cappuccino Frosting
Main Cake Ingredients:Liquid and Flavor Ingredients:Frosting and Finishing Ingredients:Additional Technical Ingredients:How to Bake Coffee Cake with Cappuccino Frosting Like a Pro
Step 1: Prepare Oven
Adjust oven rack to middle position. Preheat to 350°F. Line 8-inch round cake pan with parchment paper.
Step 2: Create Coffee Liquid
Heat ingredients in saucepan, stirring until coffee dissolves completely. Let cool to room temperature.
Step 3: Cream Butter Mixture
Blend ingredients using mixer until light and fluffy, creating smooth consistency.
Step 4: Incorporate Eggs
Add eggs one at a time, mixing thoroughly after each addition to ensure perfect integration.
Step 5: Combine Dry Ingredients
Sift ingredients together in separate bowl.
Step 6: Mix Cake Batter
Gradually combine dry ingredients and coffee liquid with butter mixture, whisking until smooth and airy.
Step 7: Bake Cake
Pour batter into prepared pan. Bake 38-40 minutes until golden. Cover with foil if browning too quickly.
Step 8: Cool Cake
Rest in pan 10 minutes, then transfer to wire rack for complete cooling.
Step 9: Prepare Cappuccino Frosting
Heat portion of cream with coffee powders. Cool completely.
Step 10: Whip Cream Frosting
Whisk remaining cream and powdered sugar until soft peaks form. Slowly incorporate coffee mixture.
Step 11: Decorate Cake
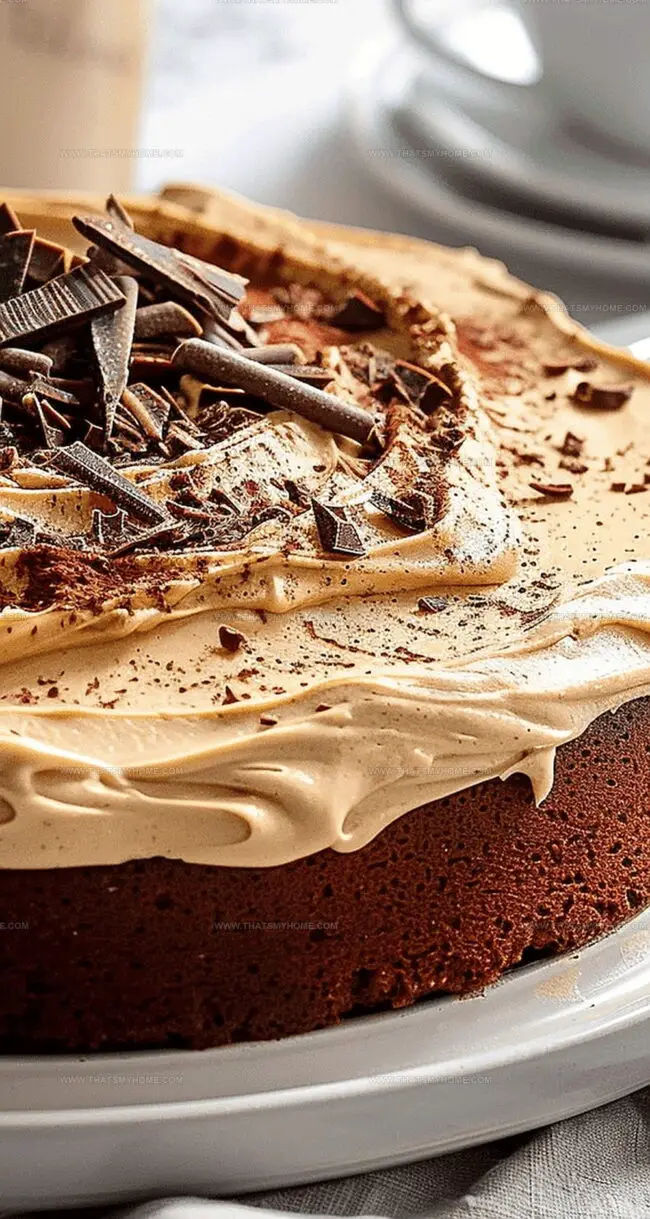
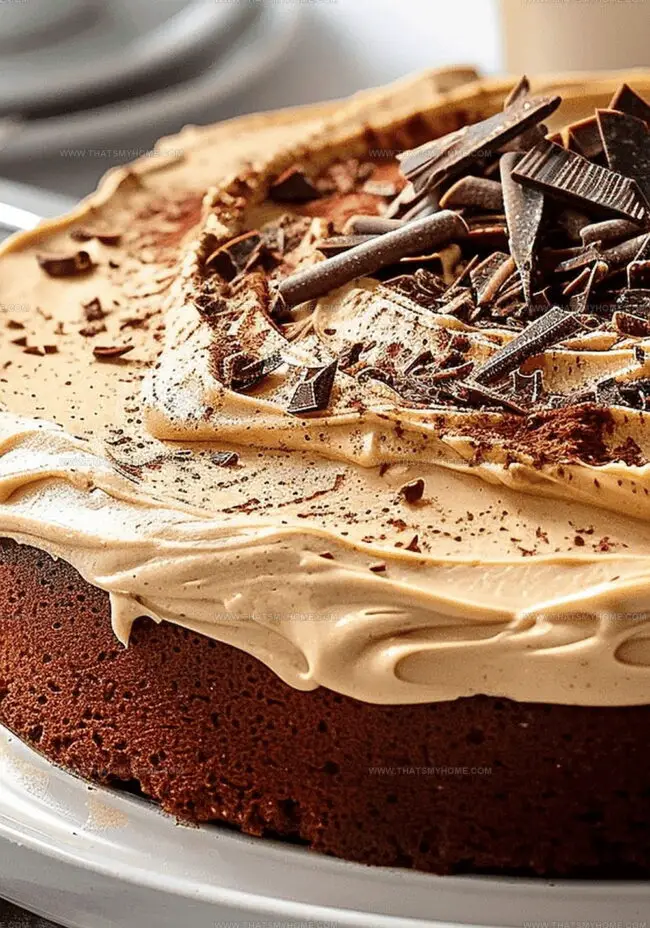
Spread frosting evenly over cooled cake. Create decorative swirls using offset spatula.
Step 12: Final Touch
Sprinkle chocolate shavings on top for elegant presentation.
Serving and Storage:
Slice and serve immediately. Store in sealed container in refrigerator for 3-4 days.
Pro Tips:Enjoy your delightful homemade coffee cake!
Tips for Mastering Coffee Cake with Cappuccino Frosting
How to Keep Coffee Cake with Cappuccino Frosting Fresh and Tasty
Delicious Pairings for Coffee Cake with Cappuccino Frosting
Fun Variations of Coffee Cake with Cappuccino Frosting to Try
Print
Coffee Cake With Cappuccino Frosting Recipe
- Total Time: 1 hour 5 minutes
- Yield: 8 1x
Description
Classic coffee cake reaches new heights with rich cappuccino frosting, promising indulgent comfort in each delectable slice. Creamy espresso-infused layers marry perfectly with tender crumb, offering coffee enthusiasts a sublime dessert experience you’ll crave again and again.
Ingredients
Main Ingredients:
Flour and Nuts:
- 180 g (1 ½ cups) plain gluten-free flour blend
- 60 g (½ cup + 1 ½ tablespoons) ground walnuts
Dairy and Sugar:
- 140 g (1 ¼ sticks) unsalted butter, softened
- 100 g (½ cup) light brown soft sugar
- 75 g (¼ cup + 2 tablespoons) caster or granulated sugar
- 120 g (½ cup) whole milk
Eggs and Flavoring:
- 3 UK medium/US large eggs, room temperature
- ½ teaspoon vanilla bean paste (or 1 teaspoon vanilla extract)
Supporting Ingredients:
Dry Ingredients:
- 2 ½ teaspoons baking powder
- ½ teaspoon xanthan gum (omit if gluten-free flour blend contains it)
- ¼ teaspoon salt
- 15 g (3 ½ tablespoons) instant coffee granules
Frosting Ingredients:
- 300 g (1 ⅓ cups) double/heavy cream
- 18 g (2 ½ tablespoons) cappuccino powder
- 2 g (1 ½ teaspoons) instant coffee granules
- 120 g (1 cup) icing/powdered sugar
- Chocolate shavings for decoration
Instructions
- Prepare the oven by positioning the rack in the middle and heating to 350°F (180°C). Carefully line an 8-inch (20 centimeters) round cake pan with parchment paper.
- Create a coffee-infused liquid by gently warming milk with instant coffee in a small saucepan, stirring until completely dissolved. Allow the mixture to cool to room temperature.
- In a large mixing bowl, combine softened butter, light brown sugar, caster sugar, and vanilla extract. Whip the ingredients using an electric mixer until the mixture becomes light and fluffy.
- Incorporate eggs into the butter mixture one at a time, ensuring each egg is thoroughly blended before adding the next.
- In a separate bowl, sift together gluten-free flour blend, ground walnuts, baking powder, xanthan gum, and salt to create a uniform dry ingredient mixture.
- Gradually fold the dry ingredients into the wet mixture, alternating with the coffee-infused milk. Mix gently until a smooth, consistent batter forms.
- Transfer the batter to the prepared cake pan, smoothing the top with a spatula. Bake for 38-40 minutes, monitoring to prevent over-browning. If the cake’s surface darkens too quickly, cover loosely with aluminum foil.
- Remove from the oven and let the cake rest in the pan for 10 minutes. Carefully transfer to a wire cooling rack to reach room temperature.
- Prepare the cappuccino cream by heating 70 grams (about ⅓ cup) of heavy cream with cappuccino powder and instant coffee. Stir until completely dissolved and allow to cool completely.
- Whip the remaining cream with powdered sugar until soft peaks form, creating a light and airy base for the frosting.
- Slowly incorporate the cooled coffee-cream mixture into the whipped cream, adding one tablespoon at a time. Whisk thoroughly to ensure a smooth, consistent texture.
- Once the cake has cooled completely, generously spread the cappuccino frosting over the top, creating elegant swirls with an offset spatula.
- Garnish the frosted cake with delicate chocolate shavings for an elegant finishing touch.
- Slice and serve immediately, or store in a sealed container in the refrigerator for 3-4 days.
Notes
- Gluten-free baking requires precise mixing and careful ingredient selection to achieve a light, fluffy texture.
- Coffee-infused milk adds deep, rich flavor throughout the entire cake, enhancing its aromatic profile.
- Xanthan gum is crucial for binding gluten-free flour, preventing crumbly texture and maintaining cake structure.
- Ground walnuts contribute nutty undertones and additional moisture to the cake’s delicate crumb.
- Whisking gradually and alternating dry and wet ingredients ensures smooth, lump-free batter with consistent consistency.
- Cooling cake completely before frosting prevents cream from melting and maintains elegant presentation.
- Prep Time: 25 minutes
- Cook Time: 40 minutes
- Category: Breakfast, Snacks, Desserts
- Method: Baking
- Cuisine: American
Nutrition
- Serving Size: 8
- Calories: 402 kcal
- Sugar: 32 g
- Sodium: 180 mg
- Fat: 28 g
- Saturated Fat: 15 g
- Unsaturated Fat: 10 g
- Trans Fat: 0.5 g
- Carbohydrates: 35 g
- Fiber: 2 g
- Protein: 6 g
- Cholesterol: 115 mg
Mary Ellen
Founder, Pastry Chef & Recipe Developer
Expertise
Education
Savannah Technical College
Mary Ellen is the heart and soul of thatsmyhome.com. As the founder, pastry chef, and recipe developer, she refined her skills at Savannah Technical College with an Associate of Applied Science in Culinary Baking & Pastry Arts.
Mary blends classic techniques with modern twists to make artisanal breads, beautifully crafted pastries, and desserts full of unique flavor. Her passion is evident in every recipe, and she enjoys sharing her expertise through hands-on pastry workshops and insightful articles in local culinary magazines.