Creamy Peanut Butter Pie Recipe

Divine Peanut Butter Pie Recipe: Silky Indulgence Awaits

Dessert lovers swoon over this irresistible peanut butter pie that promises pure indulgence.

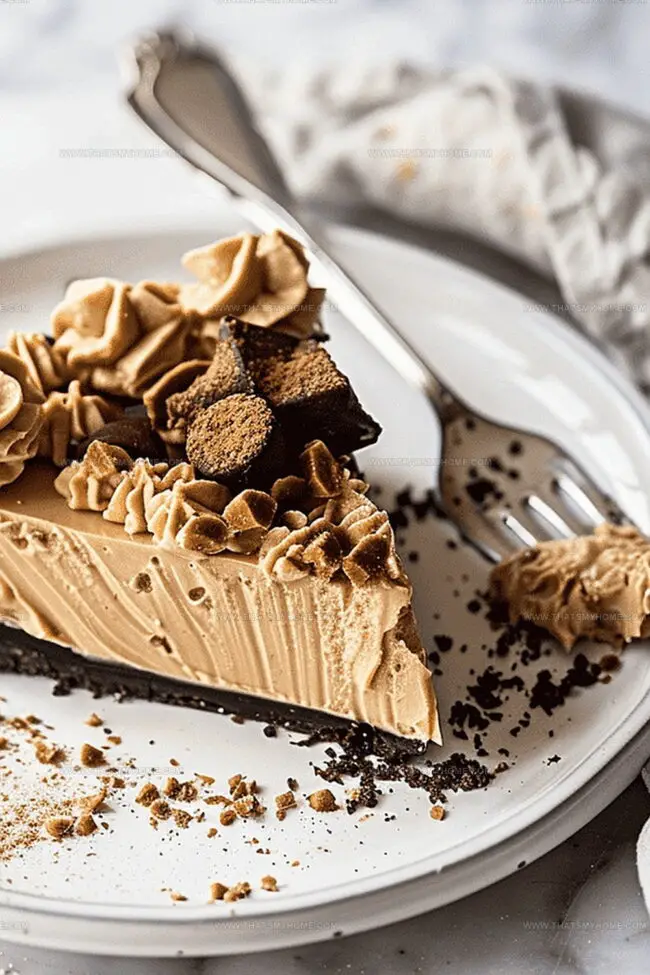
Rich, creamy textures blend seamlessly with a buttery graham cracker crust.

Every heavenly slice of this peanut butter pie recipe delivers a perfect balance of sweet and salty notes.

The silky filling melts delicately on your tongue, creating an instant moment of pure bliss.

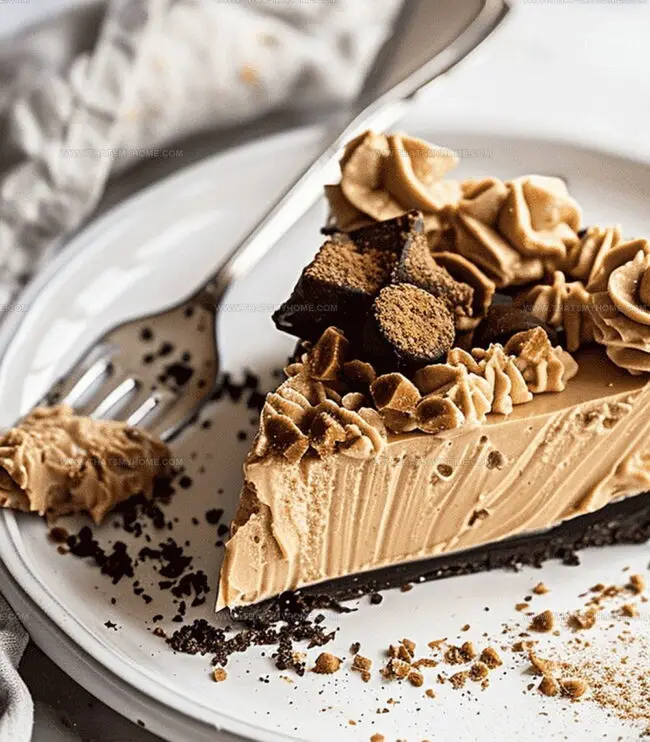
Chocolate drizzles and crushed peanuts add delightful crunch and depth to each decadent bite.

Simple ingredients come together effortlessly to craft this crowd-pleasing dessert that disappears faster than you can slice it.

One taste, and you’ll understand why this pie becomes an instant favorite at every gathering.

Tools for Building the Ultimate Peanut Butter Pie

Equipment & Tools:
  • Food processor: Essential for grinding crackers into fine crumbs for the crust.
  • 9-inch pie plate: Perfect vessel for creating and shaping the delicious pie.
  • Electric mixer: Crucial for beating cream cheese and creating smooth, fluffy filling.
  • Large mixing bowls: Needed for combining ingredients and whipping cream.
  • Wire rack: Great for cooling the baked crust completely.
  • Measuring cup: Helpful for pressing crust evenly into pie plate.
  • Resealable bags: Used for drizzling melted peanut butter and chocolate.
  • Whisk or whipping attachment: Perfect for whipping cream to stiff peaks.
  • Sharp knife or scissors: Useful for snipping bag corners for precise drizzling.

No-Fuss Instructions for Decadent Peanut Butter Pie

  • Cracker Foundation

Crush graham crackers into fine crumbs and blend with sugar. Press the mixture into a pie plate, creating a sturdy base that will cradle the creamy filling. Bake until the aroma fills your kitchen, signaling a golden transformation.

  • Silky Peanut Butter Core

Whip cream cheese and peanut butter into a cloud-like mixture. Gently fold in freshly whipped cream, creating a luxurious, airy filling that promises pure indulgence.

  • Chocolate Drizzle Finale

Melt rich chocolate and smooth peanut butter. Artfully drizzle these decadent sauces across the pie’s surface. Sprinkle mini Reese’s cups and peanut butter chips for a playful, irresistible finish.

  • Chill and Anticipate

Place the pie in the freezer, allowing flavors to meld and texture to set. After a few hours, your masterpiece will be ready to slice and savor, promising a moment of pure bliss.

Tips to Make Your Peanut Butter Pie Richer

  • Swap graham crackers with chocolate wafers or crushed pretzels for a unique base that adds extra crunch and flavor complexity.
  • Substitute full-fat cream cheese with reduced-fat or Greek yogurt to create a slightly healthier version without compromising taste.
  • Mix dark and milk chocolate for a more nuanced drizzle that creates beautiful swirls and adds depth to the pie's sweetness.
  • Roast chopped peanuts or sprinkle sea salt flakes before serving to introduce a delightful textural contrast and enhance the overall flavor profile.
  • Store the pie in the freezer for up to one week, wrapping it tightly in plastic wrap to maintain its creamy texture and prevent freezer burn.

Ways to Plate and Present Peanut Butter Pie

  • Serve Up Dessert Delights
  • Create a Chocolate Lover's Dream: Garnish each slice with extra chocolate shavings and a light dusting of cocoa powder for intense chocolate lovers who want an extra rich experience.
  • Pair with Cool Companions: Serve chilled slices alongside a scoop of vanilla ice cream or a dollop of fresh whipped cream to complement the pie's creamy peanut butter texture and enhance the overall dessert experience.
  • Craft a Stunning Presentation: Arrange mini Reese's cups artfully around the pie's edge or sprinkle additional peanut butter chips across the top for a professional bakery-style look that will impress guests and make the dessert feel extra special.
  • Perfect Party Portions: Cut into small, elegant triangular slices that allow guests to enjoy a decadent treat without feeling overwhelmed by the rich, creamy filling.

Storage Steps to Keep Your Peanut Butter Pie Smooth

  • Chill Before Serving: Refrigerate the pie for at least 6 hours or freeze for 3 hours to achieve the perfect creamy texture and allow flavors to meld together.
  • Refrigerate Smartly: Store the pie in an airtight container to prevent absorption of other food odors and maintain its delicate taste. Cover the top with plastic wrap to protect the decorative topping.
  • Maximize Freshness: Keep the pie refrigerated and consume within 3-4 days for the best flavor and texture. The cold temperature helps maintain its smooth, rich consistency.
  • Freezing Option: Wrap the entire pie tightly in plastic wrap and aluminum foil to freeze for up to 2 weeks. Thaw in the refrigerator for 2-3 hours before serving to preserve its original creamy texture.

Quick Recipe Overview

Prep Time: 25 minutes

Cook Time: 15 minutes

Total Time: 40 minutes

Calories: 430 kcal

Servings: 9

Everything in a Decadent Peanut Butter Pie Recipe

For Crust Ingredients:
  • Graham Crackers: Provides the classic, crumbly base that adds delightful texture and subtle sweetness to the pie.
  • Granulated Sugar: Enhances the overall flavor and helps bind the crust ingredients together.
  • Unsalted Butter: Adds richness and helps create a cohesive, crisp crust that holds its shape perfectly.
For Filling Ingredients:
  • Cream Cheese: Creates a smooth, tangy foundation that balances the rich peanut butter flavor.
  • Powdered Sugar: Sweetens the filling and helps achieve a silky, light texture.
  • Peanut Butter: Delivers an intense, nutty flavor that's the star of this decadent dessert.
  • Heavy Cream: Adds luxurious volume and creates a light, airy texture when whipped.
  • Vanilla Extract: Provides a subtle depth of flavor that complements the peanut butter beautifully.
For Topping Ingredients:
  • Peanut Butter: Adds an extra drizzle of nutty goodness for visual appeal and intense flavor.
  • Chocolate: Creates a rich, glossy drizzle that contrasts beautifully with the peanut butter.
  • Mini Reese's Cups: Brings a playful, nostalgic touch with their perfect chocolate-peanut butter combination.
  • Peanut Butter Chips: Provides extra crunch and concentrated peanut butter flavor as a final garnish.
Print
clock clock iconcutlery cutlery iconflag flag iconfolder folder iconinstagram instagram iconpinterest pinterest iconfacebook facebook iconprint print iconsquares squares iconheart heart iconheart solid heart solid icon
Creamy Peanut Butter Pie Recipe

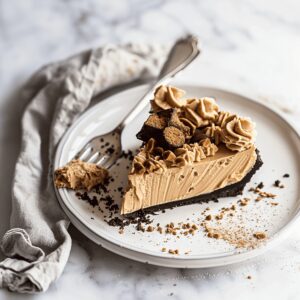
Silky Peanut Butter Pie Recipe


5 Stars 4 Stars 3 Stars 2 Stars 1 Star

4.8 from 29 reviews

  • Total Time: 40 minutes
  • Yield: 9 1x

Description

Creamy homemade Decadent Peanut Butter Pie blends rich chocolate and smooth peanut butter in a perfect dessert. Chocolate graham cracker crust and silky filling make this classic pie irresistible for those craving sweet comfort.


Ingredients

Scale
  • 1 cup (270 grams) creamy conventional peanut butter
  • 8 oz (227 grams) cream cheese, at room temperature
  • 1 cup (240 grams) heavy whipping cream
  • ¾ cup (94 grams) powdered sugar plus 2 tbsps, divided
  • 1 tsp vanilla extract
  • Melted peanut butter
  • Melted chocolate
  • Mini Reese’s cups
  • Peanut butter chips

Instructions

  1. Crust Preparation: Pulverize graham crackers and sugar in a food processor, blend with melted butter until evenly moistened. Press mixture firmly into a 9-inch pie plate using a measuring cup base.
  2. Crust Baking: Bake at 325°F (163°C) for 10-12 minutes until a nutty aroma emerges. Cool completely on a wire rack.
  3. Filling Mixing: Combine cream cheese, powdered sugar, and peanut butter in a large mixing bowl. Beat with an electric mixer until light and smooth, approximately 3 minutes.
  4. Cream Whipping: In a separate bowl, whip heavy cream with remaining powdered sugar and vanilla extract until stiff peaks form. Gently fold into the peanut butter mixture, maintaining its airy texture.
  5. Pie Assembly: Pour filling into the cooled graham cracker crust, ensuring even distribution. Freeze for 3 hours or refrigerate for 6 hours until completely set.
  6. Decorative Drizzle: Melt peanut butter and chocolate separately in microwave-safe containers. Transfer to resealable bags, snip corners, and artfully drizzle across the pie’s surface.
  7. Final Touches: Garnish with miniature Reese’s peanut butter cups and peanut butter chips. Slice and serve chilled for optimal flavor and texture.

Notes

  • Crust Consistency Check: Press graham cracker mixture firmly and evenly to create a solid, compact base that holds together when sliced.
  • Cream Cheese Temperature: Ensure cream cheese is at room temperature for smoother blending and preventing lumps in the filling.
  • Whipping Technique: Whip heavy cream carefully to avoid over-beating, which can cause a grainy texture and deflate the mixture.
  • Chilling Strategy: Allow sufficient freezing or refrigeration time to achieve the perfect slice-able, creamy texture that holds its shape.
  • Prep Time: 25 minutes
  • Cook Time: 15 minutes
  • Category: Desserts, Snacks
  • Method: Baking
  • Cuisine: American

Nutrition

  • Serving Size: 9
  • Calories: 430
  • Sugar: 24 g
  • Sodium: 200 mg
  • Fat: 35 g
  • Saturated Fat: 15 g
  • Unsaturated Fat: 20 g
  • Trans Fat: 0 g
  • Carbohydrates: 30 g
  • Fiber: 2 g
  • Protein: 9 g
  • Cholesterol: 50 mg
Michael Rivera

Michael Rivera

Co-Founder & Culinary Instructor

Expertise

  • Classic French Cuisine
  • Artisanal Bread Baking
  • Plant-Based Culinary Innovation
  • Recipe & Menu Development
  • Interactive Online Instruction

Education

The French Culinary Institute (now part of the International Culinary Center)

  • Program: Classic Culinary Arts
  • Focus: An intensive curriculum rooted in classical French techniques, artisanal bread production, and contemporary culinary methods.

Michael Rivera is a seasoned chef and culinary instructor based in San Francisco, CA. Trained in Classic Culinary Arts at The French Culinary Institute, he refined his skills in Michelin-starred kitchens, mastering classic French techniques and artisanal bread baking. 

Passionate about making gourmet methods accessible, Michael co-founded thatsmyhome.com to share his expertise through interactive online lessons and innovative, plant-based recipes. He loves blending traditional techniques with modern ideas, encouraging home cooks to enjoy the art of cooking in a relaxed, fun environment.

Leave a Reply

Your email address will not be published. Required fields are marked *

Recipe rating 5 Stars 4 Stars 3 Stars 2 Stars 1 Star