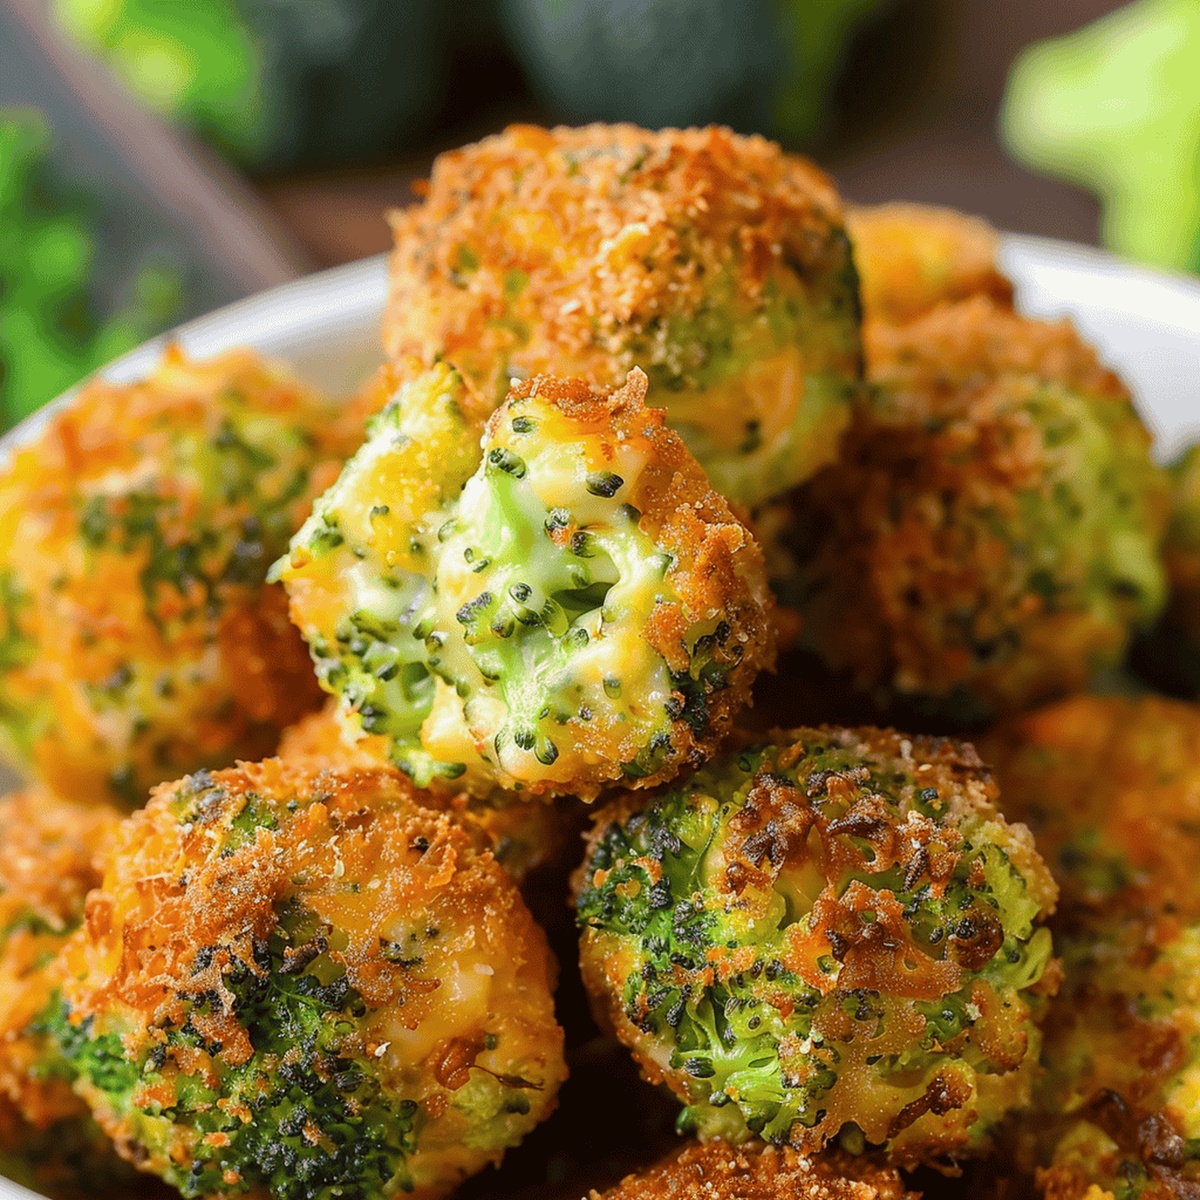
Crispy Broccoli Cheese Balls Recipe: Fun Bite-Sized Delights
Crispy, golden-brown broccoli cheese balls dance on the edge of culinary perfection, tempting taste buds with every bite.
These delightful morsels pack a flavorful punch that turns ordinary snacking into an extraordinary experience.
Packed with nutritious broccoli and melted cheese, these bite-sized delights offer a crowd-pleasing appetizer or quick side dish.
Each ball combines wholesome ingredients in a compact, irresistible package that melts in your mouth.
The combination of sharp cheddar and fresh broccoli creates a harmony of textures and flavors that will have everyone reaching for more.
Simple to make and impossible to resist, these broccoli cheese balls promise to be the star of any meal or gathering.
Get ready to elevate your cooking game with this mouthwatering recipe that transforms ordinary ingredients into something truly spectacular.
Quick Recipe Overview

What You’ll Need for Broccoli Cheese Balls
For Base Ingredients:For Binding Ingredients:For Coating and Seasoning Ingredients:Kitchen Tools for Broccoli Cheese Ball Prep
Instructions for Crispy Broccoli Cheese Balls

Gently steam broccoli until it softens slightly, then allow it to cool completely.
Create a delicious blend by combining finely chopped broccoli with a trio of cheeses, adding a sprinkle of red pepper flakes for a subtle kick.
Craft small, uniform balls using a rounded tablespoon, aiming for a dozen bite-sized treats.
Place the formed balls in the refrigerator for half an hour to help them set and develop flavor.
Set up three shallow dishes: one with flour, another with whisked eggs, and the last with crispy breadcrumbs.
Heat oil in a deep pot until it reaches the perfect frying temperature.
Carefully roll each chilled ball through flour, egg wash, and breadcrumbs for a crispy exterior.
Fry the coated balls in small batches until they turn a beautiful golden brown.
Transfer the hot balls to a paper towel to absorb excess oil and let them cool slightly before serving.
Variations & Tips for Better Cheese Balls
Serving Broccoli Cheese Balls: Quick Ideas
Best Storage Tips for Broccoli Cheese Balls
Print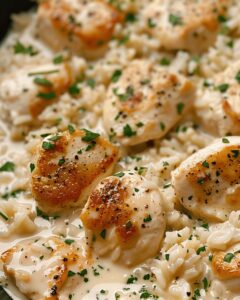
Succulent Parmesan Chicken & Rice Recipe
- Total Time: 55 minutes
- Yield: 5 1x
Description
Parmesan chicken & rice delight brings comfort and elegance to weeknight dinners with minimal cleanup. Creamy textures and rich flavors combine seamlessly, inviting you to savor each delectable bite of this simple yet sophisticated meal.
Ingredients
- 4 chicken fillets (boneless, skinless)
- 1 cup (240 ml / 8 fl oz) long-grain white rice
- 2 cups (480 ml / 16 fl oz) chicken broth
- 1 cup (240 ml / 8 fl oz) heavy cream
- 1 cup (100 g / 3.5 oz) grated Parmesan cheese
- 1 onion (small, finely chopped)
- 3 garlic cloves (minced)
- 2 tbsps (30 ml / 1 fl oz) olive oil
- Salt (to taste)
- Pepper (to taste)
- Parsley (fresh, chopped, for garnish)
Instructions
- Seasoning Preparation: Evenly coat chicken fillets with salt and pepper, ensuring comprehensive coverage on both surfaces.
- Searing Chicken: Heat olive oil in a large skillet over medium-high heat, then cook chicken until golden-brown, approximately 3-4 minutes per side. Transfer to a separate plate.
- Aromatic Foundation: In the same skillet, sauté onions and garlic until onions become translucent, releasing their fragrant essence.
- Rice Toasting: Introduce rice to the skillet, stirring continuously for 2-3 minutes to develop a rich, nutty flavor profile.
- Liquid Integration: Pour chicken broth and heavy cream into the skillet, creating a smooth, harmonious cooking base. Bring to a gentle simmer.
- Chicken Reincorporation: Carefully return seared chicken to the skillet, nestling pieces into the creamy rice mixture.
- Simmering Process: Cover skillet, reduce heat to low, and allow dish to simmer for 20-25 minutes until rice becomes tender and chicken cooks completely.
- Cheese Finale: Sprinkle freshly grated Parmesan cheese over the dish, stirring until fully melted and integrated. Perform final seasoning adjustments with salt and pepper.
Notes
- Chicken Browning Technique: Achieve a golden-brown crust by ensuring the skillet is hot before adding chicken, which locks in flavors and creates a beautiful exterior.
- Rice Toasting Tip: Sautéing rice for 2-3 minutes before adding liquid develops a deeper, nuttier flavor and prevents clumping.
- Moisture Management: Use the same skillet for each step to capture layered flavors and minimize cleanup while maintaining a rich, cohesive taste profile.
- Cheese Melting Secret: Add Parmesan off the heat to prevent separation and ensure a smooth, creamy texture that coats every grain of rice perfectly.
- Prep Time: 10 minutes
- Cook Time: 45 minutes
- Category: Dinner, Lunch
- Method: Sautéing
- Cuisine: American
Nutrition
- Serving Size: 5
- Calories: 570
- Sugar: 2 g
- Sodium: 600 mg
- Fat: 30 g
- Saturated Fat: 15 g
- Unsaturated Fat: 10 g
- Trans Fat: 0 g
- Carbohydrates: 45 g
- Fiber: 1 g
- Protein: 40 g
- Cholesterol: 150 mg
Michael Rivera
Co-Founder & Culinary Instructor
Expertise
Education
The French Culinary Institute (now part of the International Culinary Center)
Michael Rivera is a seasoned chef and culinary instructor based in San Francisco, CA. Trained in Classic Culinary Arts at The French Culinary Institute, he refined his skills in Michelin-starred kitchens, mastering classic French techniques and artisanal bread baking.
Passionate about making gourmet methods accessible, Michael co-founded thatsmyhome.com to share his expertise through interactive online lessons and innovative, plant-based recipes. He loves blending traditional techniques with modern ideas, encouraging home cooks to enjoy the art of cooking in a relaxed, fun environment.