Kettle Corn Recipe

The Perfect Sweet & Salty Kettle Corn Recipe for Movie Night

Sweet and savory kettle corn upgrades ordinary popcorn into an irresistible snack that tingles every taste bud.

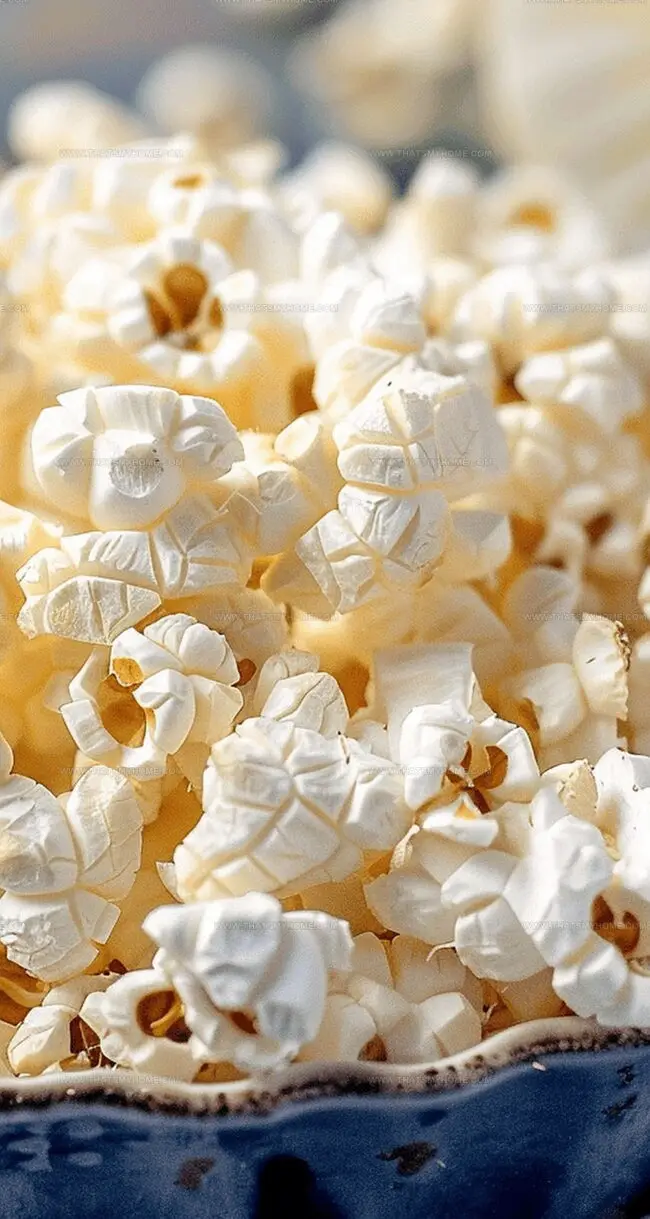
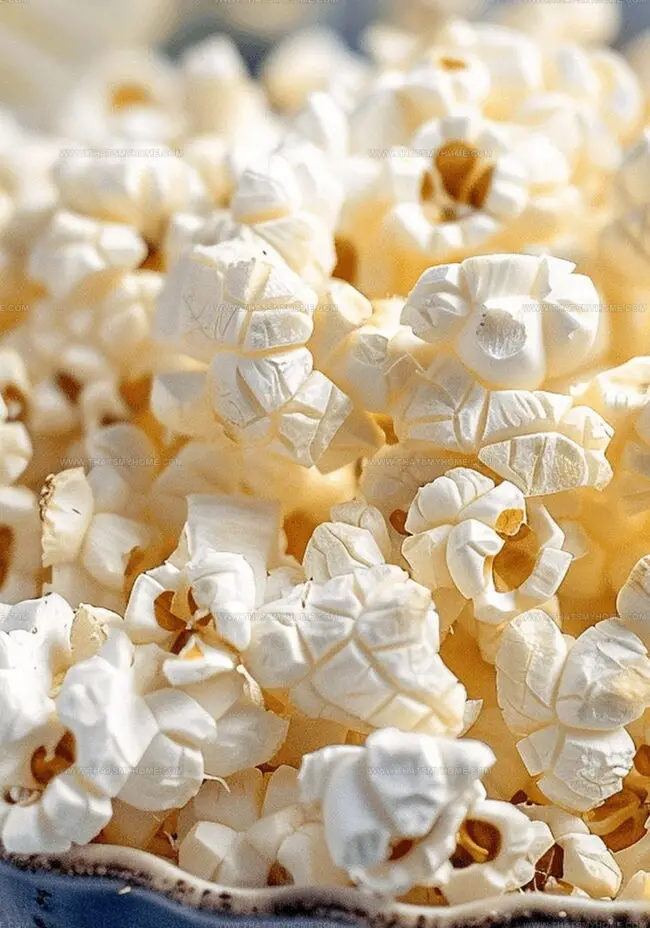
Delicate sugar crystals melt and caramelize during cooking, creating a golden-brown coating that clings to each kernel with magical precision.

Traditional methods involve careful heat control and constant stirring to prevent burning while developing complex flavor profiles.

The result is a crisp, lightweight treat that strikes a perfect harmony between sugary sweetness and subtle saltiness.

Generations have embraced this simple yet ingenious snack that elevates casual munching into a memorable experience.

Home cooks can easily master this technique with basic kitchen equipment and minimal ingredients.

Grab a bowl and prepare for a taste sensation that will have everyone asking for more.

What Snacks Go Great with Kettle Corn

  • Pair with Sweet Sips: Creamy vanilla milkshake perfectly complements the light sweetness of kettle corn, balancing its caramelized sugar notes and providing a cool contrast to the warm, crispy snack.
  • Match with Fruity Refreshment: Chilled strawberry lemonade cuts through the richness of the popcorn, offering a tangy and bright flavor that enhances the subtle sweetness and saltiness of the kettle corn.
  • Combine with Chocolate Indulgence: Dark chocolate hot cocoa creates a decadent pairing, with its rich depth matching the caramelized sugar undertones and adding a luxurious warmth to the crunchy snack experience.

Tasty Twists to Try in Your Next Batch

  • Sweet Cinnamon Kettle Corn: Sprinkle ground cinnamon and a touch of brown sugar over the popped corn for a warm, spicy-sweet flavor profile that enhances the classic kettle corn experience.
  • Chocolate Drizzle Edition: Melt dark or milk chocolate and lightly drizzle over the kettle corn, creating a decadent treat with rich chocolate notes and crispy texture.
  • Coconut Caramel Crunch: Mix shredded coconut and a light caramel sauce into the kettle corn, adding tropical sweetness and a crunchy complexity to the traditional recipe.
  • Spicy Chili Lime Kettle Corn: Dust the popped corn with chili powder, lime zest, and a pinch of sea salt for a zesty, tangy variation that brings a kick to the classic snack.

Why Kettle Corn Hits That Sweet Spot

  • Quick Sweet and Salty Crunch: This kettle corn delivers an irresistible balance of sugary sweetness and subtle saltiness in every bite, creating a perfectly addictive snack experience.
  • Super Simple Homemade Magic: With just a few ingredients and less than 10 minutes, you can transform basic pantry items into a crowd-pleasing treat that rivals store-bought versions, making it incredibly budget-friendly and satisfying.
  • Versatile Movie Night Champion: Perfect for casual gatherings, movie marathons, or afternoon snacking, this kettle corn brings instant joy and can be easily customized with additional seasonings like cinnamon or cocoa powder for variety.
  • Low-Effort, High-Reward Treat: Minimal cooking skills are required, making this recipe accessible for beginners while still producing a professional-tasting snack that looks and tastes impressively homemade.

Just a Few Things You Need to Get Poppin’

Sweet Kernels:
  • Popcorn Kernels: Fresh, high-quality kernels ensure a crisp and fluffy texture. White or yellow kernels work best for kettle corn.
  • Sugar: Provides sweetness and helps create a caramelized coating. Granulated white sugar is traditional and gives the best results.
Cooking Fats and Seasonings:
  • Vegetable Oil: Creates the base for popping and helps distribute heat evenly. Neutral-flavored oils like canola or corn oil are ideal.
  • Salt: Enhances the sweet-savory balance of the kettle corn. Fine sea salt or kosher salt provides the best flavor distribution.

How to Pop Corn Like a Pro

Step 1: Prepare the Popping Setup

Heat oil in a large pot and drop in 3 popcorn kernels. Wait until these test kernels pop, signaling the oil is at the perfect temperature for making kettle corn.

Step 2: Add Popcorn and Sugar

Add the remaining popcorn kernels and sugar to the pot. Cover with a lid and gently shake the pot continuously over the heat source to prevent burning.

Step 3: Listen for Popping Signals

Continue shaking the pot until the popping sounds slow down to about 2-3 seconds between pops. This indicates the popcorn is nearly finished cooking.

Step 4: Transfer and Season

Carefully pour the hot kettle corn into a large serving bowl. Sprinkle 1/4 to of salt over the popcorn. Gently stir to break up any clusters and distribute the salt evenly.

Step 5: Cool and Enjoy

Let the kettle corn cool for a few minutes to allow the sugar to set and the popcorn to become crispy. Serve immediately for the best flavor and texture.

Tips for That Crunchy Sweet Finish

  • Master Kernel Testing: Drop 3 test kernels in oil to ensure perfect temperature before adding full batch of popcorn.
  • Sugar Timing Technique: Add sugar simultaneously with kernels to prevent burning and create even caramelization throughout the popcorn.
  • Constant Shaking Strategy: Keep pot moving continuously during popping to prevent burning and distribute sugar evenly.
  • Salt Sprinkling Hack: Dust salt immediately after popping while popcorn is still warm for better seasoning absorption.
  • Cluster Breaking Method: Gently break up stuck clusters while popcorn is slightly warm to ensure every piece gets seasoned perfectly.

How to Store It Without Losing the Snap

  • Refrigerator Storage: Transfer leftover kettle corn to an airtight container with a tight-fitting lid. Seal completely to prevent moisture and preserve crispness. Keep at room temperature for up to 2-3 days for best quality and texture.
  • Freezing Option: Spread cooled kettle corn in a single layer on a baking sheet. Freeze for 1 hour, then transfer to a freezer-safe bag. Frozen kettle corn stays fresh for 2 weeks when properly sealed.
  • Reheating Technique: Crisp up leftovers in a preheated oven at 250°F for 5-7 minutes. Spread popcorn on a baking sheet in a single layer. Watch carefully to prevent burning and restore that fresh, crunchy texture everyone loves.
Print
clock clock iconcutlery cutlery iconflag flag iconfolder folder iconinstagram instagram iconpinterest pinterest iconfacebook facebook iconprint print iconsquares squares iconheart heart iconheart solid heart solid icon
Kettle Corn Recipe

Kettle Corn Recipe


5 Stars 4 Stars 3 Stars 2 Stars 1 Star

4.5 from 14 reviews

  • Total Time: 10 minutes
  • Yield: 4 1x

Description

Sweet and salty kettle corn dances with carnival nostalgia, bringing childhood memories to life. Crisp kernels kissed with sugar and salt promise a simple yet irresistible snack you’ll want to share with friends.


Ingredients

Scale

Main Ingredients:

  • ½ cup corn kernels
  • ⅓ cup white sugar
  • ¼ cup vegetable oil

Seasoning:

  • ¼ to ½ teaspoons salt

Instructions

  1. Warm a large, heavy-bottomed pot over medium-high heat, adding vegetable oil and 3 test popcorn kernels to gauge the precise cooking temperature.
  2. When the initial test kernels pop fully, immediately pour in the remaining popcorn kernels and granulated sugar, ensuring an even distribution across the pot’s surface.
  3. Quickly cover the pot with a tight-fitting lid, gently shaking the pot continuously to prevent sugar from burning and to promote uniform kernel heating.
  4. Continue moving the pot back and forth over the heat source until popping sounds slow to approximately 2-3 seconds between pops, indicating most kernels have transformed into crispy popcorn.
  5. Remove from heat and carefully pour the freshly made kettle corn into a spacious serving bowl, using caution as the sugar coating will be extremely hot.
  6. Sprinkle ¼–½ teaspoon (1-2 grams) kosher salt evenly over the popcorn, gently stirring and breaking apart any sugar-formed clusters to ensure a balanced seasoning and texture.
  7. Allow the kettle corn to cool for 2-3 minutes before serving to let the sugar coating set and prevent potential burns.

Notes

  • Kernels are the secret weapon for perfect popping, signaling when the oil reaches the ideal temperature.
  • Sugar caramelizes quickly, so continuous stirring prevents burning and creates an even golden coating.
  • Timing matters most when listening for popping intervals to stop, which typically takes 2-3 minutes.
  • Salt distribution requires gentle folding to ensure every piece gets a delicate seasoning touch.
  • Cooling the popcorn on a wide surface helps prevent soggy clusters and maintains that crispy crunch.
  • Prep Time: 5 minutes
  • Cook Time: 5 minutes
  • Category: Snacks
  • Method: Boiling
  • Cuisine: American

Nutrition

  • Serving Size: 4
  • Calories: 140 kcal
  • Sugar: 12g
  • Sodium: 120mg
  • Fat: 7g
  • Saturated Fat: 1g
  • Carbohydrates: 18g
  • Fiber: 2g
  • Protein: 2g
  • Cholesterol: 0mg
Mary Ellen

Mary Ellen

Founder, Pastry Chef & Recipe Developer

Expertise

  • Artisanal Bread Making
  • Exquisite Pastry Craftsmanship
  • Creative Dessert Presentation
  • Flavor Profile Development
  • Menu Concept Innovation.

Education

Savannah Technical College

  • Program: Associate of Applied Science in Culinary Baking & Pastry Arts
  • Focus: A specialized program focusing on baking and pastry fundamentals, including bread making, cake decorating, and advanced pastry techniques. Developed creative presentation skills and an understanding of ingredient functions through lab-based practice.

Mary Ellen is the heart and soul of thatsmyhome.com. As the founder, pastry chef, and recipe developer, she refined her skills at Savannah Technical College with an Associate of Applied Science in Culinary Baking & Pastry Arts. 

Mary blends classic techniques with modern twists to make artisanal breads, beautifully crafted pastries, and desserts full of unique flavor. Her passion is evident in every recipe, and she enjoys sharing her expertise through hands-on pastry workshops and insightful articles in local culinary magazines.

Leave a Reply

Your email address will not be published. Required fields are marked *

Recipe rating 5 Stars 4 Stars 3 Stars 2 Stars 1 Star