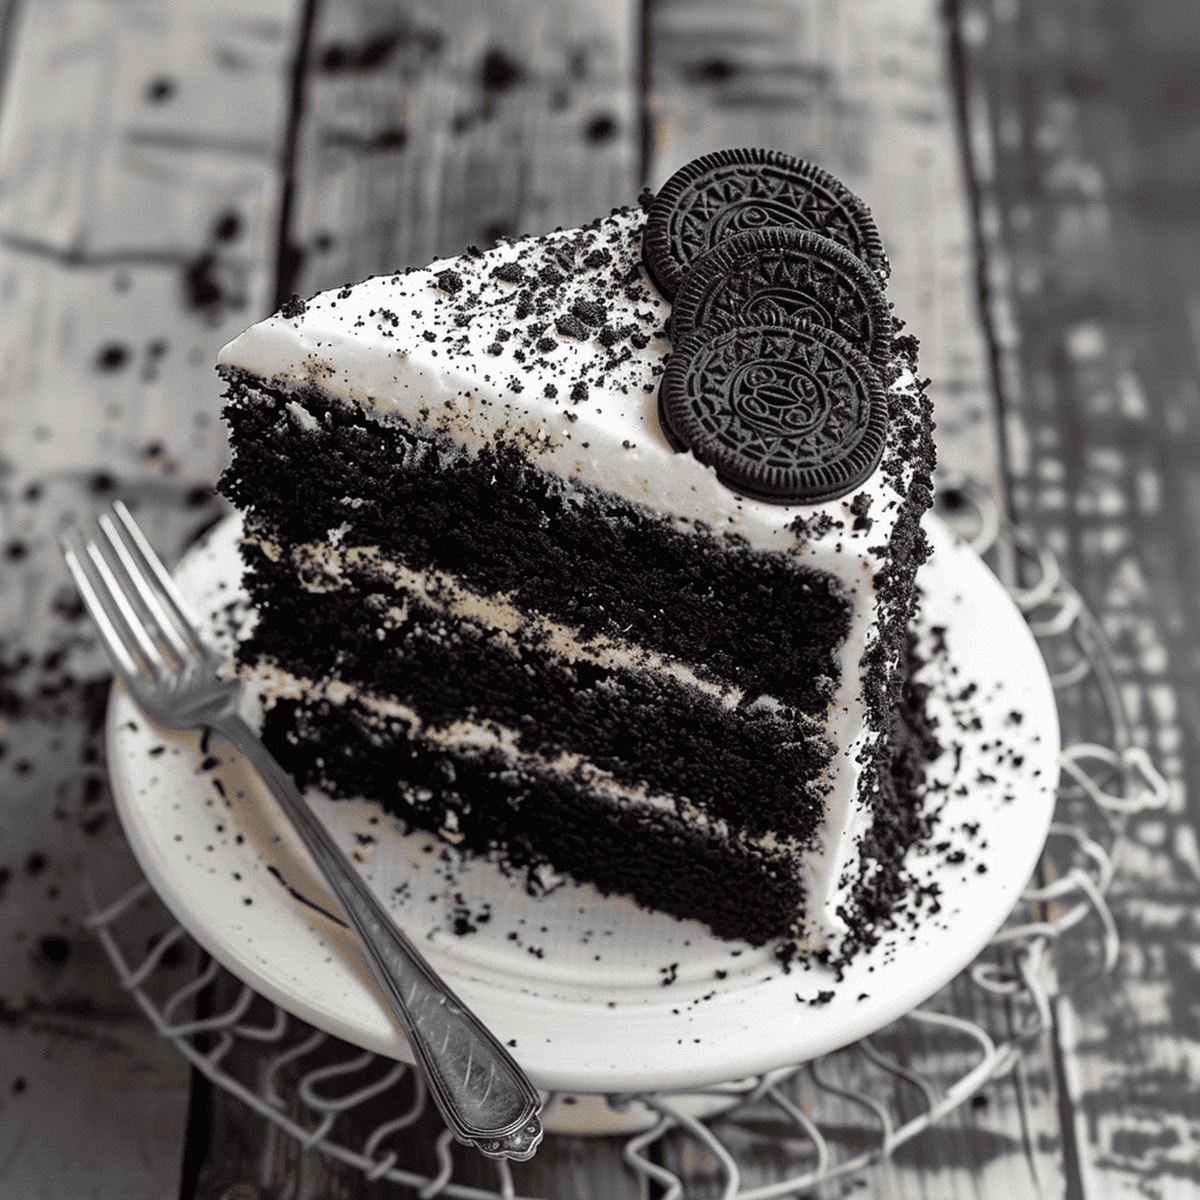
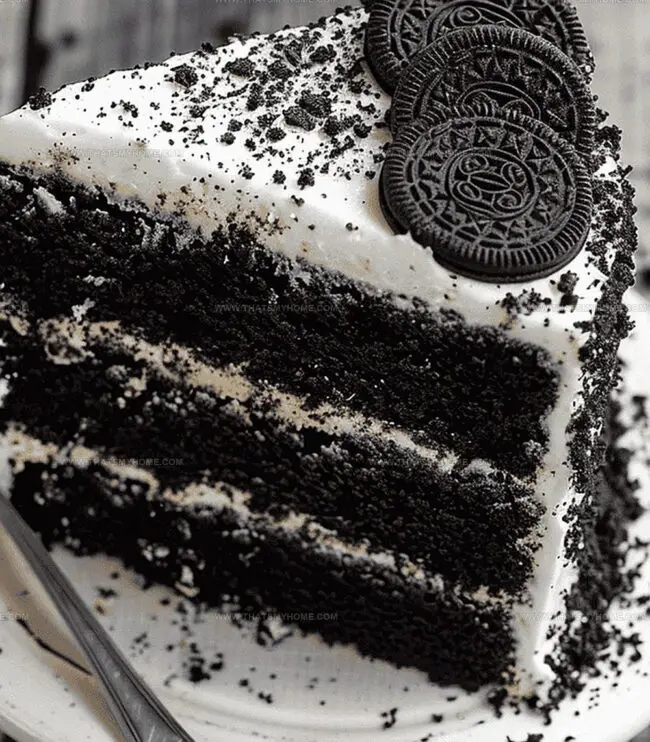
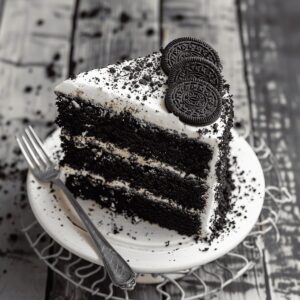
Decadent chocolate lovers unite over this rich black velvet Oreo cake that promises pure indulgence in every single bite.
Dark, luxurious layers meld seamlessly with crushed Oreo cookies for a dessert that screams celebration.
The deep cocoa undertones create a stunning visual drama on your plate.
Creamy frosting swirls between each tender cake layer, adding irresistible texture and depth.
Oreo chunks scattered throughout provide delightful crunch and a nostalgic twist to this classic cake.
Every slice delivers a perfect balance of smooth chocolate and crunchy cookie goodness.
You’ll fall head over heels for this show-stopping dessert that turns an ordinary moment into a spectacular sweet experience.
Quick Recipe Overview
Prep Time: 30 minutes
Cook Time: 30 minutes
Total Time: 1 hour
Calories: 486 kcal
Servings: 13
What You’ll Need for Black Velvet Oreo Cake
For Dry Ingredients:
All-Purpose Flour: Provides the cake’s sturdy structure and tender crumb, choose unbleached flour for best texture.
Baking Soda: Helps the cake rise and creates a light, fluffy texture, ensure it’s fresh for maximum leavening power.
Black Cocoa Powder: Delivers intense dark color and rich chocolate flavor, select high-quality Dutch-processed cocoa for deepest taste.
Salt: Enhances overall flavor and balances sweetness, use fine sea salt for even distribution.
Espresso Powder: Amplifies chocolate’s depth and complexity, opt for instant espresso for concentrated flavor.
For Wet Ingredients:
Butter, Vegetable Oil: Creates moisture and rich texture, use room temperature butter for smooth creaming.
Eggs: Bind ingredients and add structure, select fresh large eggs at room temperature.
Buttermilk: Adds tanginess and helps tenderize the cake, look for full-fat version for best results.
Vanilla Extract: Boosts overall flavor profile, choose pure vanilla for most authentic taste.
White Vinegar: Activates baking soda and creates tender crumb, use distilled white vinegar.
For Frosting Components:
Cream Cheese, Cold Butter: Provides creamy, luxurious base for frosting, ensure both are high-quality for smooth texture.
Powdered Sugar: Sweetens and thickens frosting, sift to eliminate lumps.
Heavy Cream: Adds richness and helps adjust frosting consistency, select ultra-fresh cream.
Oreo Cookies: Adds crunch and classic cookie flavor, crush just before adding to maintain texture.
Equipment Needed for Black Velvet Oreo Cake
Stand Mixer: Essential for creaming butter, mixing batter, and preparing frosting smoothly.
Paddle Attachment: Ideal for combining ingredients evenly without overmixing.
Large Mixing Bowls: Needed for dry and wet ingredient preparations.
8-inch Cake Pans (3): Crucial for baking cake layers with consistent size.
Nonstick Baking Spray: Ensures easy cake removal without sticking.
Toothpick: Helps check cake doneness by testing center.
Wire Rack: Perfect for cooling cakes completely after baking.
Cake Stand: Great for assembling and presenting the final cake.
Spatula: Helpful for spreading frosting and folding crushed Oreos.
Measuring Cups and Spoons: Necessary for accurate ingredient measurements.
Steps to Bake Black Velvet Oreo Cake
Kitchen Preparation Gather all your baking tools and ingredients, creating a delightful workspace that sparks culinary creativity.
Dry Ingredient Magic Whisk together flour, cocoa powder, baking soda, salt, and espresso powder in a bowl, creating a rich dark foundation for your cake.
Butter Bliss Cream butter and oil in a mixer until silky smooth, then add sugar and blend until the mixture becomes light and fluffy.
Liquid Harmony Gently incorporate eggs, vanilla, and vinegar into the butter mixture, creating a smooth and glossy batter.
Batter Symphony Slowly blend dry ingredients and buttermilk into the wet mixture, alternating carefully to maintain a perfect cake consistency.
Pan Performance Coat three cake pans with baking spray and distribute batter evenly, setting the stage for cake magic.
Baking Adventure Bake in a preheated oven until a toothpick comes out clean, then allow cakes to cool completely on a wire rack.
Frosting Fantasy Whip cold butter and cream cheese until creamy, gradually adding powdered sugar, cream, vanilla, and a touch of salt.
Oreo Transformation Crush Oreos and fold into the frosting, creating delightful cookie speckles.
Cake Couture Layer the cake with frosting, chilling between applications to ensure a stunning final presentation.
Tips & Tricks for Black Velvet Oreo Cake
Expert Tips for Black Velvet Oreo Cake
Select high-quality black cocoa for the deepest, richest color and most intense chocolate flavor in your cake.
Ensure all ingredients are at room temperature before mixing to create a smoother, more consistent cake batter that bakes evenly.
Crush Oreos into different sizes for varied texture – some fine crumbs and some larger chunks – to add visual and taste complexity to the frosting.
Chill cream cheese and butter slightly before mixing to prevent a runny frosting and achieve the perfect spreading consistency.
Prepare cake layers in advance and wrap tightly in plastic wrap, storing in the refrigerator for up to 2 days or freezer for 3 weeks to simplify cake assembly.
Ways to Serve Black Velvet Oreo Cake
Oreo Cookie Crunch: Sprinkle extra crushed Oreos around the cake’s base for a delightful textural contrast and eye-catching presentation.
Chocolate Drizzle Delight: Melt dark chocolate and create elegant drips down the cake’s sides for a luxurious finishing touch.
Party Perfect Plating: Serve slices on elegant white plates with a small scoop of vanilla ice cream to complement the rich chocolate and Oreo flavors.
Coffee Pairing Perfection: Accompany each slice with a shot of espresso or creamy latte to enhance the cake’s subtle coffee undertones.
Storing Black Velvet Oreo Cake
Refrigerate With Care: Store the Black Velvet Oreo Cake in an airtight container in the refrigerator for up to 5 days. Covering prevents moisture loss and keeps the cake fresh and delicious.
Freeze for Future Enjoyment: Wrap individual cake layers or the entire frosted cake tightly in plastic wrap and aluminum foil. Freeze for up to 3 months, ensuring maximum flavor retention when you’re ready to serve.
Room Temperature Revival: Before serving, remove the cake from the refrigerator 30-45 minutes prior to eating. This allows the cake and frosting to soften, bringing out the rich flavors and creamy texture.
Make-Ahead Magic: Prepare cake layers and frosting up to 2 days in advance. Store layers wrapped in plastic at room temperature, and keep frosting refrigerated until ready to assemble the cake for maximum convenience and time-saving preparation.
Black Velvet Oreo Cake delivers indulgent chocolate decadence with classic American dessert flair. Creamy Oreo frosting and rich cake layers create a delightful experience you won’t forget.
Ingredients
Scale
4 eggs
3 cups (710 ml) all-purpose flour
2 cups (400 g) sugar
1 cup (240 ml) buttermilk
1 cup (240 ml) vegetable oil
¾ cup (75 g) black cocoa
½ cup (113 g) butter, room temperature
12 oz (340 g) cream cheese, cold
¾ cup (170 g) butter, cold
6 cups (720 g) powdered sugar
2–3 tbsps (30–45 ml) heavy cream
1 tbsp vanilla extract
1 tbsp vinegar
1 tsp baking soda
1 tsp espresso powder
½ tsp kosher salt
2 tsp vanilla extract
8 oreo cookies, crushed
Pinch of salt
Instructions
Dry Ingredient Preparation: Thoroughly combine flour, baking soda, black cocoa powder, salt, and ground espresso powder in a mixing bowl, setting the mixture aside for later use.
Butter Mixture Creation: Utilize a stand mixer to whip butter and vegetable oil until achieving a smooth consistency, then gradually incorporate granulated sugar, mixing for two minutes until well integrated.
Wet Ingredient Incorporation: Add eggs individually to the butter mixture, ensuring complete blending after each addition. Mix in vanilla extract and white vinegar until uniformly combined.
Batter Assembly: Gently alternate adding dry ingredients and buttermilk to the wet mixture, mixing minimally to prevent overmixing. Evenly distribute the batter among three generously sprayed 8-inch cake pans.
Baking Process: Position cake pans in a preheated 350°F (175°C) oven, baking for 30-33 minutes until a toothpick inserted into the center comes out clean. Allow cakes to cool in pans for 5 minutes, then transfer to a wire rack to reach room temperature.
Frosting Preparation: Using a stand mixer, blend cold unsalted butter and cream cheese until smooth. Gradually add powdered sugar, mixing thoroughly between additions. Incorporate heavy cream, vanilla extract, and a pinch of salt, mixing until achieving a light, creamy texture.
Oreo Integration: Gently fold crushed Oreo cookies into the prepared frosting.
Cake Assembly: Position the first cake layer on a cake stand, spreading a generous frosting layer. Repeat with remaining layers, ensuring even distribution. Refrigerate for 30 minutes to set the frosting.
Final Finishing: Apply a smooth, final layer of frosting to complete the Black Velvet Oreo Cake.
Notes
Cocoa Powder Selection: Use high-quality black cocoa powder for intense, deep color and rich chocolate flavor that defines the cake’s unique appearance.
Mixing Technique: Avoid overmixing the batter to prevent a tough, dense cake texture; mix just until ingredients are combined for a tender crumb.
Temperature Matters: Ensure all ingredients are at room temperature before mixing to create a smoother, more homogeneous batter and consistent cake texture.
Frosting Consistency: Chill butter and cream cheese briefly before mixing to achieve a smooth, lump-free frosting that spreads easily and holds its shape.
The French Culinary Institute (now part of the International Culinary Center)
Program: Classic Culinary Arts
Focus: An intensive curriculum rooted in classical French techniques, artisanal bread production, and contemporary culinary methods.
Michael Rivera is a seasoned chef and culinary instructor based in San Francisco, CA. Trained in Classic Culinary Arts at The French Culinary Institute, he refined his skills in Michelin-starred kitchens, mastering classic French techniques and artisanal bread baking.
Passionate about making gourmet methods accessible, Michael co-founded thatsmyhome.com to share his expertise through interactive online lessons and innovative, plant-based recipes. He loves blending traditional techniques with modern ideas, encouraging home cooks to enjoy the art of cooking in a relaxed, fun environment.

Michael Rivera
Co-Founder & Culinary Instructor
Expertise
Education
The French Culinary Institute (now part of the International Culinary Center)
Michael Rivera is a seasoned chef and culinary instructor based in San Francisco, CA. Trained in Classic Culinary Arts at The French Culinary Institute, he refined his skills in Michelin-starred kitchens, mastering classic French techniques and artisanal bread baking.
Passionate about making gourmet methods accessible, Michael co-founded thatsmyhome.com to share his expertise through interactive online lessons and innovative, plant-based recipes. He loves blending traditional techniques with modern ideas, encouraging home cooks to enjoy the art of cooking in a relaxed, fun environment.