The Perfect Peanut Butter Cookie Cups Recipe for Sweet Cravings
Peanut butter cookie cups combine childhood memories with sophisticated dessert crafting.
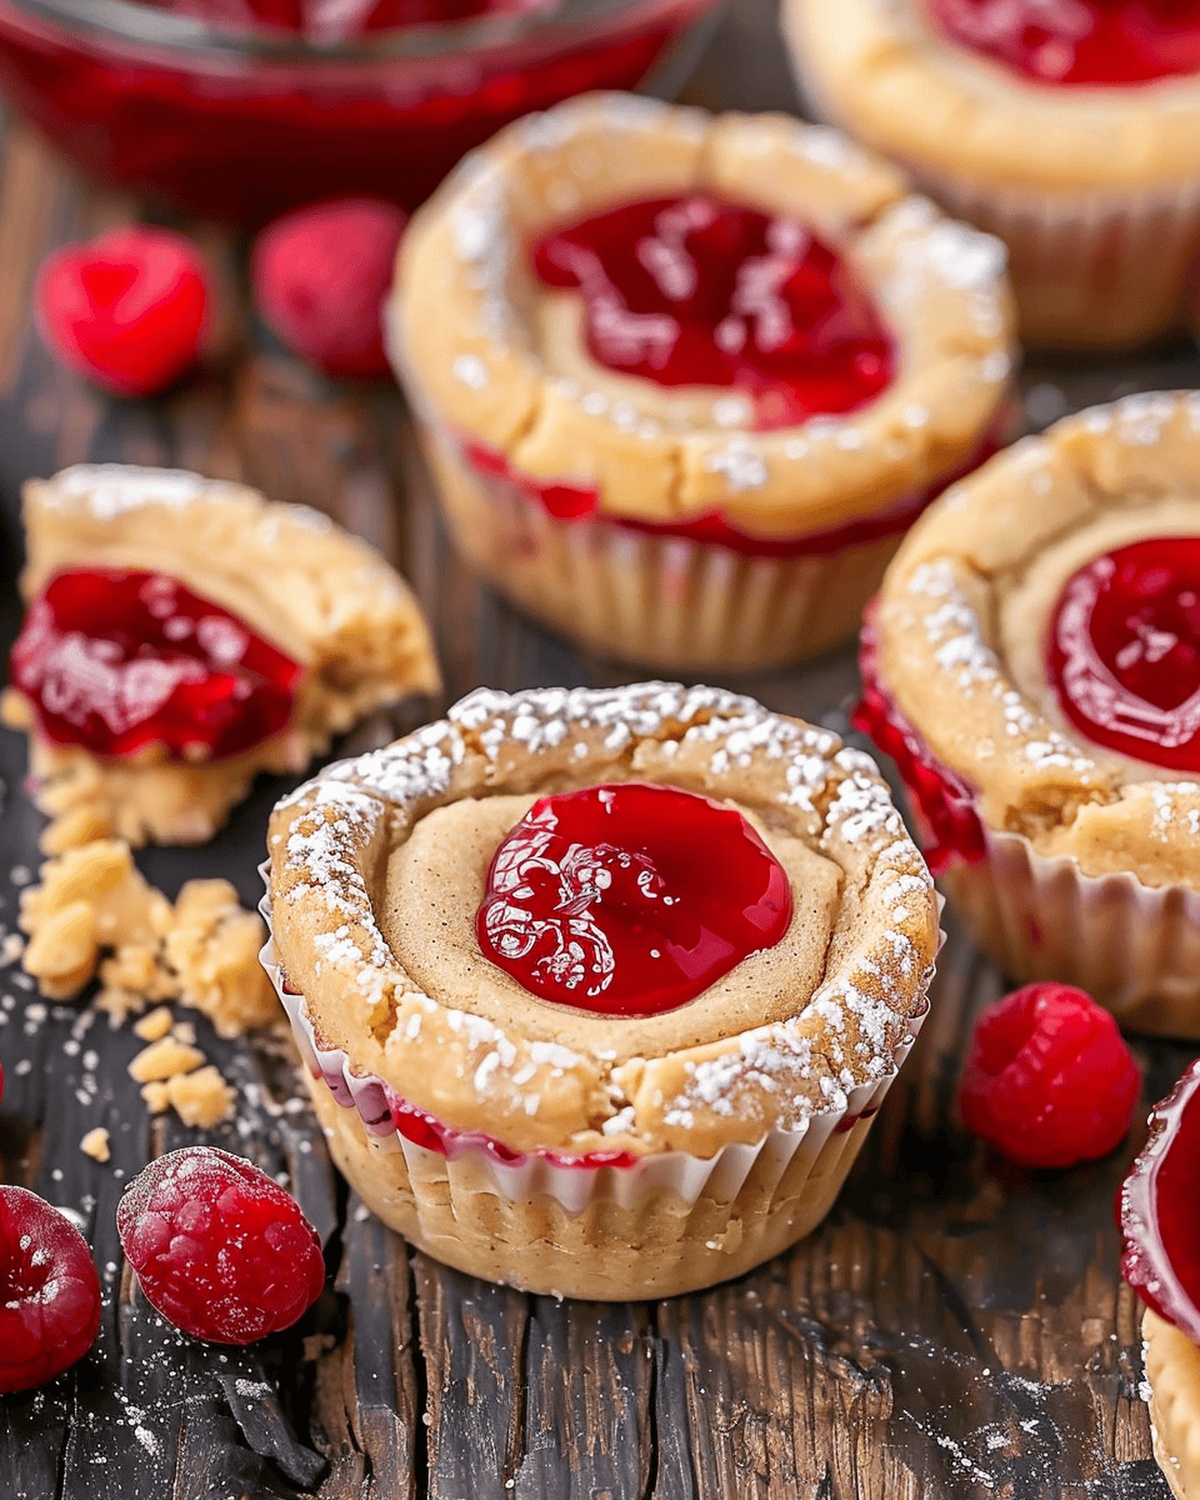
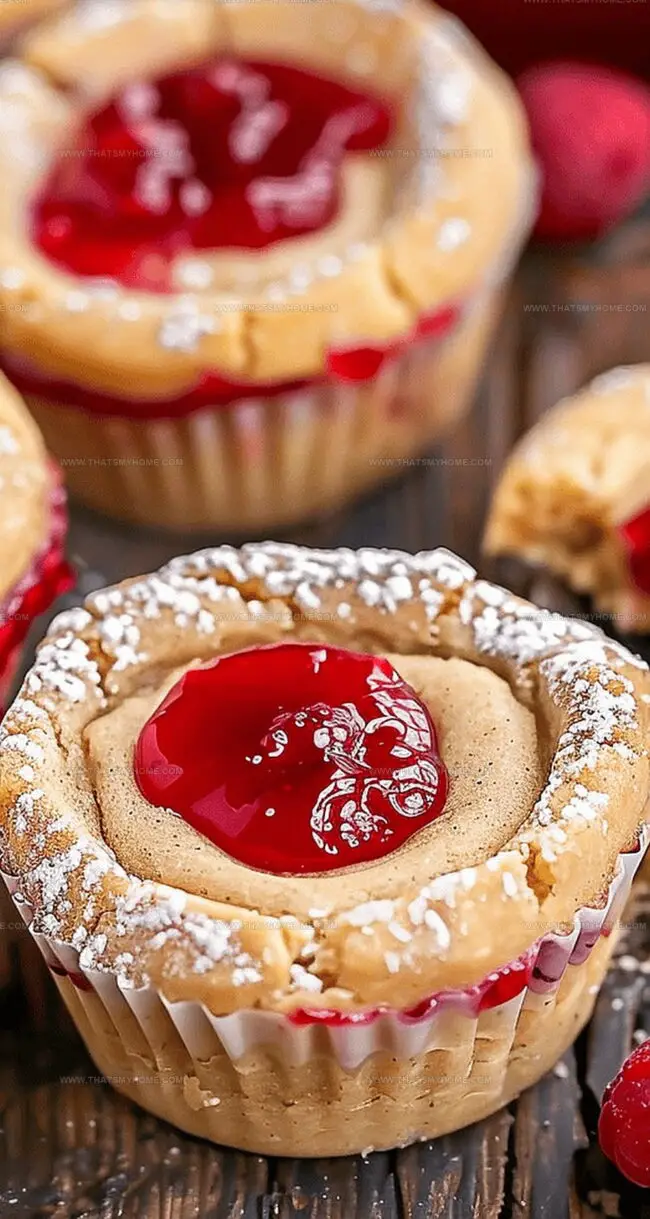
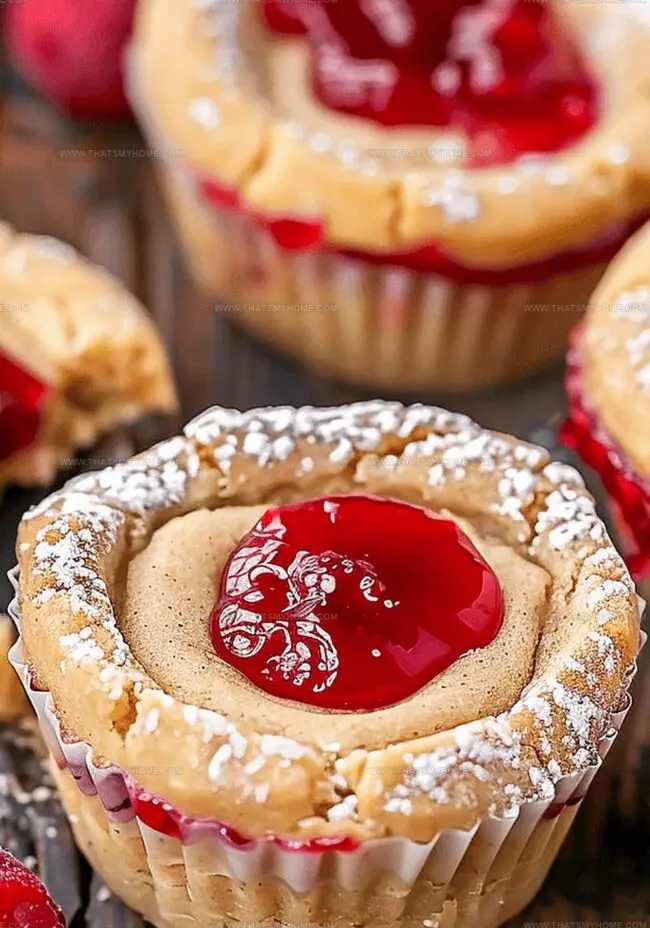
Soft, chewy cookies cradle a silky-smooth filling that enhances traditional treats into elegant bites.
Rich, nutty flavors dance across your palate with each delectable morsel.
These miniature delights blend comfort and creativity in a single, irresistible package.
Homemade desserts rarely feel this luxurious yet remain wonderfully approachable.
Layers of sweet complexity make these tiny cups more than just another cookie.
Prepare to elevate your baking game with this crowd-pleasing recipe.
Peanut Butter Cookie Cups You’ll Love
What You’ll Need for Peanut Butter Cookie Cups
Dry Ingredients:Wet and Binding Ingredients:Sweet and Filling Ingredients:How to Make Peanut Butter Cookie Cups
Step 1: Prepare Baking Space
Preheat oven to 350°F. Spray a regular-sized muffin tin with cooking spray to prevent sticking.
Step 2: Mix Dry Ingredients
Gather ingredients:Combine these ingredients in a bowl and set aside for later use.
Step 3: Cream Butter and Peanut Butter
In a separate mixing bowl, beat together:Mix until smooth and creamy.
Step 4: Add Sweetness
Gradually add sugars while mixing on medium-high speed. Continue beating for 2-3 minutes until the mixture becomes light and fluffy.
Step 5: Incorporate Wet Ingredients
Reduce mixer speed and add:Mix until fully combined.
Step 6: Create Cookie Dough
Slowly incorporate the dry ingredient mixture into wet ingredients. Mix just until no dry spots remain.
Step 7: Fill Muffin Tin
Use a large cookie scoop (about ) to portion dough into muffin tin cups. Gently press down to flatten slightly.
Step 8: Bake Cookie Bases
Bake for 10-12 minutes. Look for lightly golden brown edges while centers remain mostly set.
Step 9: Create Cookie Cups
Immediately after removing from oven, use a small jar or container to press an indentation into each warm cookie.
Let cookies cool in tin for 10 minutes, then transfer to a wire rack.
Step 10: Prepare Whipped Cream
Whip heavy cream using cold equipment until stiff peaks form. Keep chilled during preparation.
Step 11: Make Peanut Butter Mixture
In a separate bowl, blend:Mix until smooth, then add peanut butter. Blend thoroughly.
Step 12: Combine Cream Mixture
Gently fold whipped cream into peanut butter mixture, adding half a cup at a time. Maintain the airiness of the mixture.
Step 13: Warm Raspberry Jam
Microwave raspberry jam in short 20-second intervals until easily spreadable.
Step 14: Add Raspberry Layer
Spoon about of warm raspberry jam into each cooled cookie cup.
Chill for 20 minutes.
Step 15: Pipe Mousse Topping
Generously pipe prepared peanut butter mousse over the raspberry layer.
Refrigerate for at least 2 hours to allow flavors to meld.
Step 16: Final Garnish
Optional toppings:Step 17: Serve and Store
Enjoy chilled within 2-3 days directly from the refrigerator.
Tips for Perfect Peanut Butter Cookie Cups
Storing and Reheating Peanut Butter Cookie Cups
Pairings with Peanut Butter Cookie Cups
Fun Variations of Peanut Butter Cookie Cups
Print
Peanut Butter Cookie Cups Recipe
- Total Time: 42 minutes
- Yield: 12 1x
Description
Creamy peanut butter meets chocolate in these irresistible Peanut Butter Cookie Cups. Crisp cookie shells cradle rich chocolate ganache, creating a perfect balance of sweet and nutty flavors that will delight dessert enthusiasts.
Ingredients
Dry Ingredients:
- 1 ¼ cups (156 grams) all-purpose flour
- ¼ teaspoon (1.25 grams) baking soda
- ½ teaspoon (3 grams) salt
Sugars and Fats:
- ½ cup (100 grams) light brown sugar, packed
- ¼ cup (50 grams) granulated sugar
- ¼ cup (57 grams) unsalted butter, room temperature
- ¾ cup (180 grams) smooth peanut butter (not natural)
- 3 ounces (85 grams) cream cheese, softened
Liquid and Binding Ingredients:
- 1 large egg, room temperature
- 1 teaspoon (5 milliliters) vanilla extract
- ½ cup (120 milliliters) heavy whipping cream, cold
- ¼ cup (60 milliliters) raspberry jam, seedless (or your choice of jam)
- Optional: chopped peanuts
Instructions
- Prepare the oven at 350°F (177°C) and thoroughly coat a standard muffin tin with non-stick cooking spray.
- Sift together flour, baking soda, and salt in a medium mixing bowl, then reserve this dry ingredient blend.
- Using an electric mixer, cream butter and peanut butter until achieving a silky, uniform consistency. Gradually introduce granulated and brown sugars, whipping at medium-high speed until the mixture becomes pale and fluffy, approximately 2-3 minutes.
- Reduce mixer speed and incorporate egg and vanilla extract, blending until completely integrated.
- Gently fold the reserved flour mixture into the wet ingredients, stirring just until no dry patches remain visible.
- Utilize a large cookie scoop (or 45 milliliters) to distribute dough evenly into muffin tin cavities, applying gentle pressure to flatten slightly.
- Bake cookie cups for 10-12 minutes, watching for light golden edges while maintaining a slightly soft center.
- Immediately after removing from oven, create wells in each cookie cup using a small jar or container, pressing carefully while cookies remain warm.
- Allow cookies to cool in the tin for 10 minutes before transferring to a wire rack for complete cooling.
- Prepare the mousse by whipping heavy cream using chilled equipment until stiff peaks develop, then refrigerate temporarily.
- In a separate bowl, beat cream cheese and powdered sugar until smooth, then thoroughly incorporate peanut butter.
- Delicately fold whipped cream into the peanut butter mixture, maintaining the airy texture by adding in gradual half-cup increments.
- Warm raspberry jam in short microwave intervals, stirring between each 20-second burst to ensure even heating.
- Distribute approximately of warm raspberry jam into each cooled cookie cup.
- Chill the jam-filled cookie cups for 20 minutes to set the initial layer.
- Pipe the prepared peanut butter mousse generously over the raspberry layer.
- Refrigerate assembled cookie cups for a minimum of 2 hours to allow flavors to meld.
- Optional garnish: Sprinkle chopped peanuts and add small dollops of additional raspberry jam.
- Serve chilled and consume within 2-3 days for optimal freshness.
Notes
- Whip up these delightful cookie cups that transform classic peanut butter cookies into decadent dessert bites bursting with creamy mousse and tangy raspberry jam.
- Perfectly balanced treats merge rich peanut butter flavors with light, airy texture and unexpected raspberry brightness.
- Chilling the assembled cups allows mousse to set firmly, intensifying the complex flavor profile and creating a professional-looking dessert.
- Versatile recipe works great for casual gatherings, potlucks, or sophisticated dinner parties, impressing guests with minimal kitchen effort.
- Prepare components ahead of time for stress-free assembly, making these cookie cups an excellent make-ahead dessert option that looks surprisingly elegant.
- Prep Time: 30 minutes
- Cook Time: 12 minutes
- Category: Desserts, Snacks
- Method: Baking
- Cuisine: American
Nutrition
- Serving Size: 12
- Calories: 260 kcal
- Sugar: 18 g
- Sodium: 150 mg
- Fat: 16 g
- Saturated Fat: 6 g
- Unsaturated Fat: 8 g
- Trans Fat: 0 g
- Carbohydrates: 28 g
- Fiber: 1 g
- Protein: 5 g
- Cholesterol: 30 mg
Mary Ellen
Founder, Pastry Chef & Recipe Developer
Expertise
Education
Savannah Technical College
Mary Ellen is the heart and soul of thatsmyhome.com. As the founder, pastry chef, and recipe developer, she refined her skills at Savannah Technical College with an Associate of Applied Science in Culinary Baking & Pastry Arts.
Mary blends classic techniques with modern twists to make artisanal breads, beautifully crafted pastries, and desserts full of unique flavor. Her passion is evident in every recipe, and she enjoys sharing her expertise through hands-on pastry workshops and insightful articles in local culinary magazines.