
The Perfect Red Velvet Cake Recipe: Sweet, Fluffy & Unforgettable
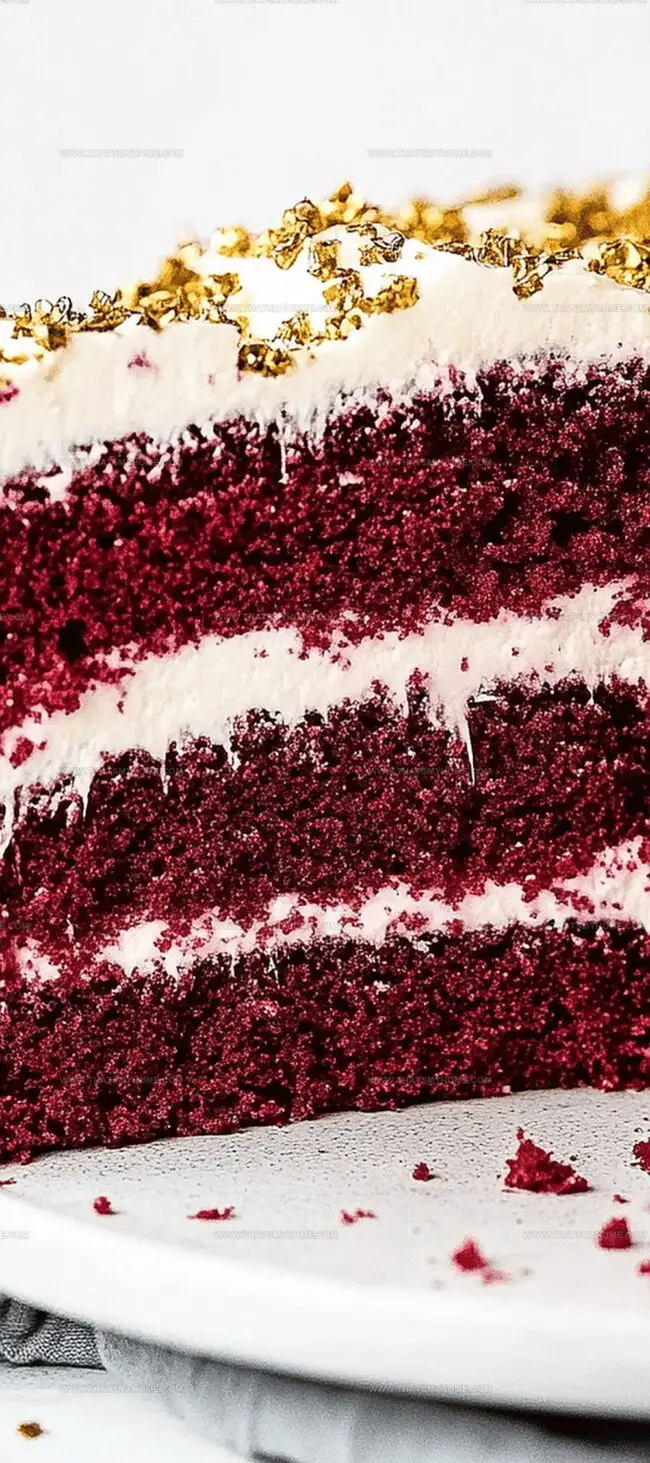
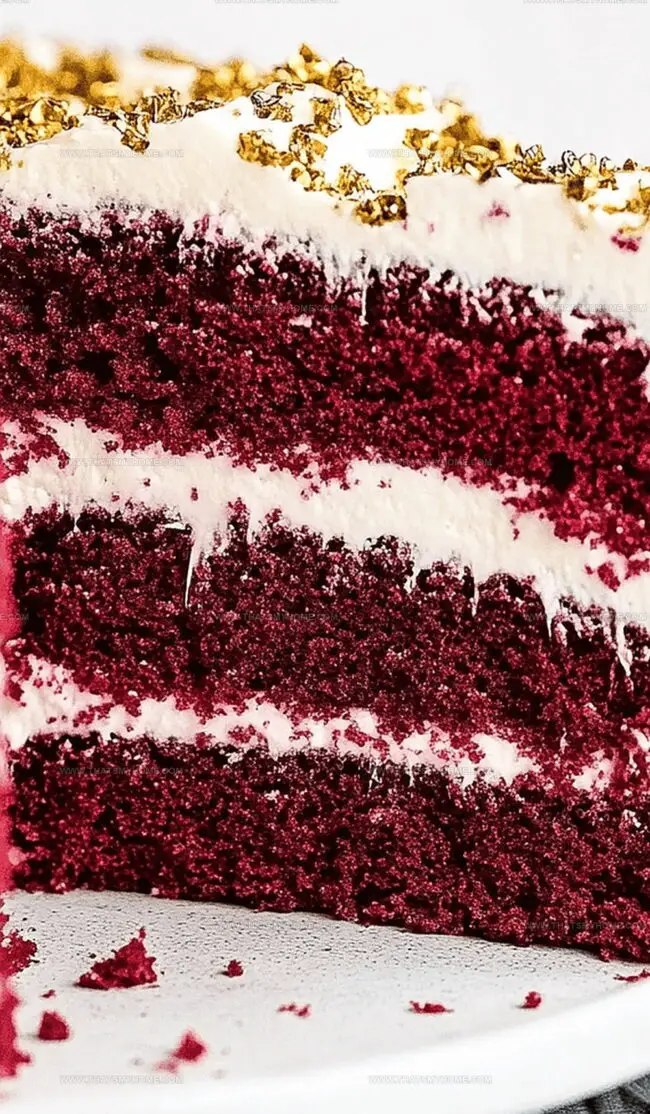
Red velvet cake whispers elegance through its deep crimson hue and silky-smooth personality.
Sophisticated bakers have long celebrated this dessert as a pinnacle of culinary craftsmanship.
Beneath its vibrant exterior lies a delicate balance of rich cocoa and subtle tang that dances across taste buds.
Sophisticated yet approachable, this cake reimagines ordinary moments into memorable celebrations.
Soft crumb and luxurious cream cheese frosting create a sensory experience that feels both nostalgic and exciting.
Texture plays a crucial role in making this dessert truly extraordinary.
Prepare to fall in love with a recipe that promises pure indulgence.
Red Velvet Cake: The Classic Dessert You’ll Crave
Essential Ingredients for the Perfect Red Velvet Cake
Cake Base Ingredients:Liquid Ingredients:Color and Flavor Enhancers:Frosting Ingredients:Binding and Moisture Ingredients:Step-by-Step to a Decadent Red Velvet Cake
Step 1: Preheat and Prepare Baking Workspace
Set oven to 325°F. Grease 3 round 8-inch cake pans with butter or cooking spray. Line bottom of pans with parchment paper.
Step 2: Create Chocolate Coffee Base
Combine hot coffee and cocoa powder in a small bowl. Stir until smooth and let mixture cool to room temperature.
Step 3: Mix Dry Ingredients
In a medium bowl, whisk together:Step 4: Combine Wet Ingredients
In a separate large mixing bowl, whisk:Step 5: Blend Cake Batter
Gradually add dry ingredients to wet ingredients. Mix until just combined. Pour in coffee-cocoa mixture and stir gently.
Step 6: Prepare for Baking
Divide batter evenly among prepared cake pans. Tap pans on counter to release air bubbles.
Step 7: Bake Cake Layers
Bake in preheated oven for 25-30 minutes. Test with toothpick – it should come out clean when inserted in center.
Step 8: Cool Cake Layers
Remove from oven and let cakes cool in pans for 10 minutes. Transfer to wire rack and cool completely.
Step 9: Create Cream Cheese Frosting
Beat together:Mix until smooth and creamy.
Step 10: Assemble and Decorate Cake
Place first cake layer on serving plate. Spread frosting between layers. Cover entire cake with remaining frosting. Slice and serve.
Tips to Ensure a Flawless Red Velvet Cake Every Time
Keeping Red Velvet Cake Fresh: Tips for Storing Leftovers
Enjoy Red Velvet Cake with These Flavorful Complements
Elevate Your Red Velvet Cake with These Simple Ideas
Print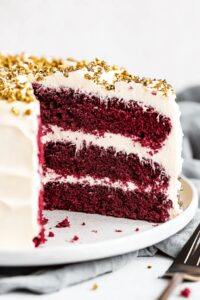
Red Velvet Cake Recipe
- Total Time: 55 minutes
- Yield: 12 1x
Description
Red Velvet Cake brings Southern charm to dessert tables with its luxurious crimson layers and silky cream cheese frosting. Chocolate undertones and buttermilk create a delicate crumb that melts on your palate, making this classic treat irresistible for celebrations.
Ingredients
Main Ingredients:
- 2 ¼ cups (279 grams) all-purpose flour
- 2 cups (400 grams) granulated sugar
- 1 cup buttermilk, at room temperature
- 2 large eggs, at room temperature
- 1 large egg yolk, at room temperature
Wet Ingredients:
- ½ cup (109 grams) vegetable oil
- 1 stick (113 grams) unsalted butter, melted
- ½ cup plain hot coffee or boiling water
- 3 teaspoons red gel food coloring, plus more if needed
- Vanilla extract to taste
Frosting Ingredients:
- 16 ounces (454 grams) cream cheese, at room temperature
- 227 grams unsalted butter
- 4 cups (500 grams) powdered sugar, sifted
Instructions
- Heat the oven to precisely 325°F (163°C) and meticulously grease three 8-inch round cake pans with butter or non-stick cooking spray.
- Create a rich cocoa infusion by whisking hot coffee and unsweetened cocoa powder until smooth, allowing the mixture to develop depth and intensity.
- In a separate large mixing bowl, combine all dry ingredients including flour, granulated sugar, baking soda, and salt, ensuring thorough blending.
- In another bowl, whisk together vegetable oil, buttermilk, eggs, red food coloring, and white vinegar until the mixture achieves a vibrant crimson consistency.
- Gradually fold the dry ingredient mixture into the wet ingredients, stirring gently to prevent overmixing and maintain a tender cake texture.
- Incorporate the prepared coffee-cocoa mixture into the batter, stirring until the color is uniformly distributed and no streaks remain.
- Carefully distribute the batter evenly among the prepared cake pans, using a spatula to smooth the surfaces and eliminate air pockets.
- Place the pans in the preheated oven and bake for 25-30 minutes, rotating halfway through to ensure even browning and checking with a toothpick for doneness.
- Remove cakes from the oven and allow them to cool in the pans for 10 minutes before transferring to a wire rack to cool completely.
- Prepare the cream cheese frosting by beating softened cream cheese, unsalted butter, powdered sugar, and vanilla extract until smooth and creamy.
- Once cakes are fully cooled, carefully layer and frost the cake, creating an even and elegant exterior.
Notes
- Capture every detail before starting to ensure smooth baking preparation.
- Organize ingredients and tools within arm’s reach to streamline the cake-making process.
- Double-check oven temperature and pan preparation for consistent, perfect results.
- Measure ingredients precisely using standard measuring cups and spoons.
- Room temperature ingredients blend more smoothly and create better cake texture.
- Prep Time: 25 minutes
- Cook Time: 30 minutes
- Category: Desserts, Snacks
- Method: Baking
- Cuisine: American
Nutrition
- Serving Size: 12
- Calories: 550 kcal
- Sugar: 70g
- Sodium: 400mg
- Fat: 30g
- Saturated Fat: 18g
- Unsaturated Fat: 12g
- Trans Fat: 0g
- Carbohydrates: 75g
- Fiber: <1g
- Protein: 6g
- Cholesterol: 120mg
Mary Ellen
Founder, Pastry Chef & Recipe Developer
Expertise
Education
Savannah Technical College
Mary Ellen is the heart and soul of thatsmyhome.com. As the founder, pastry chef, and recipe developer, she refined her skills at Savannah Technical College with an Associate of Applied Science in Culinary Baking & Pastry Arts.
Mary blends classic techniques with modern twists to make artisanal breads, beautifully crafted pastries, and desserts full of unique flavor. Her passion is evident in every recipe, and she enjoys sharing her expertise through hands-on pastry workshops and insightful articles in local culinary magazines.