
Dreamy Salted Caramel Peanut Brownie Bombs Recipe
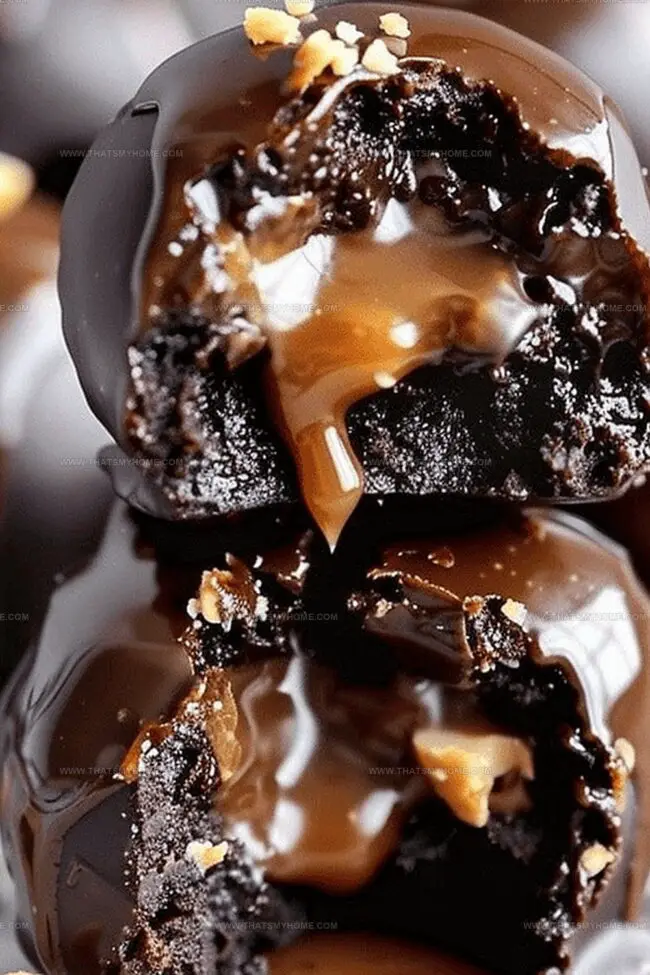
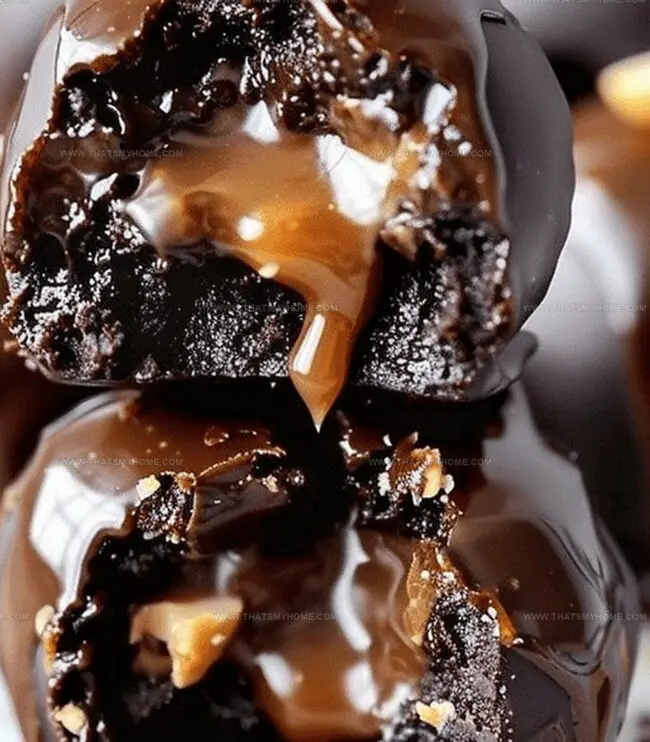
Decadent chocolate meets sweet-salty perfection in these irresistible salted caramel peanut brownie bombs that promise pure indulgence.
Layers of rich brownie and creamy caramel create a dessert experience that dances across your taste buds.
Each bite combines intense chocolate with a delightful crunch of peanuts and a sprinkle of sea salt.
The contrast of textures makes these little treats absolutely addictive.
Smooth caramel weaves through dense brownie, creating pockets of pure bliss in every single bomb.
Small yet mighty, these dessert bites pack an incredible flavor punch that will have everyone begging for more.
Grab your ingredients and get ready to become the dessert hero at your next gathering.
Quick Recipe Overview
Salted Caramel Peanut Brownie Bombs Ingredients
For The Brownie Base:For The Caramel Filling:For The Coating And Garnish:Equipment for Salted Caramel Peanut Brownie Bombs
How to Make Salted Caramel Peanut Brownie Bombs
Craft a rich, fudgy foundation by mixing sugars and butter until creamy, then blend in eggs and vanilla. Incorporate cocoa and salt, creating a velvety batter that promises deep chocolate intensity.
Create a golden caramel sauce by slowly transforming sugar and syrup into a luscious amber liquid. Introduce butter, cream, and a whisper of salt, developing a silky, luxurious filling that will surprise taste buds.
Transform slightly warm brownies into delicate spheres, carefully nestling a dollop of cooled caramel at their center. Gently encase the sweet surprise, rolling each into a perfect orb of chocolatey decadence.
Melt chocolate chips into a smooth, glossy pool. Fold in crunchy peanuts, creating a textural exterior that will enrobe each brownie ball in a crisp, nutty embrace.
Rest the chocolate-covered treats in the freezer or at room temperature, allowing the coating to set and transform into a delightful, crackling shell that reveals the gooey caramel center when bitten.
Tips for Salted Caramel Peanut Brownie Bombs
Serving Suggestions for Salted Caramel Peanut Brownie Bombs
Best Storage Tips for Salted Caramel Peanut Brownie Bombs
Print
Sinful Salted Caramel Peanut Brownie Bombs Recipe
- Total Time: 40 minutes
- Yield: 13 1x
Description
Peanut lovers rejoice with this salted caramel peanut brownie bombs recipe that blends rich chocolate, creamy caramel, and salty peanuts. Chocolate-covered treats promise delightful indulgence when you bite into these irresistible morsels.
Ingredients
- 2 large eggs
- 6 tbsps (85 grams) melted butter
- 1 tsp vanilla extract
- ¾ cup cocoa powder
- ½ cup white sugar
- ½ cup brown sugar
- ¼ tsp salt
- ¾ cup sugar
- 4 tbsps (57 grams) butter
- 3 tbsps light corn syrup
- ¼ cup heavy cream
- 1 tsp vanilla extract
- ¼ tsp salt
- 1 ½ cups chocolate chips or chopped chocolate
- ¼ cup chopped salted peanuts
Instructions
- Prepare Workspace: Preheat oven to 350°F and coat an 8×8 inch baking pan with cooking spray.
- Create Brownie Base: Cream sugars and butter until smooth, then whisk in eggs and vanilla until light and fluffy. Gently fold in cocoa powder and salt to form a velvety batter.
- Bake Brownies: Spread batter evenly in prepared pan and bake for 25 minutes, ensuring a toothpick comes out with minimal crumbs.
- Craft Caramel Sauce: In a saucepan, heat sugar and corn syrup until it transforms to a deep amber color. Incorporate butter, then add heavy cream, stirring to create a smooth sauce. Mix in sea salt and vanilla, then refrigerate until completely cooled.
- Shape Brownie Bombs: Once brownies are slightly warm, cut into squares and mold into compact balls. Create a small indentation in each, fill with cooled caramel, and carefully seal, reshaping into perfect spheres.
- Freeze and Coat: Place brownie balls on a parchment-lined sheet and freeze for 20 minutes. Melt chocolate chips, fold in chopped peanuts, and thoroughly coat each frozen ball in the chocolate-peanut mixture.
- Finalize Treats: Allow chocolate coating to set by freezing briefly or resting at room temperature until hardened.
Notes
- Precision Matters: Measure ingredients exactly for consistent texture and flavor, especially in baking where small variations can significantly impact results.
- Temperature Control: Ensure butter and eggs are at room temperature to create smoother, more evenly mixed batter that promotes better brownie consistency.
- Caramel Technique: Watch sugar mixture closely while cooking to prevent burning; amber color indicates perfect caramelization and prevents bitter taste.
- Chocolate Coating Tip: Work quickly when dipping frozen brownie balls to maintain chocolate’s smooth texture and prevent premature hardening.
- Prep Time: 15 minutes
- Cook Time: 25 minutes
- Category: Desserts, Snacks
- Method: Baking
- Cuisine: American
Nutrition
- Serving Size: 13
- Calories: 320
- Sugar: 30 g
- Sodium: 120 mg
- Fat: 18 g
- Saturated Fat: 10 g
- Unsaturated Fat: 8 g
- Trans Fat: 0 g
- Carbohydrates: 37 g
- Fiber: 2 g
- Protein: 4 g
- Cholesterol: 40 mg
Michael Rivera
Co-Founder & Culinary Instructor
Expertise
Education
The French Culinary Institute (now part of the International Culinary Center)
Michael Rivera is a seasoned chef and culinary instructor based in San Francisco, CA. Trained in Classic Culinary Arts at The French Culinary Institute, he refined his skills in Michelin-starred kitchens, mastering classic French techniques and artisanal bread baking.
Passionate about making gourmet methods accessible, Michael co-founded thatsmyhome.com to share his expertise through interactive online lessons and innovative, plant-based recipes. He loves blending traditional techniques with modern ideas, encouraging home cooks to enjoy the art of cooking in a relaxed, fun environment.