
Jolly Minty Magic: A Festive Green Mint Cookies Recipe
When the holiday season rolls around, these delightful green mint cookies become the star of every festive gathering.
Soft, chewy, and bursting with refreshing mint flavor, they capture the essence of winter celebrations.
The vibrant green hue instantly catches everyone’s eye at potlucks and cookie exchanges.
Rich butter and cool peppermint create a harmonious blend that melts in your mouth.
Each cookie carries a delicate balance of sweetness and minty freshness that makes dessert time magical.
Bakers of all skill levels can whip up these delectable treats in under an hour.
Get ready to become the holiday hero with this irresistible cookie recipe that will have everyone asking for seconds.
Quick Recipe Overview
Festive Green Mint Cookie Ingredient Guide
For Base Ingredients:For Wet Ingredients:For Decorative and Flavor Enhancers:Tool You’ll Need for Making Mint Cookies
Baking Festive Mint Cookies Without a Hitch
Combine flour, baking soda, baking powder, and salt in a medium bowl, creating a smooth and even powder blend.
Mix melted butter, sugar, vanilla extract, egg, and green food dye in a large bowl until the mixture becomes silky and uniform.
Gently fold dry ingredients into wet mixture using a rubber spatula, blending until just combined to maintain a soft, delicate texture.
Preheat oven to 350°F. Line cookie sheets with parchment paper. While oven warms, finely chop Andes mints into small, delectable pieces.
Scoop dough using a tablespoon, create a small pocket in each ball, fill with chopped mint pieces, and fold dough to encase the minty surprise.
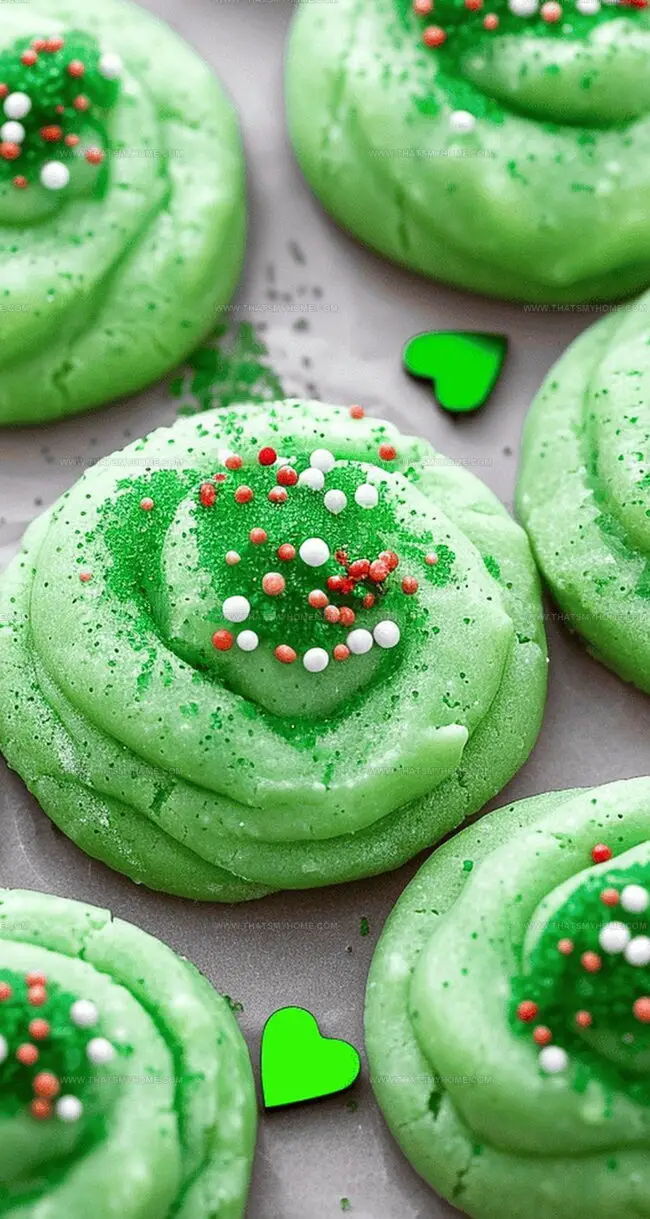
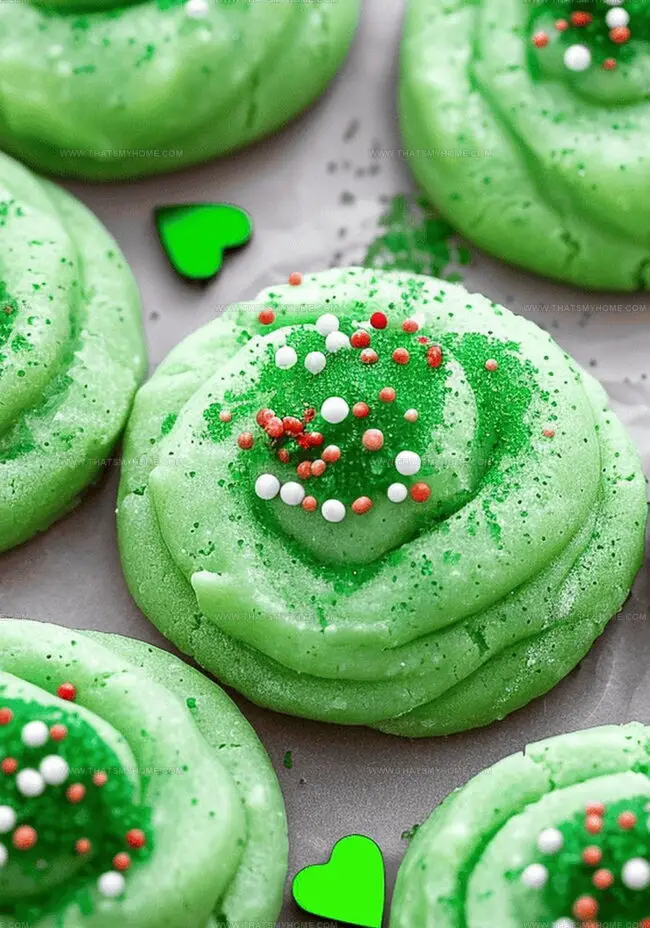
Roll each cookie in green sugar, ensuring complete coverage. Arrange cookies on prepared sheets with generous spacing.
Bake for 8-10 minutes until edges are set. Quickly press a heart sprinkle onto each warm cookie for a festive touch.
Transfer cookies to a wire rack and allow them to cool completely, letting the flavors settle and texture firm up.
Tips to Elevate Your Mint Cookie Game
Serve Those Green Mint Cookies Fresh
Store Mint Cookies Baker
Print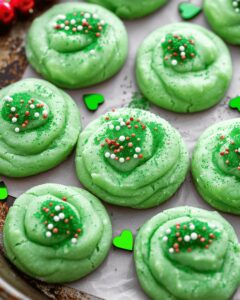
Whimsical Green Mint Cookies Recipe
- Total Time: 30 minutes
- Yield: 22 1x
Description
Green mint cookies celebrate holiday cheer with rich peppermint flavor and buttery crunch. Delicate cookie edges complement chocolate drizzles, inviting friends and family to savor winter’s sweet magic.
Ingredients
- 1 ⅓ cups (170 g) all-purpose flour
- ¾ cup (150 g) white granulated sugar
- ½ cup (113 g) unsalted butter, melted and cooled
- 1 large egg, room temperature
- 1 tsp pure vanilla extract
- ½ tsp salt
- ¼ tsp baking soda
- ¼ tsp baking powder
- 17 Andes mints, chopped
- 16 jumbo heart sprinkles
- Green gel food dye (a few drops)
- Green sugar for rolling the cookies
Instructions
- Dry Mixture Preparation: Sift flour, baking soda, baking powder, and salt into a medium bowl, creating a uniform dry foundation for the cookies.
- Wet Ingredient Fusion: Blend melted butter, granulated sugar, vanilla extract, egg, and green food coloring in a large mixing bowl until achieving a smooth, vibrant emerald mixture.
- Dough Assembly: Delicately incorporate dry ingredients into the wet mixture using a flexible spatula, mixing until just combined to maintain a tender cookie texture. Gently fold in chopped Andes mint chocolates.
- Oven Preparation and Shaping: Preheat oven to 350°F (175°C) and line baking sheets with parchment paper. Scoop dough using a cookie scoop, creating small indentations to nestle mint chocolate pieces inside each cookie ball.
- Sugar Coating and Arrangement: Roll each dough ball in green decorative sugar, ensuring complete coverage. Arrange cookies on prepared baking sheets, allowing space between each for potential expansion during baking.
- Baking and Decoration: Bake for 8-10 minutes until cookies are set but not overly browned. Immediately after removing from oven, press a heart-shaped sprinkle into the center of each warm cookie.
- Cooling and Finishing: Transfer cookies to a wire cooling rack, allowing them to cool completely and develop their signature texture and flavor profile.
Notes
- Sift with Precision: Meticulously sifting dry ingredients prevents lumps and ensures a smooth, consistent cookie texture that melts in your mouth.
- Color Control: Add food coloring drop by drop to achieve the perfect festive green shade without altering the cookie’s delicate flavor profile.
- Chocolate Chopping Technique: Finely chop Andes mint chocolates to distribute mint flavor evenly and create delightful chocolate pockets within each cookie.
- Sugar Coating Tip: Roll cookies generously in green decorative sugar for a stunning visual appeal and a subtle sweet crunch that elevates the entire dessert experience.
- Prep Time: 20 minutes
- Cook Time: 10 minutes
- Category: Desserts, Snacks
- Method: Baking
- Cuisine: American
Nutrition
- Serving Size: 22
- Calories: 135
- Sugar: 8.4 g
- Sodium: 66 mg
- Fat: 7 g
- Saturated Fat: 4.5 g
- Unsaturated Fat: 2.5 g
- Trans Fat: 0 g
- Carbohydrates: 17 g
- Fiber: 0.5 g
- Protein: 1.3 g
- Cholesterol: 20 mg
Michael Rivera
Co-Founder & Culinary Instructor
Expertise
Education
The French Culinary Institute (now part of the International Culinary Center)
Michael Rivera is a seasoned chef and culinary instructor based in San Francisco, CA. Trained in Classic Culinary Arts at The French Culinary Institute, he refined his skills in Michelin-starred kitchens, mastering classic French techniques and artisanal bread baking.
Passionate about making gourmet methods accessible, Michael co-founded thatsmyhome.com to share his expertise through interactive online lessons and innovative, plant-based recipes. He loves blending traditional techniques with modern ideas, encouraging home cooks to enjoy the art of cooking in a relaxed, fun environment.