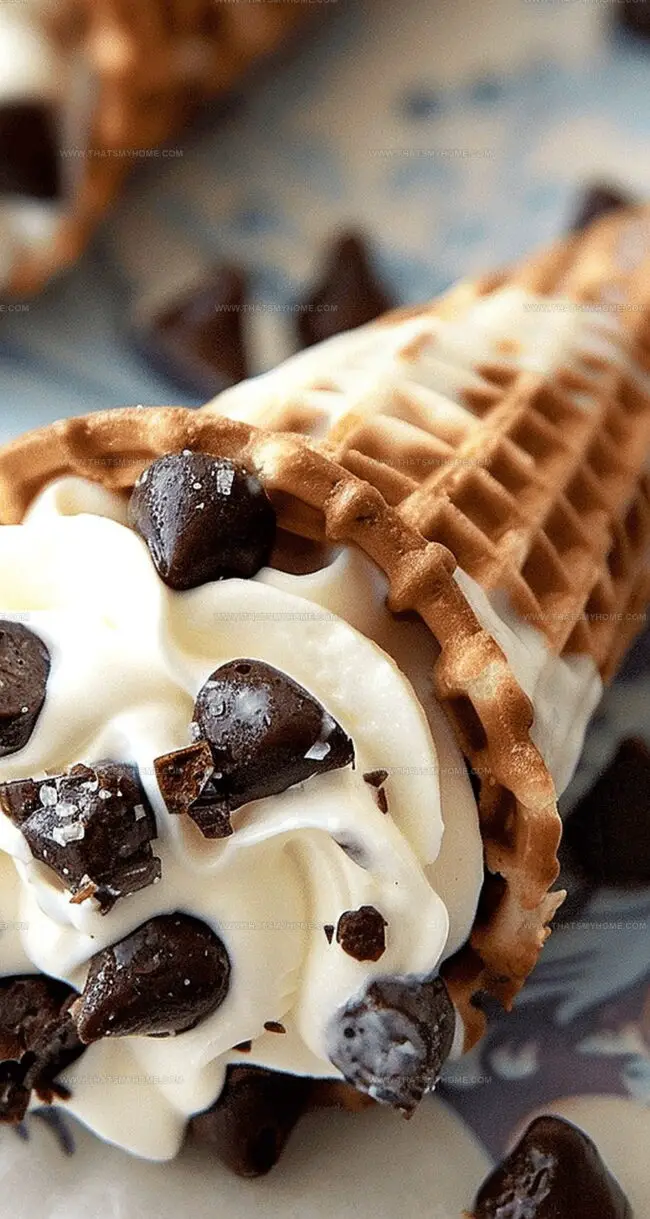
Cannoli Cones Recipe

The Perfect Cannoli Cones Recipe: Classic Italian Treat Made Fun

Cannoli cones convert traditional Italian desserts into a whimsical handheld delight.

Sweet culinary magic happens when crisp sugar cones meet luxurious cream-based filling.

These irresistible treats blend nostalgic flavors with modern convenience, offering a delectable experience that defies expectations.

Creamy textures dance against crunchy edges, creating a sensory celebration in every single bite.

Light and indulgent, these desserts break free from conventional pastry boundaries with unexpected charm.

Compact yet satisfying, cannoli cones promise a delightful escape from ordinary dessert routines.

Cannoli Cones: An Italian Treat

  • Create Quick Dessert Magic: These cannoli cones transform classic Italian pastry into an easy, handheld treat that anyone can whip up in minutes without complex baking skills.
  • Enjoy Luxurious Texture Contrast: The silky smooth ricotta filling meets crispy sugar cone, delivering a delightful crunch and creamy experience in every single bite.
  • Customize Your Sweet Adventure: Melted chocolate-dipped cone edges and mini chocolate chips allow personal creativity, letting you adjust sweetness and design to match your mood or guest preferences.
  • Effortless Entertaining Solution: Perfect for casual gatherings, summer parties, or spontaneous dessert cravings, these cones serve up impressive flavor with minimal preparation time and zero complicated techniques.

Key Ingredients for Cannoli Cones

Base Ingredients:
  • Ricotta Cheese: Creamy base for the filling, should be well-drained for the best texture and consistency.
  • Sugar Cones: Classic cone shape for holding the cannoli filling, provides a crisp and sweet foundation for the dessert.
  • Powdered Sugar: Adds sweetness and helps create a smooth, silky filling texture.
  • Vanilla Extract: Enhances the overall flavor profile with a warm, sweet undertone.
Chocolate Elements:
  • Semisweet Chocolate Chips: Used for dipping cone rims, adds a rich chocolate coating and decorative touch.
  • Mini Chocolate Chips: Folded into the filling for extra texture and chocolate flavor bursts.
Optional Garnish and Serving:
  • Cheesecloth or Paper Towel: Helps drain excess moisture from ricotta cheese during preparation.
  • Wax Paper or Glass: Provides a surface for drying chocolate-dipped cone rims and holding cones upright.

How to Make Cannoli Cones

Step 1: Drain Ricotta Cheese

Place a large mesh strainer over a mixing bowl. Line it with paper towel or cheesecloth. Add ricotta cheese and refrigerate overnight to remove excess moisture, creating a thick and creamy base.

Step 2: Prepare Chocolate-Dipped Cones

Melt semisweet chocolate chips in the microwave using 20-second intervals. Stir until smooth and completely melted.

Step 3: Coat Cone Edges

Dip the rims of sugar cones into the melted chocolate. Stand cones upright in a glass or on wax paper to dry completely.

Step 4: Create Cannoli Filling

In a clean bowl, mix:
  • Drained ricotta cheese
  • Powdered sugar
  • Vanilla extract

Blend until the mixture becomes smooth and creamy.

Step 5: Add Chocolate Chips

Gently fold mini chocolate chips into the ricotta mixture to create extra texture and flavor.

Step 6: Fill Cones

Use a piping bag or spoon to fill each prepared chocolate-rimmed cone generously with the cannoli filling.

Step 7: Serve and Store

Enjoy the cannoli cones immediately or refrigerate until ready to serve. Best consumed within a few hours of filling.

Tips for Perfect Cannoli Cones

  • Drain Ricotta Perfectly: Let ricotta sit in a lined strainer overnight to remove excess moisture, ensuring a thick, creamy filling that won't become runny.
  • Melt Chocolate Smoothly: Use short microwave intervals and stir frequently to prevent burning, creating a silky chocolate coating for cone rims.
  • Prevent Soggy Cones: Fill cones just before serving to maintain their crisp texture and prevent them from becoming soft.
  • Balance Sweetness Carefully: Adjust powdered sugar gradually, tasting as you mix to achieve the ideal level of sweetness without overwhelming the ricotta's delicate flavor.
  • Enhance Texture Creatively: Experiment with different mix-ins like chopped pistachios, candied orange peel, or toasted almonds to add interesting crunch and flavor variations.

Storing and Reheating Cannoli Cones

  • Refrigerate filled cannoli cones in an airtight container for up to 2 days. Keep them standing upright to prevent filling from leaking. Wrap each cone individually with plastic wrap to maintain freshness and prevent moisture absorption. Avoid freezing these delicate treats as the cone will lose its crispness and the filling might separate. When ready to enjoy, remove from refrigerator 10-15 minutes before serving to allow cones to slightly warm and filling to soften. Consume leftover cannoli cones chilled for the best texture and flavor experience. Do not reheat, as the sugar cones will become soggy and lose their delightful crunch.

Pairing Cannoli Cones with Wine

  • Chocolate Symphony Pairing: Enhance the sweet chocolate notes by serving these cannoli cones with a rich, full-bodied red wine like Cabernet Sauvignon or a smooth espresso martini that complements the dessert's decadent flavor profile.
  • Citrus Fresh Contrast: Balance the creamy ricotta filling with a crisp limoncello or a bright, zesty orange-infused sparkling water to cut through the richness and provide a refreshing palate cleanser.
  • Nutty Companion Delight: Pair the cannoli cones with a classic amaretto liqueur or roasted almond biscotti to echo the chocolate chip's crunch and add depth to the dessert's already delightful texture.
  • Cool Cream Companion: Serve alongside a scoop of vanilla bean gelato or a chilled vanilla cream liqueur to enhance the dessert's creamy consistency and create a luxurious tasting experience.

Fun Variations of Cannoli Cones

  • Chocolate Lovers' Cannoli: Swap mini chocolate chips for dark chocolate chunks and drizzle extra melted chocolate over filled cones for intense chocolate flavor.
  • Nutty Sicilian Style: Incorporate chopped pistachios into the ricotta filling and sprinkle crushed nuts on top for authentic Mediterranean crunch.
  • Fruity Summer Spin: Mix finely diced candied orange peel or dried cherries into the ricotta filling, creating a refreshing and zesty variation that brightens the classic dessert.
  • Caramel Crunch Edition: Swirl salted caramel sauce into the ricotta mixture and garnish cone edges with crushed toffee bits for a decadent sweet-salty experience.
Print
clock clock iconcutlery cutlery iconflag flag iconfolder folder iconinstagram instagram iconpinterest pinterest iconfacebook facebook iconprint print iconsquares squares iconheart heart iconheart solid heart solid icon
Cannoli Cones Recipe

Cannoli Cones Recipe


5 Stars 4 Stars 3 Stars 2 Stars 1 Star

4.8 from 29 reviews

  • Total Time: 10 minutes
  • Yield: 10 1x

Description

Sicilian cannoli cones deliver a delightful twist on classic Italian desserts with crispy waffle cones and creamy ricotta filling. Rich chocolate chips and powdered sugar elevate this sweet treat you’ll savor with pure Mediterranean delight.


Ingredients

Scale

Main Ingredients:

  • 16 ounces (454 grams) whole milk ricotta cheese (drained overnight)
  • 10 sugar cones
  • ⅔ cup (113 grams) mini chocolate chips

Sweet Additions:

  • ¾ cup (128 grams) semisweet chocolate chips (for dipping cones; optional)
  • ½ to cup (57 to 76 grams) powdered sugar
  • ½ teaspoon (2.5 milliliters) vanilla extract

Instructions

  1. Meticulously drain ricotta cheese overnight through a fine-mesh strainer lined with cheesecloth, allowing it to rest in the refrigerator to eliminate excess liquid and achieve a rich, velvety consistency.
  2. Create a chocolate-dipped base by gently melting semisweet chocolate chips in 20-second microwave intervals, stirring until achieving a glossy, smooth texture.
  3. Carefully coat the rims of sugar cones in the melted chocolate, positioning them vertically in a tall glass or on parchment paper to set completely at room temperature.
  4. Whisk the drained ricotta with powdered sugar and pure vanilla extract until the mixture transforms into a silky, uniform cream with no visible lumps.
  5. Delicately incorporate miniature chocolate chips into the ricotta mixture, ensuring an even distribution for consistent flavor and delightful textural contrast.
  6. Transfer the decadent filling into a piping bag or use a spoon to generously fill each prepared chocolate-rimmed sugar cone, creating elegant peaks and ensuring complete coverage.
  7. Serve immediately for optimal freshness, or refrigerate the filled cannoli cones for up to 2 hours before presenting your gourmet dessert.

Notes

  • Drain ricotta overnight through a mesh strainer lined with cheesecloth to remove excess moisture and create a thick, luxurious base for your filling.
  • Melt chocolate chips carefully in short microwave bursts, stirring between intervals to ensure a silky smooth coating for cone edges.
  • Dip sugar cone rims into melted chocolate, standing them upright to dry completely and create a delectable decorative border.
  • Blend drained ricotta with powdered sugar and vanilla extract until the mixture transforms into a creamy, dreamy filling with perfect sweetness.
  • Gently incorporate mini chocolate chips, distributing them evenly throughout the ricotta mixture for delightful bursts of texture and flavor.
  • Generously fill prepared chocolate-rimmed cones using a piping bag or spoon, creating an indulgent dessert best enjoyed immediately or chilled.
  • Prep Time: 10 minutes
  • Category: Desserts
  • Method: None
  • Cuisine: Italian

Nutrition

  • Serving Size: 10
  • Calories: 270 kcal
  • Sugar: 17 g
  • Sodium: 150 mg
  • Fat: 9 g
  • Saturated Fat: 4 g
  • Unsaturated Fat: 5 g
  • Trans Fat: 0 g
  • Carbohydrates: 43 g
  • Fiber: 1 g
  • Protein: 4 g
  • Cholesterol: 10 mg
Mary Ellen

Mary Ellen

Founder, Pastry Chef & Recipe Developer

Expertise

  • Artisanal Bread Making
  • Exquisite Pastry Craftsmanship
  • Creative Dessert Presentation
  • Flavor Profile Development
  • Menu Concept Innovation.

Education

Savannah Technical College

  • Program: Associate of Applied Science in Culinary Baking & Pastry Arts
  • Focus: A specialized program focusing on baking and pastry fundamentals, including bread making, cake decorating, and advanced pastry techniques. Developed creative presentation skills and an understanding of ingredient functions through lab-based practice.

Mary Ellen is the heart and soul of thatsmyhome.com. As the founder, pastry chef, and recipe developer, she refined her skills at Savannah Technical College with an Associate of Applied Science in Culinary Baking & Pastry Arts. 

Mary blends classic techniques with modern twists to make artisanal breads, beautifully crafted pastries, and desserts full of unique flavor. Her passion is evident in every recipe, and she enjoys sharing her expertise through hands-on pastry workshops and insightful articles in local culinary magazines.

Leave a Reply

Your email address will not be published. Required fields are marked *

Recipe rating 5 Stars 4 Stars 3 Stars 2 Stars 1 Star