Irresistible Crispy Sushi Rice Squares Recipe for Lunch Fun
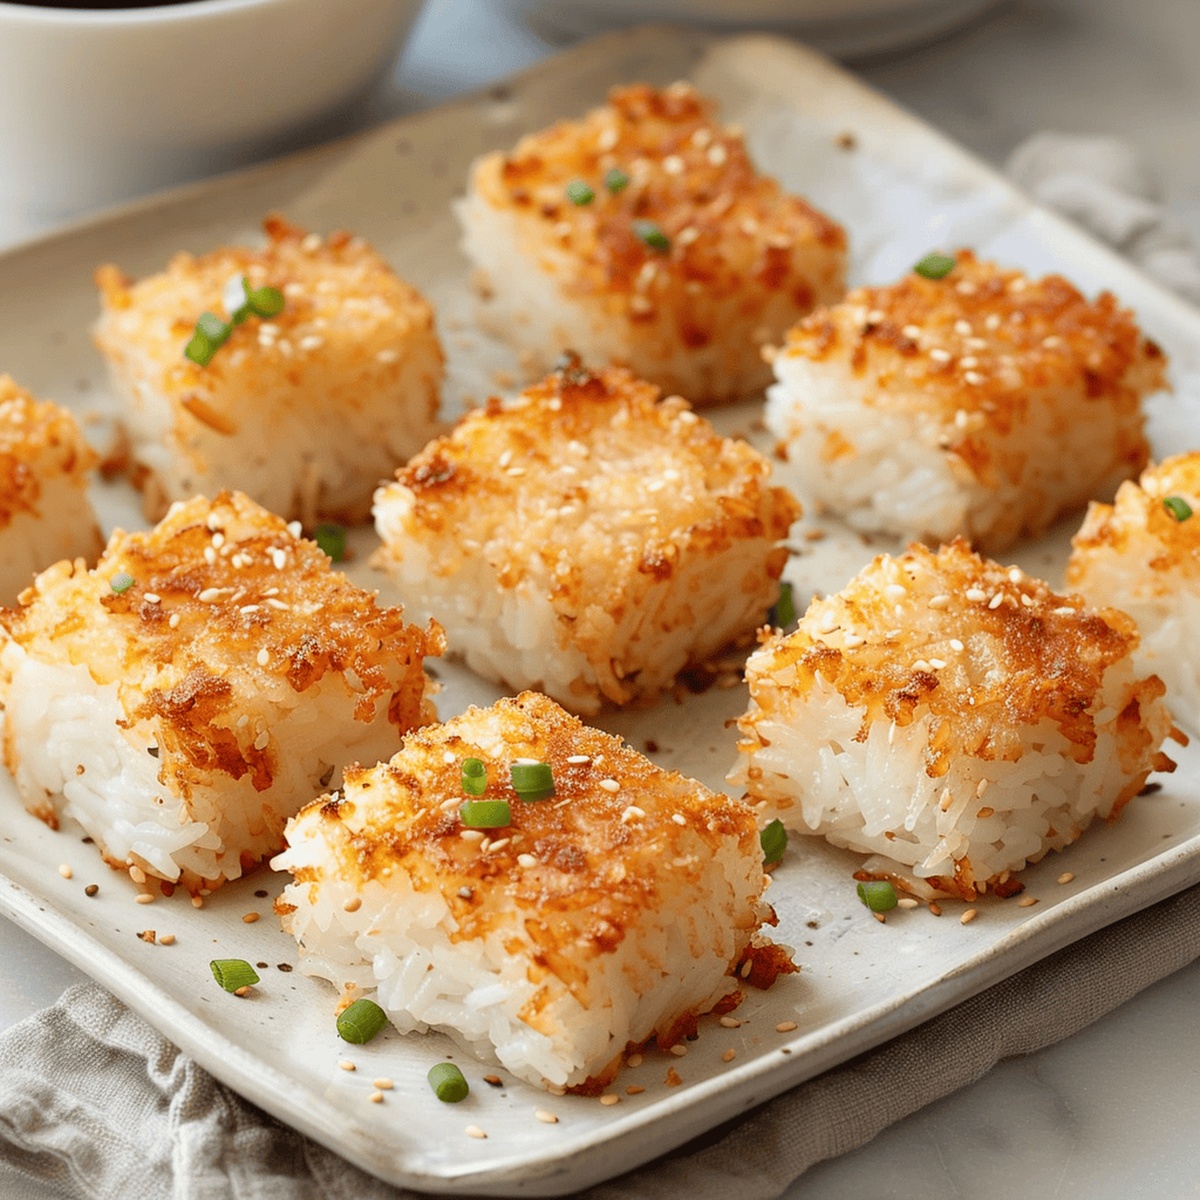
Sizzling and golden, these crispy sushi rice squares burst with flavor that’ll make your taste buds dance.
Light, crunchy edges give way to a tender center packed with umami goodness.
Each bite delivers a perfect balance of textures that elevates your appetizer game.
The crispy sushi rice squares bring restaurant-quality magic right to your kitchen counter.
Simple ingredients combine to create something truly spectacular.
You’ll love how these little squares turn an ordinary snack into an extraordinary culinary experience.
Grab your apron and get ready to impress everyone at the table with this irresistible recipe.
Quick Recipe Overview
Ingredients in Crispy Sushi Rice Squares
For Base:For Seasoning Blend:For Frying and Preparation:Tools for Making Crispy Sushi Rice Squares
Sushi Rice Squares: How to Cook Them Right
Select high-quality short-grain rice known for its sticky texture. Wash thoroughly under cool running water until liquid becomes transparent, removing excess starch for perfect consistency.
Create a delicate seasoning blend combining tangy rice vinegar, delicate sugar, hint of salt, and subtle sesame essence. Gently fold mixture into warm rice, ensuring even distribution for balanced flavor profile.
Carefully press seasoned rice into a compact square shape using parchment-lined container. Allow mixture to rest and solidify in refrigerator, developing firm structure that will support crispy exterior.
Heat neutral cooking oil in heavy-bottomed skillet until shimmering. Carefully place rice squares into hot oil, allowing each side to develop a gorgeous golden-brown crust that delivers incredible crunch and rich caramelized notes.
Tips to Get That Signature Crisp on Sushi Rice
Plating & Serving Crispy Sushi Rice Squares
Storage Tips for Sushi Rice Squares
Print
Crunchy Sushi Rice Squares Recipe
- Total Time: 20 minutes
- Yield: 5 1x
Description
Crispy sushi rice squares elevate traditional Japanese flavors with a modern twist. Crunchy edges and umami-rich toppings invite guests to savor each delectable bite, promising a memorable culinary experience you won’t soon forget.
Ingredients
- 2 cups (480 ml) water
- 1 ½ cups (375 ml) dry sushi rice, rinsed until water is clear
- 3 tbsps (45 ml) rice vinegar
- 1 tbsp (15 ml) granulated sugar
- 1 tsp salt
- 1 tsp (5 ml) toasted sesame oil
Instructions
- Rice Preparation: Rinse short-grain rice thoroughly under cool water until water runs clear, eliminating excess starch for perfect texture.
- Seasoning Fusion: Whisk rice vinegar, kosher salt, granulated sugar, and sesame oil into a harmonious blend, then gently incorporate into warm rice, ensuring uniform flavor distribution.
- Molding Foundation: Line a square baking tray with plastic wrap, spread seasoned rice evenly to create a compact 1/2-inch thick block, then refrigerate for 3-4 hours to solidify.
- Precision Cutting: Extract chilled rice block and slice into uniform bite-sized squares using an oil-lightly coated sharp knife for clean edges.
- Crispy Transformation: Heat vegetable oil in a large skillet over medium-high temperature until shimmering, then strategically fry rice squares, achieving a golden-brown crust by cooking 2-3 minutes per side.
- Finishing Touch: Drain fried squares on a wire rack lined with paper towels to preserve crispiness and remove excess oil, allowing slight cooling before serving.
Notes
- Rinse Thoroughly: Remove excess starch by repeated rinsing to prevent sticky, clumpy rice and ensure a perfect crispy texture.
- Seasoning Secret: Dissolve sugar completely in the vinegar mixture to create a balanced, harmonious flavor profile that enhances the rice’s taste.
- Chill for Success: Refrigerate rice block for at least 3 hours to achieve firm, easily manageable squares that hold their shape during frying.
- Frying Finesse: Use medium-high heat and lightly oiled knife to prevent sticking, ensuring evenly golden-brown, crispy exterior without burning.
- Prep Time: 5 minutes
- Cook Time: 15 minutes
- Category: Snacks, Appetizer
- Method: Frying
- Cuisine: Japanese
Nutrition
- Serving Size: 5
- Calories: 150
- Sugar: 1 g
- Sodium: 300 mg
- Fat: 3 g
- Saturated Fat: 0.5 g
- Unsaturated Fat: 2.5 g
- Trans Fat: 0 g
- Carbohydrates: 30 g
- Fiber: 0 g
- Protein: 3 g
- Cholesterol: 0 mg
Michael Rivera
Co-Founder & Culinary Instructor
Expertise
Education
The French Culinary Institute (now part of the International Culinary Center)
Michael Rivera is a seasoned chef and culinary instructor based in San Francisco, CA. Trained in Classic Culinary Arts at The French Culinary Institute, he refined his skills in Michelin-starred kitchens, mastering classic French techniques and artisanal bread baking.
Passionate about making gourmet methods accessible, Michael co-founded thatsmyhome.com to share his expertise through interactive online lessons and innovative, plant-based recipes. He loves blending traditional techniques with modern ideas, encouraging home cooks to enjoy the art of cooking in a relaxed, fun environment.