Crunchy & Sweet Salt River Bars Recipe for Treat Lovers
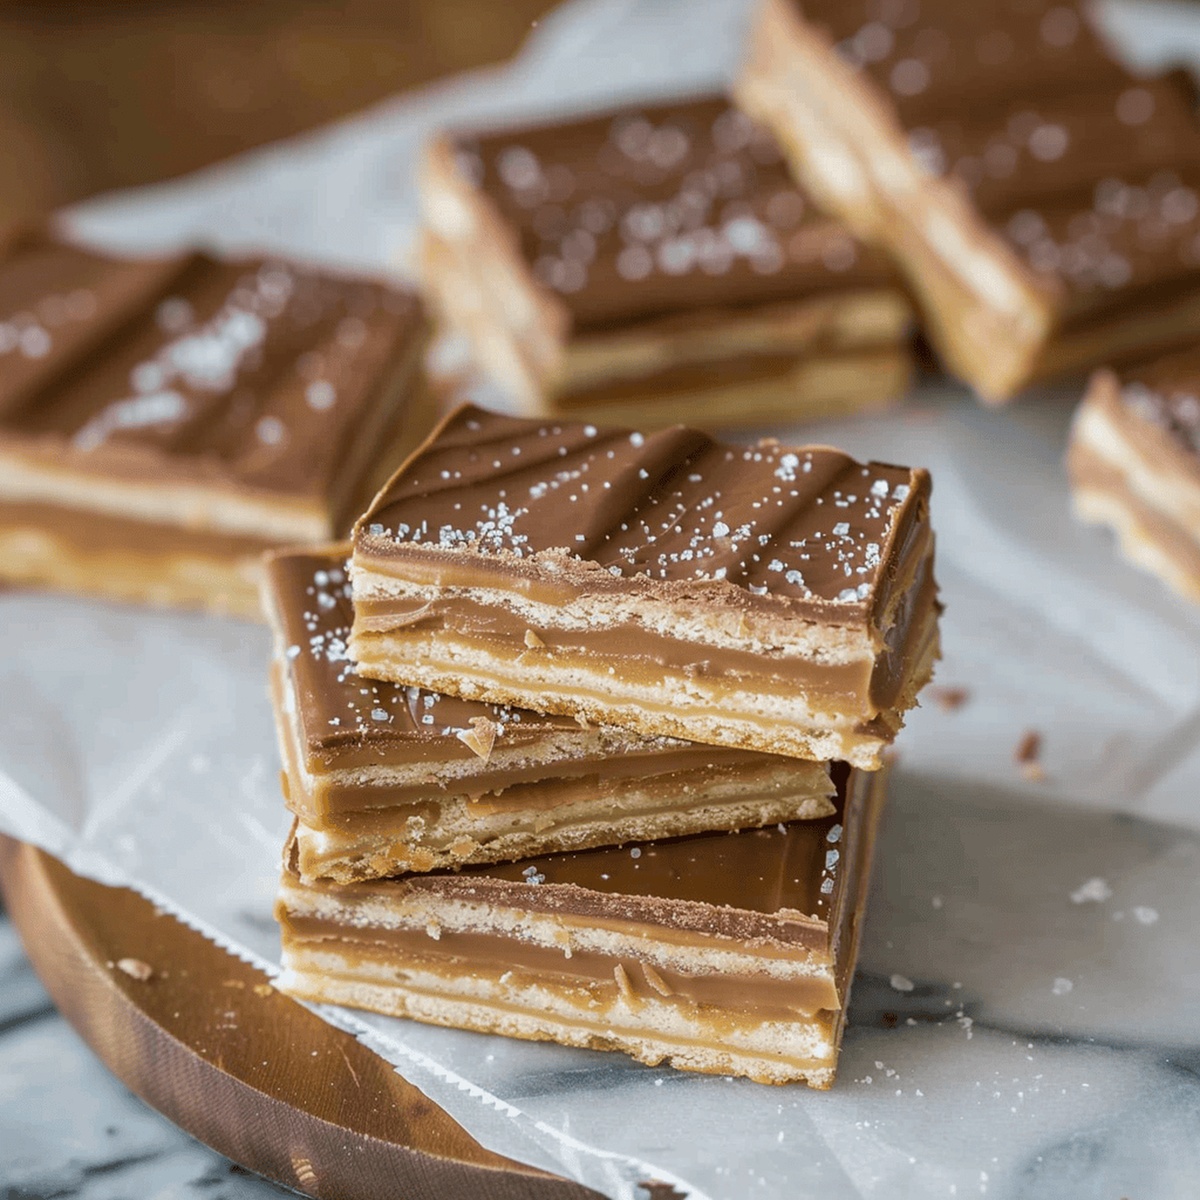
Chocolate and caramel collide in this irresistible salt river bars recipe that promises pure indulgence.
Sweet meets salty in a delectable dance of flavors.
Every bite delivers a perfect balance of rich chocolate and gooey caramel.
The layers meld together creating a dessert that stops conversations and sparks joy.
Crisp graham cracker crust provides a sturdy foundation for the decadent filling.
Generous drizzles of chocolate and caramel add dramatic flair to this stunning treat.
You won’t be able to resist grabbing another bar after the first heavenly taste.
Quick Recipe Overview
Ingredients for Crafting Salt River Bars
For Base Layer:For Caramel Layer:For Topping Layer:Tools That Make Salt River Bars Easy to Prepare
Baking Directions for Salt River Bars at Home
Create a cozy foundation for your delightful treat by lining a 9×13 inch pan with parchment paper and giving it a light non-stick spray coating.
Carefully nestle Club crackers across the bottom of the pan, creating a crisp and sturdy base for your layers.
Craft a rich caramel mixture by gently combining butter, brown sugar, graham crumbs, and heavy cream in a heavy saucepan. Stir with love over medium heat until the blend transforms into a bubbling, golden treasure. Let it dance and simmer for seven magical minutes.
Pour half of the golden caramel over the crackers, then crown with another cracker layer. Repeat the process, building delicious depth and texture.
Tuck your creation into the refrigerator, allowing the layers to chill and set perfectly.
Melt chocolate chips, butterscotch chips, and peanut butter into a smooth, glossy blanket. Spread this luxurious mixture across the chilled layers and sprinkle with a whisper of sea salt.
Let the bars relax in the refrigerator for 1-2 hours, then lift them out using the parchment paper and slice into tempting squares of pure happiness.
Smart Tips to Elevate Your Salt River Bars
How to Serve Salt River Bars with Style
Storage Hacks for Keeping Salt River Bars Fresh
Print
Gooey Salt River Bars Recipe
- Total Time: 25 minutes
- Yield: 17 1x
Description
Salt River Bars combine chocolate, caramel, and pretzels in a delightful dessert from Arizona’s culinary scene. Salty-sweet layers create an irresistible treat you’ll crave again and again.
Ingredients
- 90 club crackers
- 1 cup (227 grams/8 oz) salted butter
- 2 cups (440 grams/15.5 oz) packed light brown sugar
- 1 cup (120 grams/4.2 oz) graham cracker crumbs
- 1 ½ cups (255 grams/9 oz) milk chocolate chips
- ½ cup (85 grams/3 oz) butterscotch chips
- ½ cup (128 grams/4.5 oz) creamy peanut butter
- ¾ cup (180 milliliters/6 fl oz) heavy cream
- Maldon sea salt (to taste)
Instructions
- Preparation: Heat oven to 350°F and line a 9×13 inch baking pan with parchment paper, lightly spraying with non-stick cooking spray.
- Base Layer: Create a uniform foundation by laying Club crackers edge-to-edge across the entire pan bottom.
- Caramel Creation: In a heavy saucepan, combine unsalted butter, dark brown sugar, graham cracker crumbs, and heavy cream. Heat on medium, stirring continuously until the mixture reaches a rolling boil. Maintain constant stirring for 7 minutes until the caramel transforms into a rich, glossy consistency.
- Layering Process: Pour half the molten caramel evenly over the cracker base. Add a second cracker layer, then cover completely with remaining caramel. Refrigerate for 15-20 minutes to partially set.
- Chocolate Topping: Melt semi-sweet chocolate chips, butterscotch chips, and peanut butter in a microwave-safe bowl, stirring at 30-second intervals until smooth and fully blended.
- Finishing Touch: Spread the chocolate mixture uniformly across the chilled caramel layers. Sprinkle flaky sea salt over the surface for a gourmet flavor enhancement.
- Final Chill: Refrigerate for 1-2 hours until chocolate sets completely. Remove from pan using parchment paper edges and slice into rectangular bars with a sharp knife.
Notes
- Prevent Burning Caramel: Stir constantly during caramel preparation to avoid scorching and ensure a smooth, glossy texture.
- Cracker Layer Precision: Arrange crackers edge-to-edge without gaps for a stable, uniform base that supports the caramel layers.
- Chocolate Melting Technique: Use short microwave intervals and stir between each to prevent chocolate from burning and achieve a silky consistency.
- Salt Finishing Touch: Sprinkle flaky sea salt after chocolate sets to enhance flavor complexity and create a gourmet dessert experience.
- Prep Time: 15 minutes
- Cook Time: 10 minutes
- Category: Snacks, Desserts
- Method: Boiling
- Cuisine: American
Nutrition
- Serving Size: 17
- Calories: 356
- Sugar: 27 g
- Sodium: 160 mg
- Fat: 24 g
- Saturated Fat: 15 g
- Unsaturated Fat: 9 g
- Trans Fat: 0 g
- Carbohydrates: 36 g
- Fiber: 1 g
- Protein: 4 g
- Cholesterol: 49 mg
Michael Rivera
Co-Founder & Culinary Instructor
Expertise
Education
The French Culinary Institute (now part of the International Culinary Center)
Michael Rivera is a seasoned chef and culinary instructor based in San Francisco, CA. Trained in Classic Culinary Arts at The French Culinary Institute, he refined his skills in Michelin-starred kitchens, mastering classic French techniques and artisanal bread baking.
Passionate about making gourmet methods accessible, Michael co-founded thatsmyhome.com to share his expertise through interactive online lessons and innovative, plant-based recipes. He loves blending traditional techniques with modern ideas, encouraging home cooks to enjoy the art of cooking in a relaxed, fun environment.