Dreamy Red Velvet Chocolate Chip Cheesecake Bars Recipe
Decadent red velvet chocolate chip cheesecake bars meld rich, velvety textures into an irresistible dessert that screams indulgence.
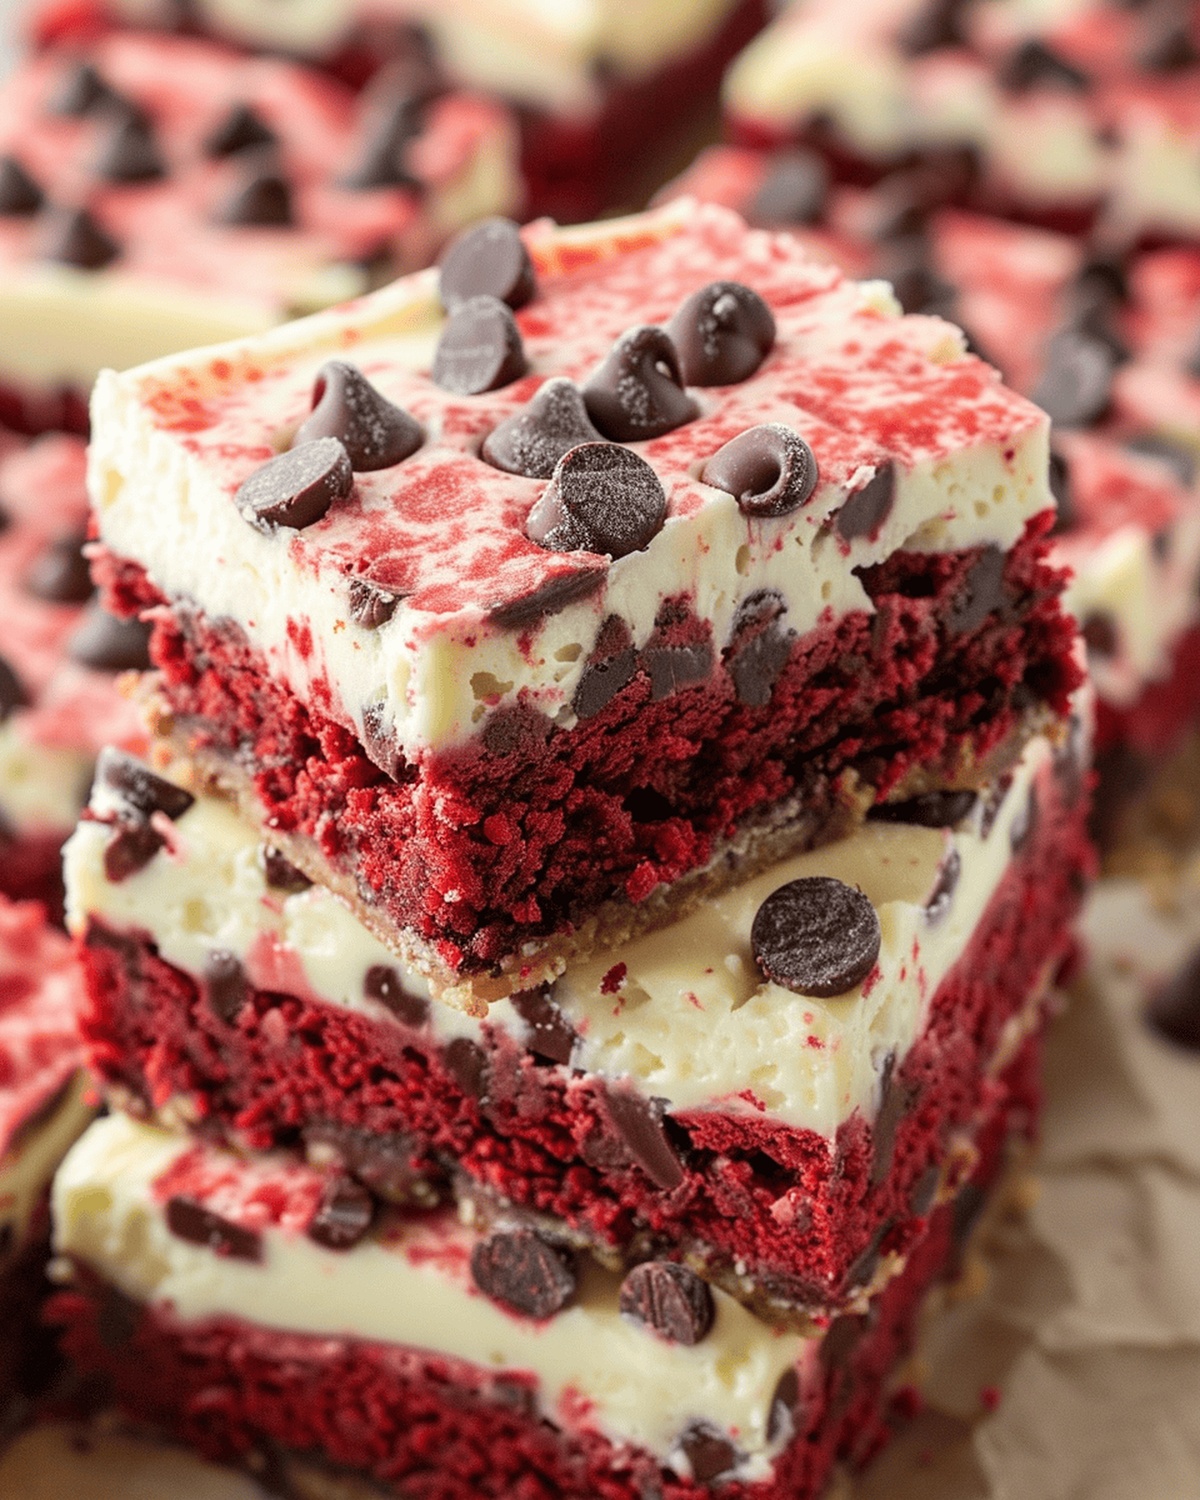
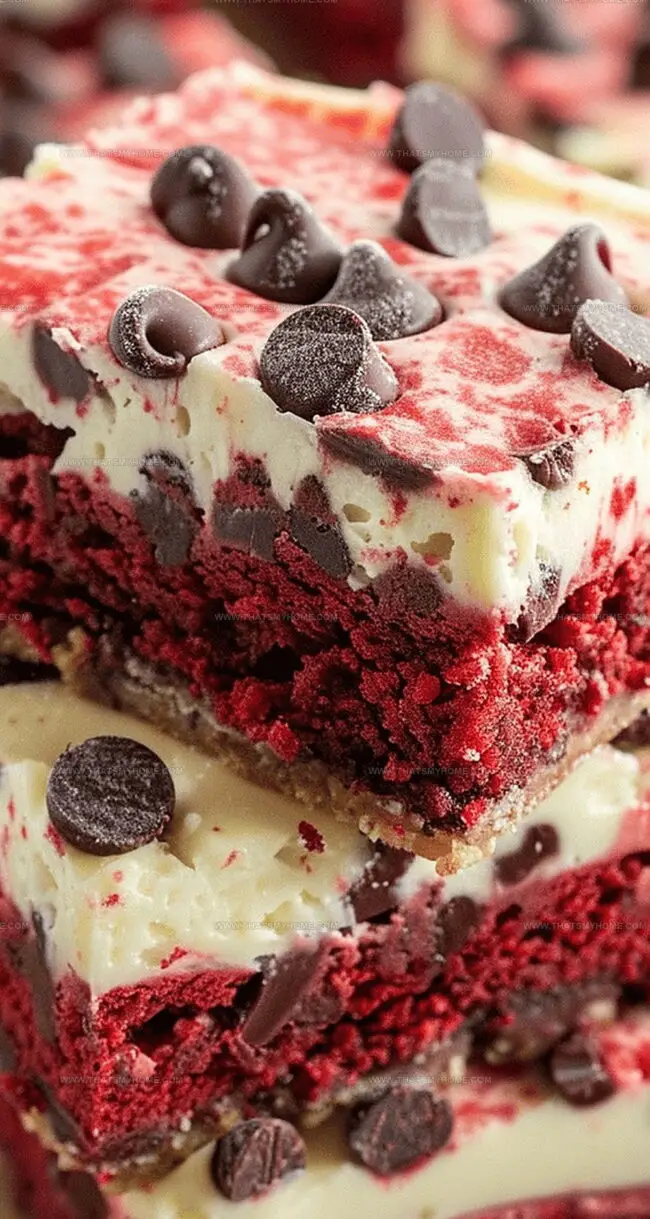
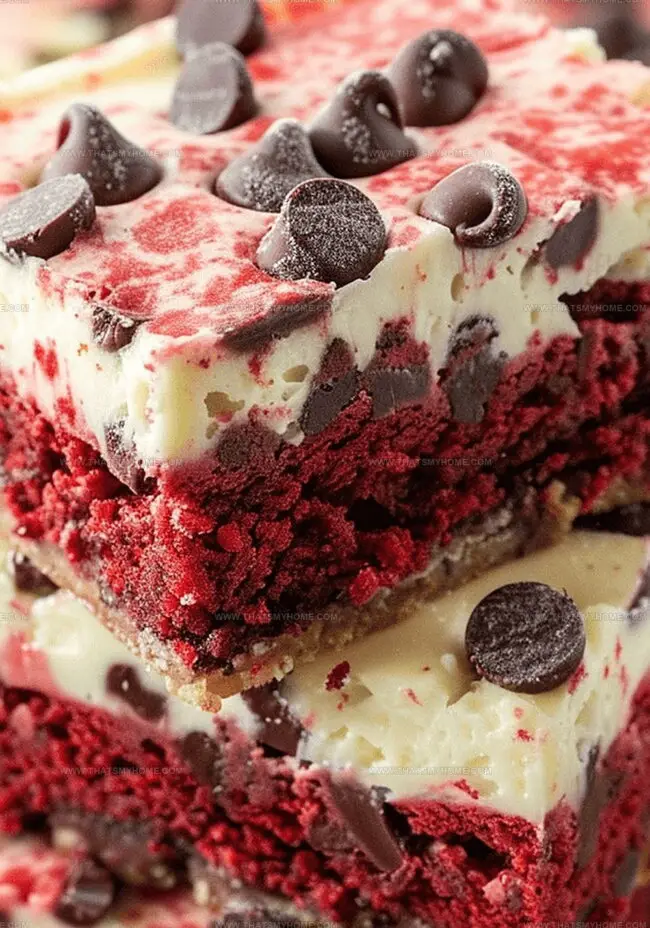
Layers of soft, crimson cake intertwine with creamy cheesecake and delightful chocolate chips for a sensational treat.
Each bite promises a harmony of flavors that dance across your palate with luxurious intensity.
The vibrant red hue catches the eye, making these bars a showstopping dessert for any occasion.
Smooth cream cheese filling nestles between tender cake, creating a contrast that delights the senses.
chocolate chips add a delectable crunch that elevates every single morsel.
Whip up these bars and watch as they disappear in moments, leaving everyone craving more of this delightful confection.
Quick Recipe Overview
Red Velvet Cheesecake Bars: What You’ll Need
For The Base:For The Cheesecake Layer:For Texture And Flavor Boost:Tools to Make Red Velvet Chip Cheesecake Bars
Equipment & Tools:How to Assemble and Bake Cheesecake Bars
Gather all your baking tools and create a clean workspace. Set your oven to warm up and prepare a rectangular baking pan with protective lining.
Create a soft, rich base by blending cake mix with creamy butter and a single egg. Press this vibrant mixture evenly across the pan’s bottom, ensuring a smooth surface.
Whip cream cheese until silky and luxurious. Gently incorporate sugar, followed by a fresh egg, tangy sour cream, and pure vanilla. Mix carefully to maintain a velvety texture without any unwanted lumps.
Sprinkle generous handfuls of chocolate chips across the creamy cheesecake mixture, creating delightful pockets of rich chocolate throughout the dessert.
Slide the pan into the preheated oven. Watch for golden edges and a slightly wobbly center, which signals perfect doneness. Baking typically takes around 35 minutes.
Allow the bars to cool completely at room temperature. Refrigerate for several hours to help the layers set and develop deep, rich flavors. Slice into elegant squares when thoroughly chilled.
Flavor Variations & Ideas for This Dessert
Serving Your Cheesecake Bars with Style
How to Store Cheesecake Bars Properly
Print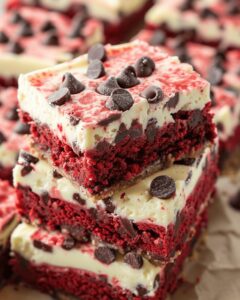
Luscious Red Velvet Chocolate Chip Cheesecake Bars Recipe
- Total Time: 50 minutes
- Yield: 13 1x
Description
Indulgent red velvet chocolate chip cheesecake bars blend rich chocolate and creamy cheesecake in one irresistible dessert. Chocolate lovers will savor this decadent Southern-inspired treat that promises pure bliss with each delectable bite.
Ingredients
- 1 box red velvet cake mix
- 8 oz (226g) cream cheese, room temperature
- ½ cup (113g) unsalted butter, softened
- 1 large egg, room temperature
- ¼ cup (50g) granulated sugar
- ¼ cup (61g) sour cream, room temperature
- 1 egg
- 1 tsp vanilla extract
- ½ cup mini chocolate chips
Instructions
- Oven Preparation: Preheat oven to 350°F (175°C) and line a 9×13 inch pan with foil, lightly spraying with non-stick cooking spray for easy removal.
- Base Formation: Combine softened butter, egg, and cake mix in a mixer, blending until a cohesive dough develops. Press the mixture uniformly across the pan’s bottom, creating a smooth red velvet foundation.
- Cheesecake Layer Construction: Whip cream cheese until completely smooth, gradually integrating granulated sugar to achieve a silky, lump-free consistency. Incorporate remaining egg, sour cream, and vanilla extract, mixing until the filling becomes perfectly homogeneous.
- Chocolate Integration: Delicately fold chocolate chips throughout the cheesecake batter, ensuring even distribution of the sweet morsels.
- Layering and Baking: Gently pour the cheesecake mixture over the red velvet base, spreading evenly. Bake for 30-40 minutes, watching for golden-brown edges and a slightly jiggly center that indicates proper doneness.
- Cooling and Setting: Remove from oven and allow bars to cool completely at room temperature. Refrigerate for a minimum of 4 hours or overnight to solidify texture and enhance flavor profile.
- Serving: Slice into individual bars, presenting a decadent dessert that combines rich red velvet and creamy cheesecake textures.
Notes
- Optimize Ingredient Temperature: Bring cream cheese, eggs, and sour cream to room temperature before mixing to ensure smooth, lump-free texture and even blending.
- Prevent Sticking: Line the baking pan with aluminum foil and use non-stick spray to guarantee easy removal and clean slicing of the bars.
- Master Mixing Technique: Beat cream cheese thoroughly until completely smooth, gradually adding sugar to create a silky, uniform cheesecake layer.
- Chill for Perfect Consistency: Refrigerate bars for at least 4 hours or overnight to develop ideal texture and allow flavors to meld together completely.
- Prep Time: 15 minutes
- Cook Time: 35 minutes
- Category: Desserts
- Method: Baking
- Cuisine: American
Nutrition
- Serving Size: 13
- Calories: 248
- Sugar: 16 g
- Sodium: 220 mg
- Fat: 13 g
- Saturated Fat: 8 g
- Unsaturated Fat: 5 g
- Trans Fat: 0 g
- Carbohydrates: 31 g
- Fiber: 1 g
- Protein: 3 g
- Cholesterol: 45 mg
Michael Rivera
Co-Founder & Culinary Instructor
Expertise
Education
The French Culinary Institute (now part of the International Culinary Center)
Michael Rivera is a seasoned chef and culinary instructor based in San Francisco, CA. Trained in Classic Culinary Arts at The French Culinary Institute, he refined his skills in Michelin-starred kitchens, mastering classic French techniques and artisanal bread baking.
Passionate about making gourmet methods accessible, Michael co-founded thatsmyhome.com to share his expertise through interactive online lessons and innovative, plant-based recipes. He loves blending traditional techniques with modern ideas, encouraging home cooks to enjoy the art of cooking in a relaxed, fun environment.