The Ultimate Mummy Rice Krispy Treat Recipe for Halloween Fun
Festive mummy rice krispy treats refine ordinary snacks into spine-tingling Halloween delicacies.
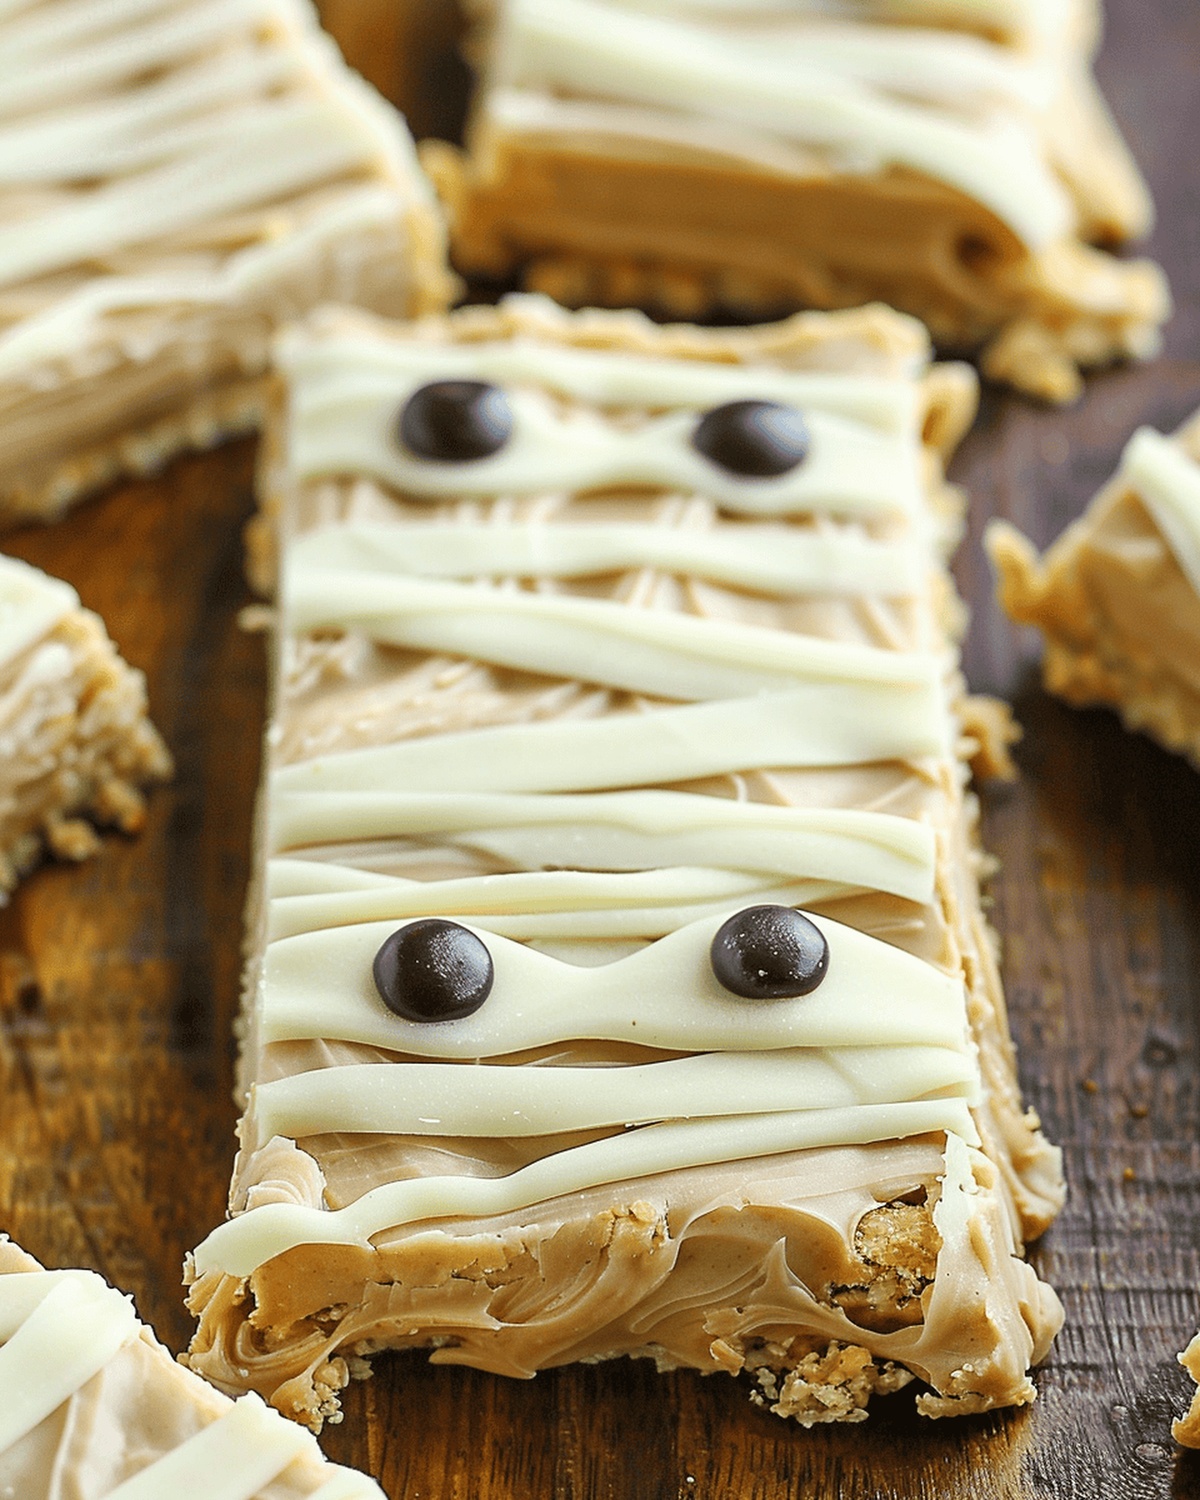
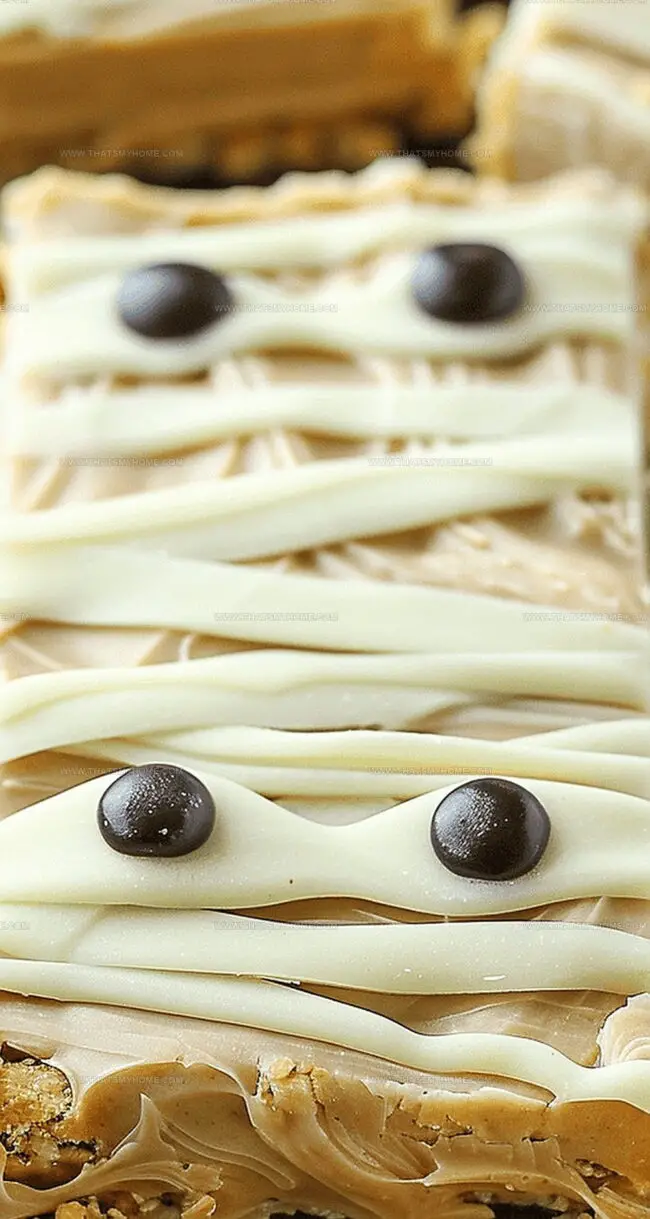
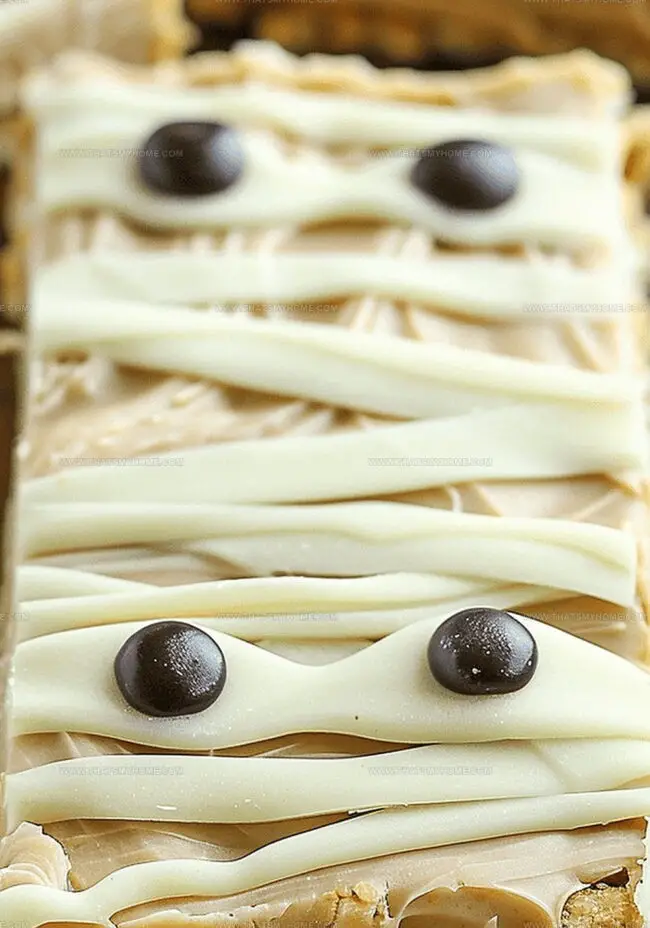
Soft marshmallow bindings wrap crispy rectangles with delicate white chocolate strands, creating a whimsical dessert that captures seasonal magic.
Sugary layers meld together, producing a sweet sensation that delights both children and adults.
Intricate bandage-like decorations give these treats a playful ghostly character that sparks imagination.
Crisp rice cereal provides delightful texture beneath the creamy chocolate coating.
These spooky confections bring unexpected fun to any Halloween gathering.
Prepare to dazzle friends with your creative culinary skills.
Spooky Mummy Rice Krispy Treats for Halloween
Essential Ingredients for Mummy Rice Krispy Treats
Base Ingredients:Binding Ingredients:Coating and Decoration Ingredients:Preparation Ingredients:How to Make Mummy Rice Krispy Treats
Step 1: Prepare Baking Dish
Line an 8×8 inch dish with parchment paper, letting edges hang over for easy removal later.
Step 2: Create Peanut Butter Base
In a mixing bowl, combine:Mix ingredients until thoroughly blended.
Step 3: Develop Creamy Mixture
Gradually add powdered sugar to the mixture, stirring consistently until smooth and creamy.
Step 4: Form Initial Layer
Press the mixture firmly into the lined dish, creating a ½ inch thick layer. Freeze until completely set.
Step 5: Shape Rectangular Treats
Remove from freezer and cut into rectangular shapes. Transfer to a parchment-lined tray.
Step 6: Melt White Chocolate
Microwave 1 ½ cups white chocolate chips in 15-second intervals, stirring between each burst until completely smooth.
Step 7: Coat Treats
Pour melted white chocolate evenly over each peanut butter rectangle, ensuring full coverage.
Step 8: Create Mummy Design
Transfer remaining white chocolate to a small plastic bag. Carefully snip a tiny corner for precise drizzling.
Step 9: Add Decorative Details
Drizzle white chocolate in zigzag patterns across treats to mimic mummy bandages.
Step 10: Final Mummy Touch
Place mini chocolate chips as eyes on each treat.
Step 11: Chill And Set
Refrigerate treats until chocolate hardens completely, allowing designs to stabilize.
Tips for the Best Mummy Rice Krispy Treats
Storing and Reheating Mummy Rice Krispy Treats
Pairing Mummy Rice Krispy Treats with Snacks
Fun Variations of Mummy Rice Krispy Treats
Print
Mummy Rice Krispy Treat Recipe
- Total Time: 20 minutes
- Yield: 12 1x
Description
Spooky Mummy Rice Krispy Treats bring Halloween magic to sweet snack time. Marshmallow-coated white chocolate drizzles create delightful bandage designs that wrap around crispy rice bars, making you eager to unwrap this playful seasonal dessert.
Ingredients
Main Ingredients:
- 1 cup creamy peanut butter
- 2 cups white chocolate chips
- 2 cups powdered sugar
Binding Ingredients:
- ¼ cup (57 grams) unsalted butter, melted
- 2 teaspoons vanilla extract
- Pinch of salt
Decoration Ingredients:
- ¼ cup mini chocolate chips, for eyes
Instructions
- Prepare an 8 x 8 inches (20 x 20 centimeters) baking dish by lining it with parchment paper, allowing excess paper to hang over the edges for convenient removal.
- In a spacious mixing bowl, combine creamy peanut butter, melted unsalted butter, pure vanilla extract, and a delicate sprinkle of salt, whisking until the ingredients create a harmonious blend.
- Gradually fold powdered sugar into the mixture, stirring consistently until the texture transforms into a smooth, luxurious consistency.
- Press the peanut butter mixture firmly and evenly into the prepared dish, aiming for a uniform thickness of approximately 0.5 inches (1.27 centimeters).
- Transfer the dish to the freezer, allowing the mixture to solidify completely for about 15-20 minutes.
- Once set, extract the peanut butter base and slice into precise rectangular shapes using a sharp knife.
- Arrange the rectangles on a fresh parchment-lined tray, ensuring they do not touch each other.
- Carefully melt white chocolate chips in a microwave-safe bowl, utilizing short 15-second intervals and stirring between each burst to prevent scorching.
- Generously coat each peanut butter rectangle with the melted white chocolate, ensuring complete and even coverage.
- Refrigerate the chocolate-covered bars until the coating hardens completely.
- Transfer remaining melted white chocolate into a small piping bag or plastic sandwich bag, then carefully snip a tiny corner to create a makeshift piping tool.
- Drizzle the white chocolate in zigzag patterns across the bars to mimic mummy bandages.
- Strategically place mini chocolate chips as eyes on each bar, pressing gently to secure them.
- Return the decorated bars to the refrigerator for a final 5-10 minutes to ensure all elements set perfectly.
Notes
- Transforming simple ingredients into spooky sweet treats becomes a fun Halloween baking adventure.
- Peanut butter base creates a creamy, rich foundation that melts in your mouth with each bite.
- Freezing the mixture helps achieve perfect cutting precision for uniform rectangular shapes.
- White chocolate drizzling technique mimics mummy bandages, turning ordinary dessert into a festive masterpiece.
- Mini chocolate chips strategically placed add playful eyes that bring your edible mummies to life.
- Prep Time: 20 minutes
- Cook Time: 0 minutes
- Category: Snacks, Desserts
- Method: None
- Cuisine: American
Nutrition
- Serving Size: 12
- Calories: 310 kcal
- Sugar: 28 g
- Sodium: 60 mg
- Fat: 16 g
- Saturated Fat: 6 g
- Unsaturated Fat: 10 g
- Trans Fat: 0 g
- Carbohydrates: 41 g
- Fiber: 0 g
- Protein: 4 g
- Cholesterol: 15 mg
Mary Ellen
Founder, Pastry Chef & Recipe Developer
Expertise
Education
Savannah Technical College
Mary Ellen is the heart and soul of thatsmyhome.com. As the founder, pastry chef, and recipe developer, she refined her skills at Savannah Technical College with an Associate of Applied Science in Culinary Baking & Pastry Arts.
Mary blends classic techniques with modern twists to make artisanal breads, beautifully crafted pastries, and desserts full of unique flavor. Her passion is evident in every recipe, and she enjoys sharing her expertise through hands-on pastry workshops and insightful articles in local culinary magazines.