
The Ultimate Red Velvet Cheesecake Balls Recipe: Perfect Treats
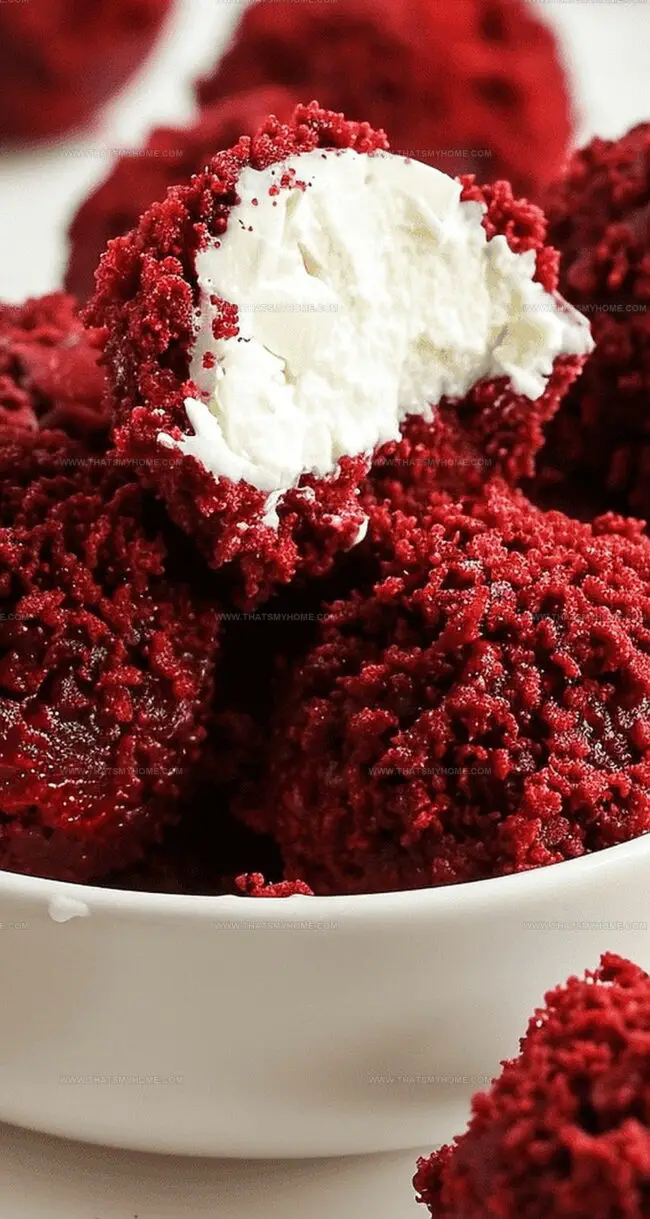
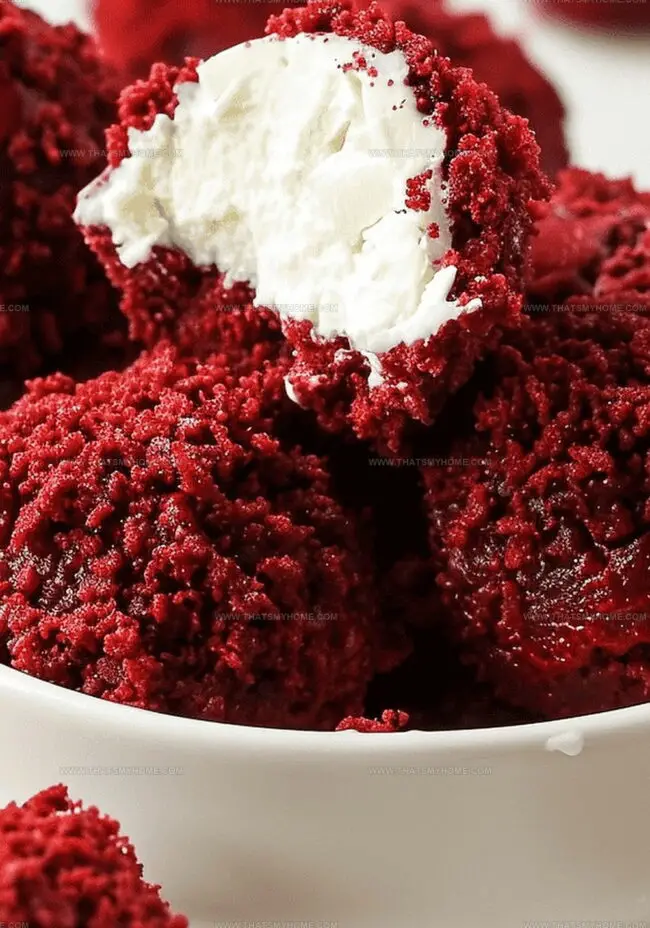
Red velvet cheesecake balls combine luxurious chocolate undertones with silky cream cheese for an irresistible confectionery experience.
Soft and delicate, these bite-sized delights capture the essence of elegant dessert crafting.
Their crimson hue hints at a rich, complex flavor profile that tantalizes taste buds.
Each spherical treat promises a harmonious balance of sweetness and tang, melting effortlessly on your tongue.
Compact yet decadent, these confections redefine ordinary moments into extraordinary culinary adventures.
Carefully crafted with precision and passion, they represent a perfect fusion of traditional baking techniques and modern dessert innovation.
Prepare to elevate your dessert game with these sophisticated, crowd-pleasing delicacies.
Why You’ll Fall for Red Velvet Cheesecake Balls
The Best Ingredients for Red Velvet Cheesecake Balls
Red Velvet Cake Base:Cheesecake Filling:Preparation Essentials:How to Make Red Velvet Cheesecake Balls
Step 1: Prepare the Cake
Preheat oven to 350°F. Bake red velvet cake according to package instructions in a 9×13 pan or jelly roll pan. Mix in:Let cake cool completely, then crumble into small pieces.
Step 2: Create Cream Cheese Filling
In a stand mixer, blend:Mix until smooth. Add:Continue mixing until stiff peaks form.
Step 3: Shape Cheesecake Balls
Line a baking sheet with parchment paper. Use a small cookie scoop to form cream cheese mixture into balls. Place tray in freezer for 1 hour.
Step 4: Coat the Balls
Remove frozen cheesecake balls from freezer. Roll each ball in reserved red velvet cake crumbs until fully covered.
Step 5: Chill and Serve
Refrigerate coated balls until ready to serve. Keep chilled for best texture and flavor.
Top Tips for Red Velvet Cheesecake Balls
Storing and Reheating Red Velvet Cheesecake Balls
Pairing Ideas for Red Velvet Cheesecake Balls
Delicious Variations of Red Velvet Cheesecake Balls
Print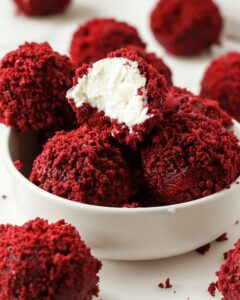
Red Velvet Cheesecake Balls Recipe
- Total Time: 1 hour 5 minutes
- Yield: 24 1x
Description
Red Velvet Cheesecake Balls blend creamy cheesecake with rich red velvet cake in delightful bite-sized treats. Chocolate-coated and sprinkled with crumbs, these elegant dessert bites will charm your guests and satisfy sweet cravings.
Ingredients
Main Ingredients:
- 1 box red velvet cake mix
- 3 eggs
- ½ cup (120 milliliters) vegetable oil
- 1 ¼ cups (300 milliliters) water
Frosting Ingredients:
- 16 ounces (454 grams) cream cheese, softened
- ½ cup (60 grams) confectioner’s sugar
- 2 tablespoons (30 milliliters) heavy cream
- 1 teaspoon (5 milliliters) vanilla extract
Instructions
- Preheat the oven to 350°F (175°C) and prepare a 9×13 inch (23×33 centimeters) baking pan with non-stick cooking spray.
- Follow the red velvet cake mix package instructions, carefully combining water, vegetable oil, and eggs until the batter is smooth and uniform.
- Pour the cake batter into the prepared pan and bake for 25-30 minutes, or until a toothpick inserted into the center comes out clean.
- Allow the cake to cool completely at room temperature for approximately 1 hour, ensuring no residual warmth remains.
- Crumble the cooled cake into fine, uniform crumbs using your hands or a food processor, creating a consistent texture.
- In a large mixing bowl, beat the softened cream cheese using an electric mixer until smooth and creamy.
- Gradually add confectioner’s sugar and vanilla extract, mixing until the cream cheese mixture is well combined and free of lumps.
- Fold in the heavy cream, whipping until the mixture forms stiff, peaks that hold their shape.
- Line a large baking sheet with parchment paper and use a small cookie scoop to create uniform cream cheese balls.
- Place the cream cheese balls in the freezer for 45-60 minutes to firm up and facilitate easier coating.
- Roll each chilled cream cheese ball in the prepared red velvet cake crumbs, ensuring complete and even coverage.
- Refrigerate the coated cheesecake balls for at least 30 minutes before serving to maintain their shape and enhance flavor.
Notes
- Freezing the cheesecake balls helps them hold their shape and makes coating easier, preventing messy crumbling during the rolling process.
- Crumbling the red velvet cake into fine, even pieces ensures a consistent coating and smooth texture for the exterior of each ball.
- Using a stand mixer creates a smooth, lump-free cream cheese filling that blends perfectly and provides a creamy base for the dessert.
- Parchment paper prevents sticking and makes transferring and cleaning up the cheesecake balls a breeze during preparation.
- Room temperature ingredients like cream cheese and eggs blend more smoothly and create a more uniform mixture for the filling.
- Chilling the balls before serving enhances their flavor and allows the cream cheese and cake crumb coating to set properly.
- Prep Time: 35 minutes
- Cook Time: 30 minutes
- Category: Desserts, Snacks
- Method: Baking
- Cuisine: American
Nutrition
- Serving Size: 24
- Calories: 200 kcal
- Sugar: 10 g
- Sodium: 250 mg
- Fat: 12 g
- Saturated Fat: 3.5 g
- Unsaturated Fat: 8 g
- Trans Fat: 0 g
- Carbohydrates: 24 g
- Fiber: <1 g
- Protein: 2.5 g
- Cholesterol: 45 mg
Mary Ellen
Founder, Pastry Chef & Recipe Developer
Expertise
Education
Savannah Technical College
Mary Ellen is the heart and soul of thatsmyhome.com. As the founder, pastry chef, and recipe developer, she refined her skills at Savannah Technical College with an Associate of Applied Science in Culinary Baking & Pastry Arts.
Mary blends classic techniques with modern twists to make artisanal breads, beautifully crafted pastries, and desserts full of unique flavor. Her passion is evident in every recipe, and she enjoys sharing her expertise through hands-on pastry workshops and insightful articles in local culinary magazines.