The Ultimate Seven-Layer Taco Dip Recipe for Party Magic
Seven-layer taco dip redefines party snacking into a culinary adventure that tempts taste buds with its colorful, textured landscape.
Mexican-inspired ingredients dance together in strategic harmony, creating a sensational appetizer that sparks excitement at gatherings.
Creamy, crunchy, and spicy elements intermingle beneath a vibrant surface, promising an explosion of complementary flavors.
Each carefully constructed layer contributes unique dimensions to the overall taste experience.
The dip architectural design ensures that no single bite becomes monotonous or predictable.
Guests will marvel at the complex yet approachable nature of this crowd-pleasing creation.
Seven-Layer Taco Dip: A Perfect Party Snack
Must-Have Ingredients for Seven-Layer Taco Dip
Base Layer Ingredients:Creamy Layer Ingredients:Topping Ingredients:How to Make Seven-Layer Taco Dip
Step 1: Prepare Bean Base
Mix refried beans with taco seasoning thoroughly until well blended.
Step 2: Create Bean Foundation
Spread the seasoned bean mixture evenly across the bottom of a serving dish.
Step 3: Add Creamy Layer
Spread a smooth, even layer of sour cream directly over the bean base.
Step 4: Introduce Salsa Splash
Pour salsa over the sour cream layer, ensuring complete coverage.
Step 5: Sprinkle Cheese Goodness
Evenly distribute shredded cheddar cheese across the salsa layer.
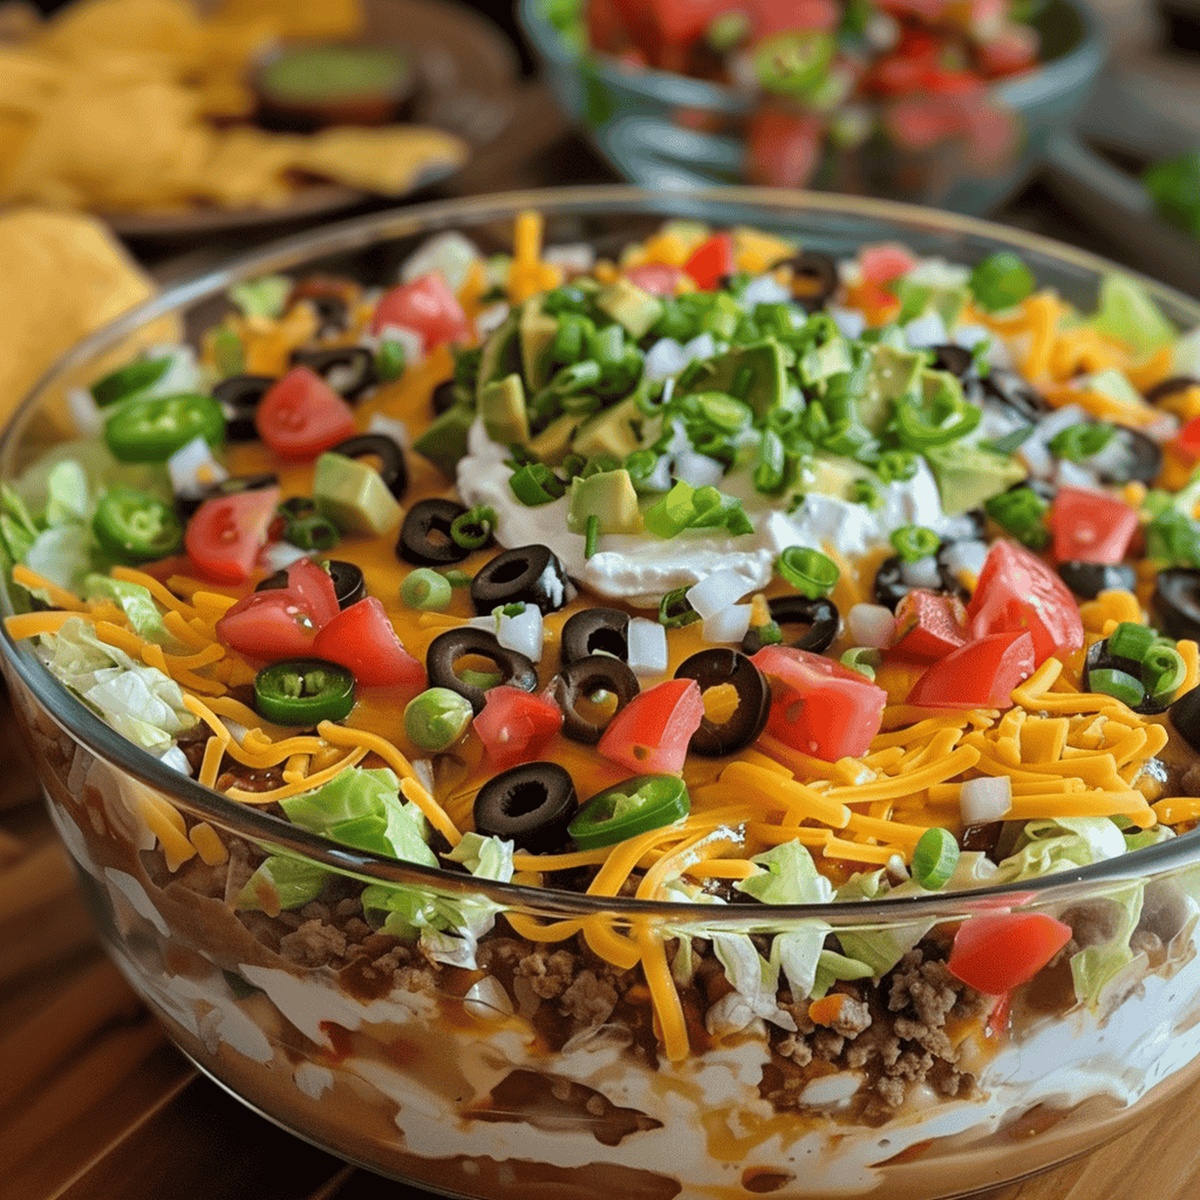
Step 6: Add Fresh Vegetable Layers
Scatter diced tomatoes across the cheese layer.
Follow with a generous layer of shredded lettuce.
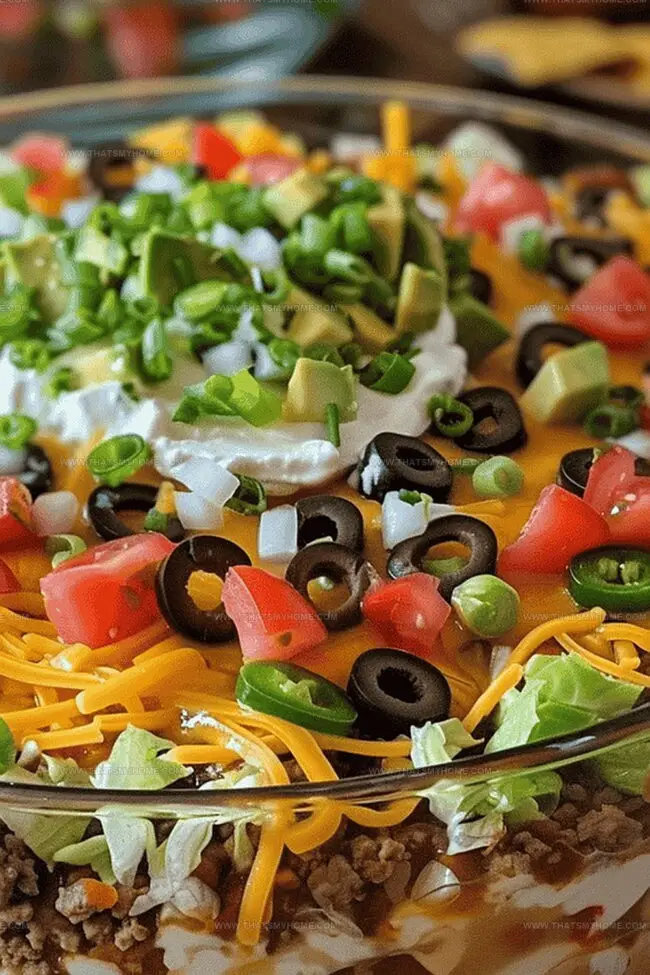
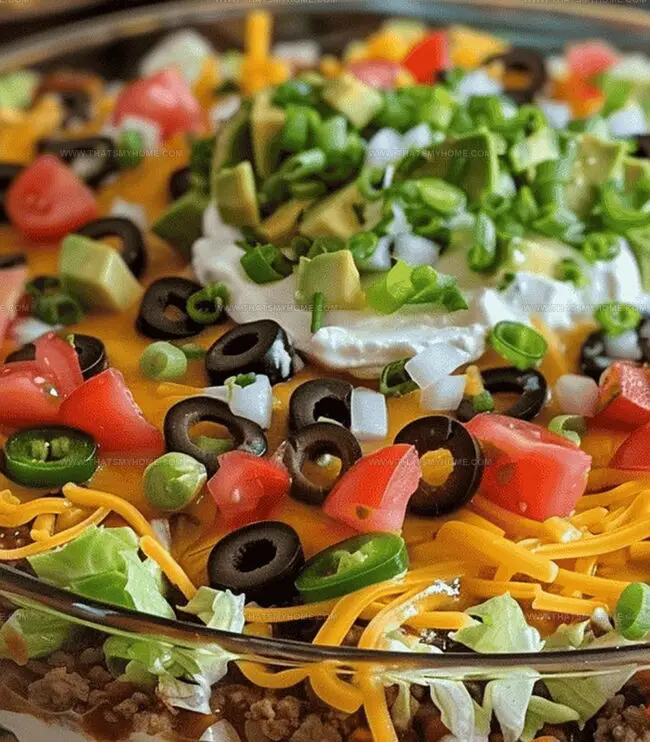
Step 7: Top With Garnish
Strategically place sliced black olives and chopped green onions on top.
Step 8: Chill and Serve
Refrigerate the dip for 1 hour to allow flavors to meld together.
Serve chilled alongside crispy tortilla chips for the ultimate party appetizer.
Tip: For best results, use fresh ingredients and prepare just before serving.
Tips for Perfect Seven-Layer Taco Dip
Storing and Reheating Seven-Layer Taco Dip
Pairing Seven-Layer Taco Dip with Chips or Veggies
Fun Variations of Seven-Layer Taco Dip
Print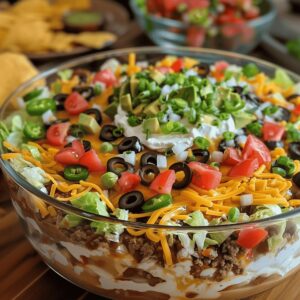
Seven-Layer Taco Dip Recipe
- Total Time: 15 minutes
- Yield: 8 1x
Description
Layered with zesty Mexican flavors, Seven-Layer Taco Dip brings party-perfect appetizer magic to your table. Creamy refried beans, spicy ground beef, tangy sour cream, and fresh toppings create an irresistible crowd-pleasing dish you’ll devour with crisp tortilla chips.
Ingredients
Main Ingredients:
- 1 can (16 ounces/454 grams) refried beans
- 1 cup (240 milliliters/8 ounces) salsa
- 1 cup (240 milliliters/8 ounces) shredded cheddar cheese
- 1 cup (240 milliliters/8 ounces) diced tomatoes
- 1 cup (240 milliliters/8 ounces) shredded lettuce
Dairy and Seasoning Ingredients:
- 1 cup (240 milliliters/8 ounces) sour cream
- 1 packet taco seasoning
Garnish Ingredients:
- ½ cup (120 milliliters/4 ounces) sliced black olives
- ¼ cup (60 milliliters/2 ounces) chopped green onions
Serving:
- Tortilla chips
Instructions
- Thoroughly blend refried beans with zesty taco seasoning until the mixture reaches a smooth, uniform consistency.
- Carefully transfer the seasoned bean mixture into a large serving dish, creating an even, foundational layer that covers the entire bottom surface.
- Gently spread a generous layer of creamy sour cream directly over the bean base, ensuring complete and consistent coverage.
- Pour a vibrant salsa layer across the sour cream, distributing it evenly to create a colorful and flavorful stratum.
- Generously sprinkle sharp cheddar cheese over the salsa, covering the surface with a delectable dairy blanket.
- Distribute freshly diced tomatoes across the cheese layer, adding a juicy and bright element to the dip.
- Delicately scatter crisp, shredded lettuce over the tomatoes, providing a fresh and crunchy texture to the assembly.
- Crown the dip with sliced black olives and finely chopped green onions, creating a visually appealing and flavorful topping.
- Refrigerate the completed taco dip for a minimum of 60 minutes (1 hour), allowing the flavors to harmonize and intensify. Serve chilled alongside crisp tortilla chips for a perfect party appetizer.
Notes
- Chilling this dip beforehand intensifies the flavor combination and lets the layers settle into a harmonious blend.
- Guests will go crazy for the colorful presentation that looks like a fiesta on a plate.
- Each layer adds a unique texture and taste profile, creating a mouthwatering appetizer experience.
- Preparing ingredients ahead of time makes assembly quick and stress-free.
- Customize the dip by adjusting spice levels or swapping out toppings to match personal preferences.
- Prep Time: 15 minutes
- Cook Time: 0 minutes
- Category: Appetizer, Snacks
- Method: None
- Cuisine: Mexican
Nutrition
- Serving Size: 8
- Calories: 400 kcal
- Sugar: 6g
- Sodium: 950mg
- Fat: 24g
- Saturated Fat: 12g
- Unsaturated Fat: 8g
- Trans Fat: 0g
- Carbohydrates: 38g
- Fiber: 7g
- Protein: 15g
- Cholesterol: 50mg
Mary Ellen
Founder, Pastry Chef & Recipe Developer
Expertise
Education
Savannah Technical College
Mary Ellen is the heart and soul of thatsmyhome.com. As the founder, pastry chef, and recipe developer, she refined her skills at Savannah Technical College with an Associate of Applied Science in Culinary Baking & Pastry Arts.
Mary blends classic techniques with modern twists to make artisanal breads, beautifully crafted pastries, and desserts full of unique flavor. Her passion is evident in every recipe, and she enjoys sharing her expertise through hands-on pastry workshops and insightful articles in local culinary magazines.