
Crispy Air Fryer Yaki Onigiri Recipe: Homemade Flavor Bombs
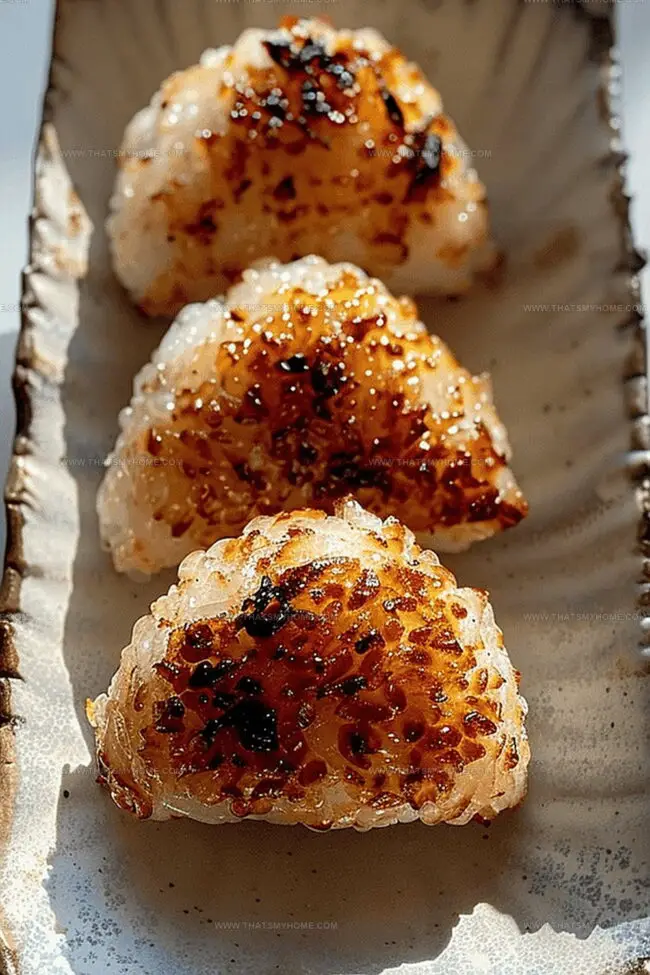
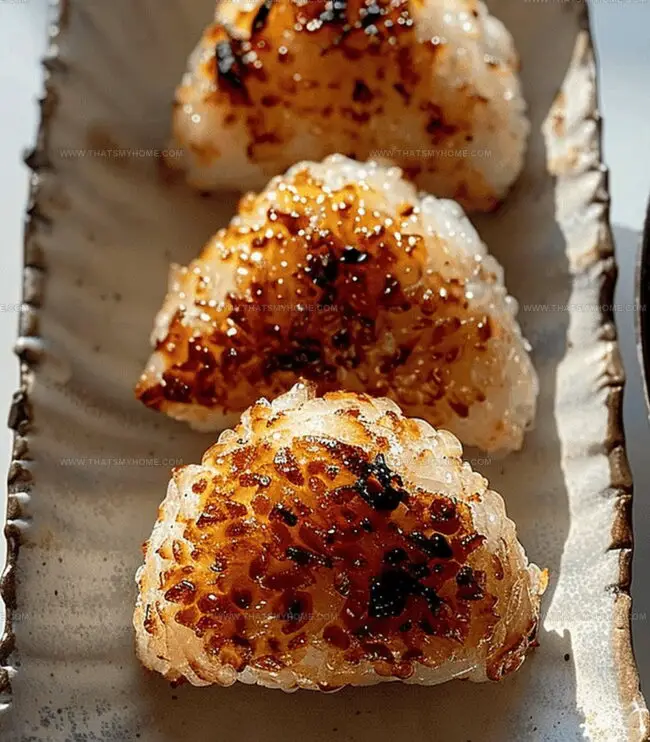
Sizzling Japanese cuisine meets modern cooking technology in this delectable air fryer yaki onigiri that promises a crispy, golden exterior with a tender rice center.
The classic Japanese rice ball gets a delightful upgrade when cooked in an air fryer, creating an irresistible snack bursting with umami flavors.
Each compact triangle delivers a perfect balance of textures that will transport you straight to the streets of Tokyo.
Brushed with savory soy sauce and grilled to achieve a beautiful char, these onigiri are more than just a simple side dish.
Packed with robust flavors and incredibly easy to make, this recipe turns ordinary rice into an extraordinary culinary experience.
You’ll love how quickly these can be prepared and how they become an instant favorite at any gathering.
Get ready to impress your guests with this simple yet sophisticated Japanese street food that’s sure to become a staple in your cooking repertoire.
Quick Recipe Overview
Air Fryer Yaki Onigiri Ingredient Guide
For Base Ingredient:For Coating and Flavor:For Optional Garnish:Tools to Form and Air Fry Japanese Onigiri
Instructions for Crispy-Skinned Onigiri at Home
Filling Variations and Texture Tweaks
Serving These Rice Balls Warm or Cold
Keeping Onigiri Crispy Until Later
Print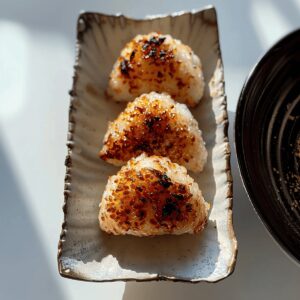
Crispy Air Fryer Yaki Onigiri Recipe
- Total Time: 33 minutes
- Yield: 3 1x
Description
Japanese culinary delight Air Fryer Yaki Onigiri brings crispy grilled rice balls to your kitchen with minimal effort. Warm, golden-brown edges and umami-rich fillings make this snack irresistible when you crave authentic Japanese comfort cuisine.
Ingredients
- 1 slice Mozzarella cheese
- 300 g (10.6 oz) Cooked rice
- 1 tbsp Sugar
- 2 tbsps Soy sauce
- 1 tbsp Mirin
- 1 tbsp Sake
- Water (small bowl for wetting hands when shaping onigiri)
Instructions
- Preparation: Moisten hands with water to prevent rice from sticking, then mold freshly cooked rice into three uniform triangular shapes using hands or a specialized mold.
- Initial Crisping: Position rice triangles in the air fryer basket with adequate spacing, then set temperature to 400°F and cook for 15 minutes, ensuring even exposure.
- Midpoint Rotation: Gently turn each rice triangle halfway through cooking to promote consistent golden-brown coloration and crisp exterior development.
- Soy Sauce Glazing: Remove onigiri and thoroughly coat both surfaces with soy sauce mixture, returning to air fryer for an additional 2 minutes to caramelize and intensify flavor profiles.
- Flavor Layering: Repeat soy sauce application and brief air frying process twice more, creating multi-dimensional taste and characteristic charred edges while carefully monitoring to prevent burning.
- Final Presentation: Transfer immediately to serving plate, preserving optimal temperature and textural integrity of the yaki onigiri, ready to be enjoyed as a delectable Japanese-inspired rice delicacy.
Notes
- Wet Hands Wisely: Rinse hands with cool water before shaping rice to prevent sticking and ensure smooth, clean triangular formations.
- Shape Precisely: Use consistent pressure and techniques to create uniform rice triangles that cook evenly and maintain structural integrity.
- Monitor Closely: Watch onigiri during air frying to prevent burning, adjusting cooking time and rotation for perfect golden-brown caramelization.
- Sauce Application Technique: Brush soy sauce mixture generously and repeatedly to build complex layers of flavor and achieve authentic yaki onigiri char marks.
- Prep Time: 10 minutes
- Cook Time: 23 minutes
- Category: Snacks, Lunch, Dinner
- Method: Air Frying
- Cuisine: Japanese
Nutrition
- Serving Size: 3
- Calories: 195
- Sugar: 3 g
- Sodium: 610 mg
- Fat: 6 g
- Saturated Fat: 3 g
- Unsaturated Fat: 2 g
- Trans Fat: 0 g
- Carbohydrates: 30 g
- Fiber: 0 g
- Protein: 6 g
- Cholesterol: 15 mg
Michael Rivera
Co-Founder & Culinary Instructor
Expertise
Education
The French Culinary Institute (now part of the International Culinary Center)
Michael Rivera is a seasoned chef and culinary instructor based in San Francisco, CA. Trained in Classic Culinary Arts at The French Culinary Institute, he refined his skills in Michelin-starred kitchens, mastering classic French techniques and artisanal bread baking.
Passionate about making gourmet methods accessible, Michael co-founded thatsmyhome.com to share his expertise through interactive online lessons and innovative, plant-based recipes. He loves blending traditional techniques with modern ideas, encouraging home cooks to enjoy the art of cooking in a relaxed, fun environment.