Irresistible Butterfinger Cheesecake Recipe For Sweet Tooths
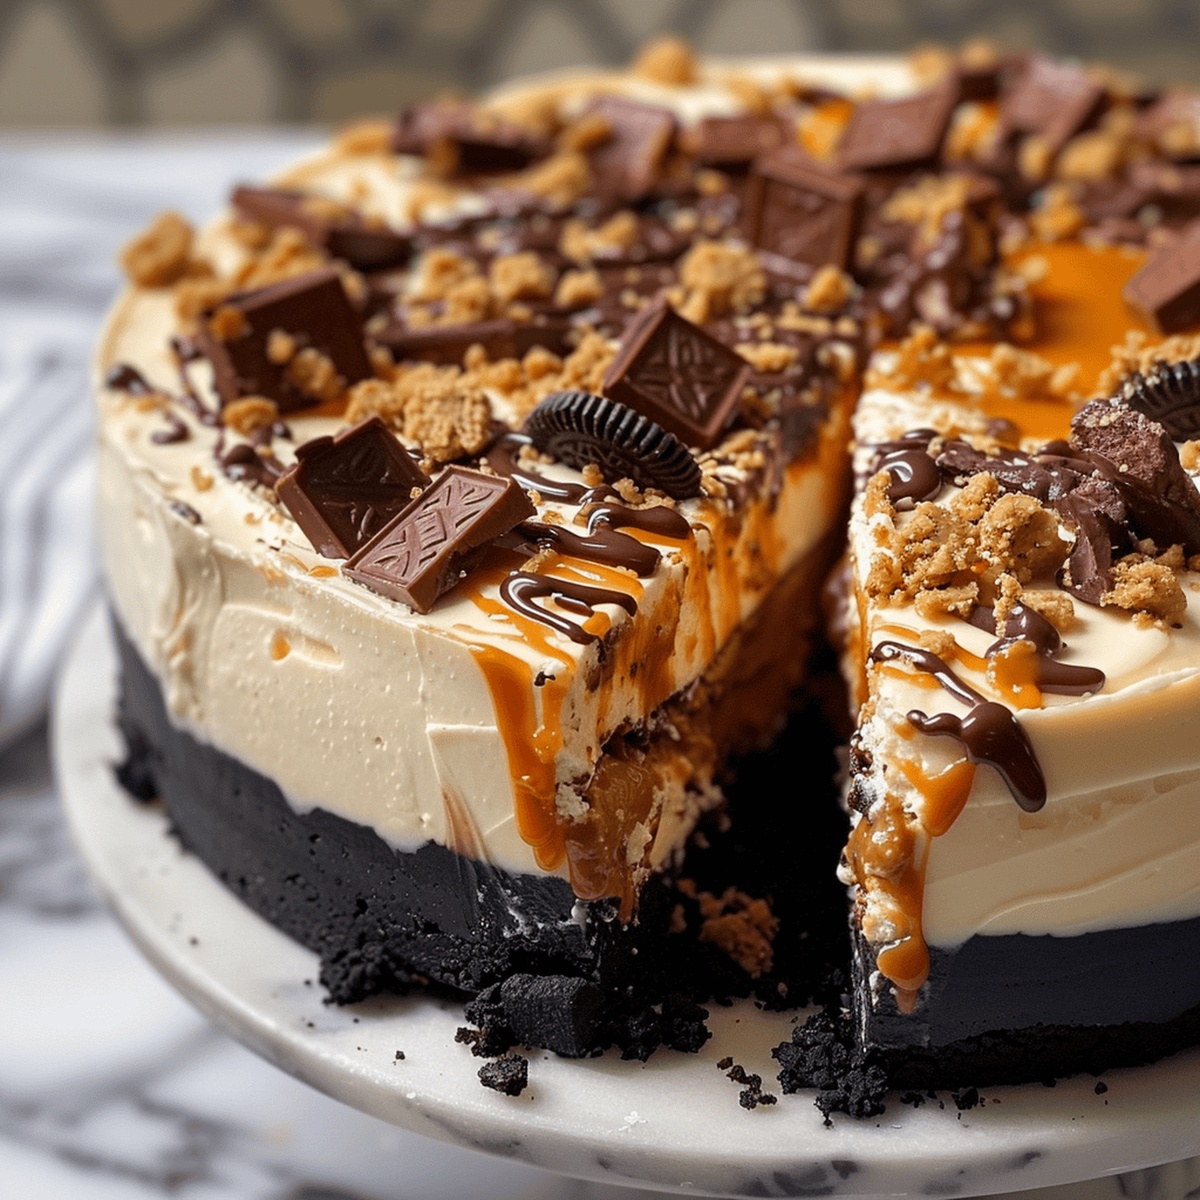
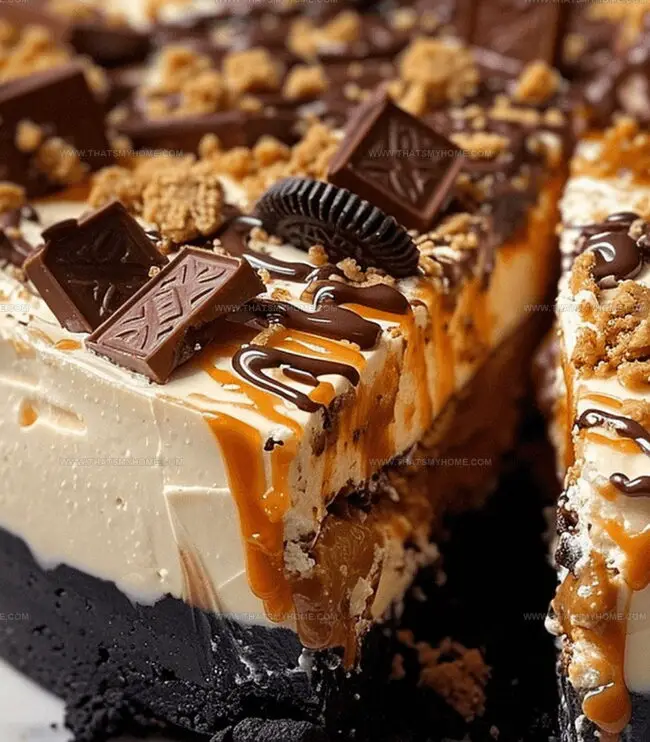
Decadent layers of creamy goodness meet the iconic crunch of butterfinger in this irresistible butterfinger cheesecake recipe that promises pure dessert bliss.
Rich, velvety cream cheese mingles with crushed butterfinger bars, creating a symphony of textures and flavors.
Every slice tells a story of indulgence, with a graham cracker crust providing the perfect foundation for this heavenly treat.
The contrast between smooth cheesecake and crunchy candy pieces makes each bite an exciting adventure.
Chocolate and peanut butter notes dance together, promising a dessert that’s both nostalgic and luxurious.
Forget complicated bakery prices – this homemade masterpiece delivers restaurant-quality decadence right from your kitchen.
Grab your mixing bowl and get ready to become the dessert hero of your next gathering.
Quick Recipe Overview

Ingredients You’ll Need for Butterfinger Cheesecake
For Crust:For Filling:For Topping and Decoration:Tools for Making Butterfinger Cheesecake at Home
Baking Directions for Butterfinger Cheesecake
Crush Oreo cookies into fine crumbs and blend with melted butter. Press mixture firmly into a springform pan, creating a smooth base. Bake briefly to set the foundation, creating a crispy platform for the creamy layers.
Blend cream cheese until ultra-smooth, incorporating peanut butter and subtle vanilla notes. Gently fold in eggs, ensuring a velvety texture. Sprinkle chopped Butterfinger pieces throughout the mixture, creating delightful caramel-like pockets of crunch.
Position cheesecake pan inside a larger pan filled with warm water. This technique ensures even, gentle baking, preventing cracks and maintaining a luxurious, creamy consistency. Bake at a low temperature, allowing the delicate dessert to set perfectly.
Create a rich ganache by melting chocolate with warm cream. Allow the mixture to transform into a glossy, flowing river of sweetness. Drizzle elegantly across the cooled cheesecake surface.
Whip cream into billowy peaks, incorporating a hint of peanut butter. Dollop gracefully across the cheesecake. Sprinkle additional Butterfinger fragments for a dramatic, crunchy finale.
Refrigerate the masterpiece, allowing flavors to meld and texture to become supremely smooth. Patience transforms this dessert from good to extraordinary.
Butterfinger Tips & Flavor Additions
Serving Butterfinger Cheesecake
Storing Your Butterfinger Cheesecake the Right Way
Print
Decadent Butterfinger Cheesecake Recipe
- Total Time: 47 minutes
- Yield: 13 1x
Description
Butterfinger cheesecake delivers a delightful blend of creamy richness and chocolate-peanut butter crunch. Rich graham cracker crust and silky filling invite dessert enthusiasts to savor each indulgent bite.
Ingredients
- 24 oz (680 g) cream cheese, room temperature
- 1 cup (200 g) sugar
- 4 large eggs, room temperature
- 1 ½ cups chopped Butterfingers
- 2 ¼ cups (280 g) Oreo crumbs
- 4 tbsps (60 g) salted butter, melted
- ½ cup (120 g) peanut butter
- ¾ cup (180 g) sour cream, room temperature
- 3 tbsps (24 g) all-purpose flour
- 1 tsp vanilla extract
- 6 oz (170 g) semi-sweet chocolate chips
- ½ cup (120 mL) heavy whipping cream
- ¾ cup (180 mL) heavy whipping cream
- ½ cup (60 g) powdered sugar
- 2 tbsps (30 g) peanut butter
- ¼ tsp vanilla extract
- Chopped Butterfingers (for garnish)
Instructions
- Crust Preparation: Pulverize Oreo cookies into fine crumbs, blend with melted butter, and press firmly into a 9-inch springform pan. Bake at 325°F (163°C) for 10 minutes, then set aside for water bath baking.
- Batter Creation: Whip cream cheese until silky, gradually mixing in sugar, flour, sour cream, peanut butter, and vanilla extract. Incorporate eggs delicately, stirring minimally to maintain a velvety consistency. Fold in chopped Butterfinger pieces, ensuring even distribution.
- Baking Process: Pour batter into the pre-baked crust, placing the springform pan in a prepared water bath. Bake at 300°F (149°C) for approximately 1 hour and 25 minutes, aiming for a slightly jiggly yet set center.
- Cooling and Topping: Allow cheesecake to cool completely at room temperature. Prepare ganache by heating heavy cream and pouring over dark chocolate chips, stirring until glossy. Drizzle ganache across the surface, creating an elegant cascade.
- Finishing Touches: Whip heavy cream with powdered sugar, peanut butter, and vanilla extract until stiff peaks form. Pipe cream around the cheesecake’s edge and generously sprinkle crushed Butterfinger pieces for a dramatic garnish.
- Serving Recommendation: Refrigerate for a minimum of 4 hours or overnight to enhance flavor and texture. Slice with a warm knife and serve chilled, ensuring a decadent and indulgent dessert experience.
Notes
- Prevent Cracking Technique: Bake in a water bath to create gentle, even heat that prevents surface cracks and ensures a smooth, creamy texture.
- Ingredient Temperature Tip: Allow cream cheese and eggs to reach room temperature before mixing to guarantee a silky, lump-free batter.
- Mixing Mastery: Minimize mixing after adding eggs to maintain a tender, light cheesecake structure and avoid incorporating excess air.
- Cooling Critical: Let cheesecake cool completely at room temperature before refrigerating to prevent condensation and maintain optimal texture.
- Prep Time: 45 minutes
- Cook Time: 2 hours 35 minutes
- Category: Desserts
- Method: Baking
- Cuisine: American
Nutrition
- Serving Size: 13
- Calories: 486
- Sugar: 34 g
- Sodium: 365 mg
- Fat: 30 g
- Saturated Fat: 15 g
- Unsaturated Fat: 12 g
- Trans Fat: 0 g
- Carbohydrates: 43 g
- Fiber: 2 g
- Protein: 7 g
- Cholesterol: 110 mg
Michael Rivera
Co-Founder & Culinary Instructor
Expertise
Education
The French Culinary Institute (now part of the International Culinary Center)
Michael Rivera is a seasoned chef and culinary instructor based in San Francisco, CA. Trained in Classic Culinary Arts at The French Culinary Institute, he refined his skills in Michelin-starred kitchens, mastering classic French techniques and artisanal bread baking.
Passionate about making gourmet methods accessible, Michael co-founded thatsmyhome.com to share his expertise through interactive online lessons and innovative, plant-based recipes. He loves blending traditional techniques with modern ideas, encouraging home cooks to enjoy the art of cooking in a relaxed, fun environment.