Irresistible Homemade Protein Bites Recipe for Energetic Snackers
Energize your day with these delightful no-bake protein bites that pack a serious nutritional punch.
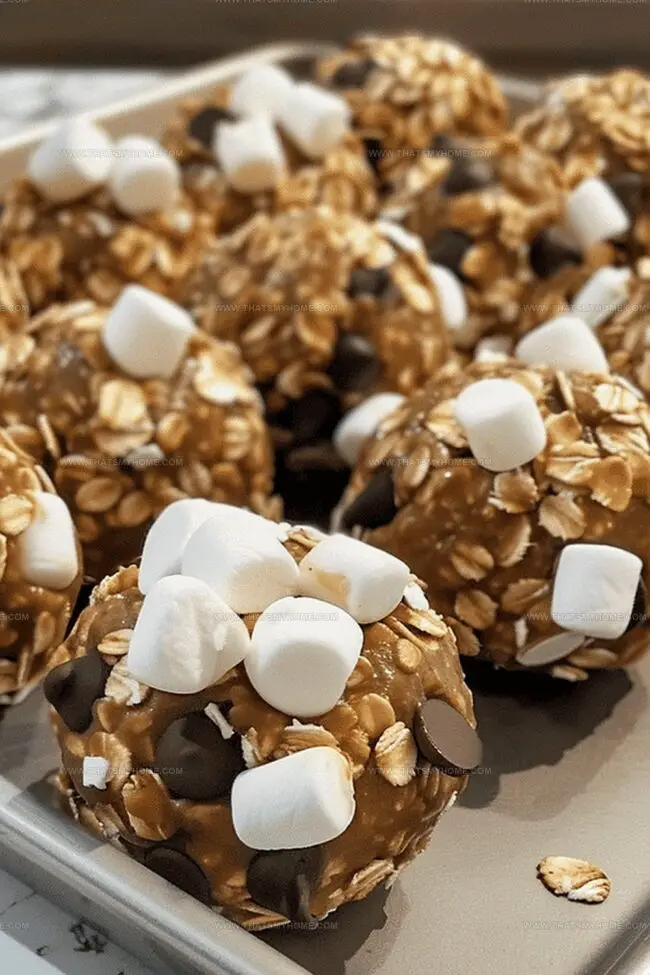
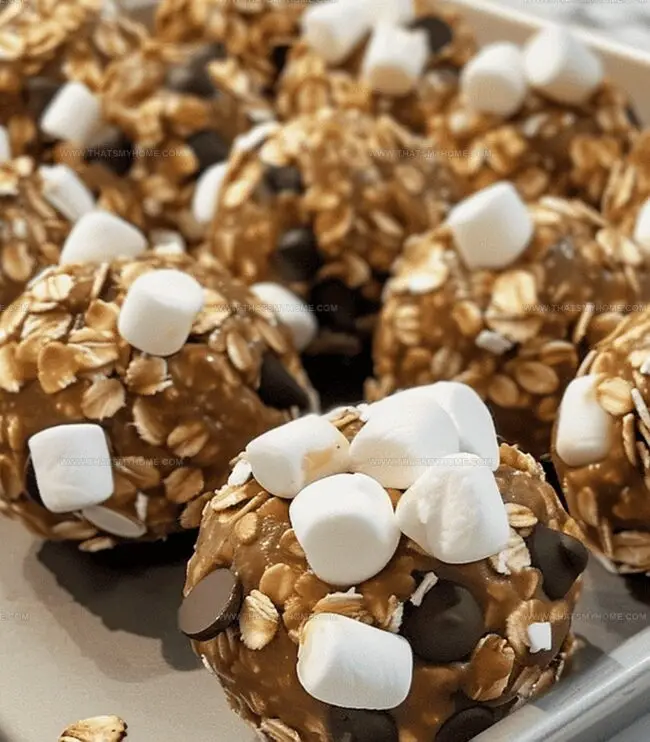
Rolled in coconut and studded with chocolate chips, these protein bites deliver a quick and satisfying snack perfect for busy mornings or afternoon pick-me-ups.
Nutrient-dense ingredients like oats, almond butter, and honey combine to create a treat that’s both delicious and nourishing.
Each bite offers a balanced blend of sweetness and subtle nutty flavors that dance across your palate.
The simple, foolproof recipe requires minimal prep time and zero cooking skills, making it accessible for everyone from fitness enthusiasts to casual snackers.
These protein-packed morsels can be customized with your favorite mix-ins like dried fruit, nuts, or seeds.
Quick Recipe Overview
What You Need to Make Protein Bites
For Base Ingredients:For Binding and Flavor Ingredients:For Optional Mix-Ins:Equipment Guide for Quick Protein Bites
How to Mix and Shape Protein Bites
Grab a spacious mixing bowl and toss in your favorite oats, crispy Rice Krispies, creamy peanut butter, golden honey, and a splash of vanilla extract.
Combine all ingredients with a gentle stir, ensuring every morsel gets coated with deliciousness. Feel free to sprinkle in some chocolate chips or fluffy marshmallows for an extra treat.
Using your hands or a cookie scoop, shape the mixture into small, compact spheres that fit perfectly in your palm.
Place your protein bites on a lightly greased pan and pop them into the refrigerator. Let them chill and firm up, transforming into solid, grab-and-go snacks.
Transfer your cooled protein bites to an airtight container. They’ll be ready to fuel your day with a burst of energy whenever hunger strikes.
Tips for Boosting Protein Bites with Extras
Ways to Serve Protein Bites On-The-Go
Keeping Protein Bites Fresh for Snacking
Print
Explosive Protein Bites Recipe
- Total Time: 11 minutes
- Yield: 13 1x
Description
Wholesome protein bites packed with nutty almonds and rich dark chocolate offer a delightful snack for health-conscious individuals. Energy-boosting ingredients blend seamlessly, providing quick nourishment you’ll crave between meals.
Ingredients
- 1 cup (240 ml) peanut butter
- 2 cups (480 ml) oats
- 1 cup (240 ml) Rice Krispies
- ⅔ cup (160 ml) honey
- 2 tsp vanilla extract
- Chocolate chips (amount optional)
- Marshmallows (amount optional)
Instructions
- Mixing Base: Combine rolled oats, crispy rice cereal, peanut butter, honey, and vanilla extract in a large bowl, thoroughly blending until dry ingredients are completely coated and uniform.
- Enhance Mixture: Gently incorporate chocolate chips and mini marshmallows, ensuring even distribution throughout the mixture for added texture and flavor complexity.
- Shape Formation: Using a tablespoon or cookie scoop, carefully craft compact spheres approximately 1 inch in diameter, rolling the mixture between palms to create smooth, consistent protein bites.
- Chilling Process: Place formed bites on a lightly greased baking sheet or tray, then refrigerate for 30-45 minutes to solidify the structure and intensify the flavor profile.
- Storage Method: Transfer chilled protein bites to an airtight container, layering with parchment paper to prevent adhesion, and store in the refrigerator for up to one week as a convenient, nutritious snack option.
Notes
- Chill for Perfect Shape: Refrigeration is crucial for these protein bites to set properly, helping them maintain a compact, uniform shape and enhancing their overall texture.
- Customize Your Mix: Feel free to experiment with add-ins like nuts, dried fruits, or different chocolate varieties to create your personalized flavor profile.
- Smart Storage Strategy: Use parchment paper between layers when storing to prevent the bites from sticking together and maintain their individual integrity.
- Freshness Window: These protein-packed treats remain delicious and safe to eat for up to one week when stored correctly in the refrigerator.
- Prep Time: 10 minutes
- Cook Time: 1 hour
- Category: Snacks, Breakfast
- Method: Blending
- Cuisine: American
Nutrition
- Serving Size: 13
- Calories: 220
- Sugar: 10g
- Sodium: 2mg
- Fat: 11g
- Saturated Fat: 2g
- Unsaturated Fat: 9g
- Trans Fat: 0g
- Carbohydrates: 29g
- Fiber: 3g
- Protein: 6g
- Cholesterol: 0mg


Michael Rivera
Co-Founder & Culinary Instructor
Expertise
Education
The French Culinary Institute (now part of the International Culinary Center)
Michael Rivera is a seasoned chef and culinary instructor based in San Francisco, CA. Trained in Classic Culinary Arts at The French Culinary Institute, he refined his skills in Michelin-starred kitchens, mastering classic French techniques and artisanal bread baking.
Passionate about making gourmet methods accessible, Michael co-founded thatsmyhome.com to share his expertise through interactive online lessons and innovative, plant-based recipes. He loves blending traditional techniques with modern ideas, encouraging home cooks to enjoy the art of cooking in a relaxed, fun environment.