Hearty Beef And Potato Bake Recipe

Hearty Cheesy Beef and Potato Bake Recipe for Cozy Nights

Comfort food reaches new heights with this irresistible cheesy beef and potato bake that promises to satisfy every hearty appetite.

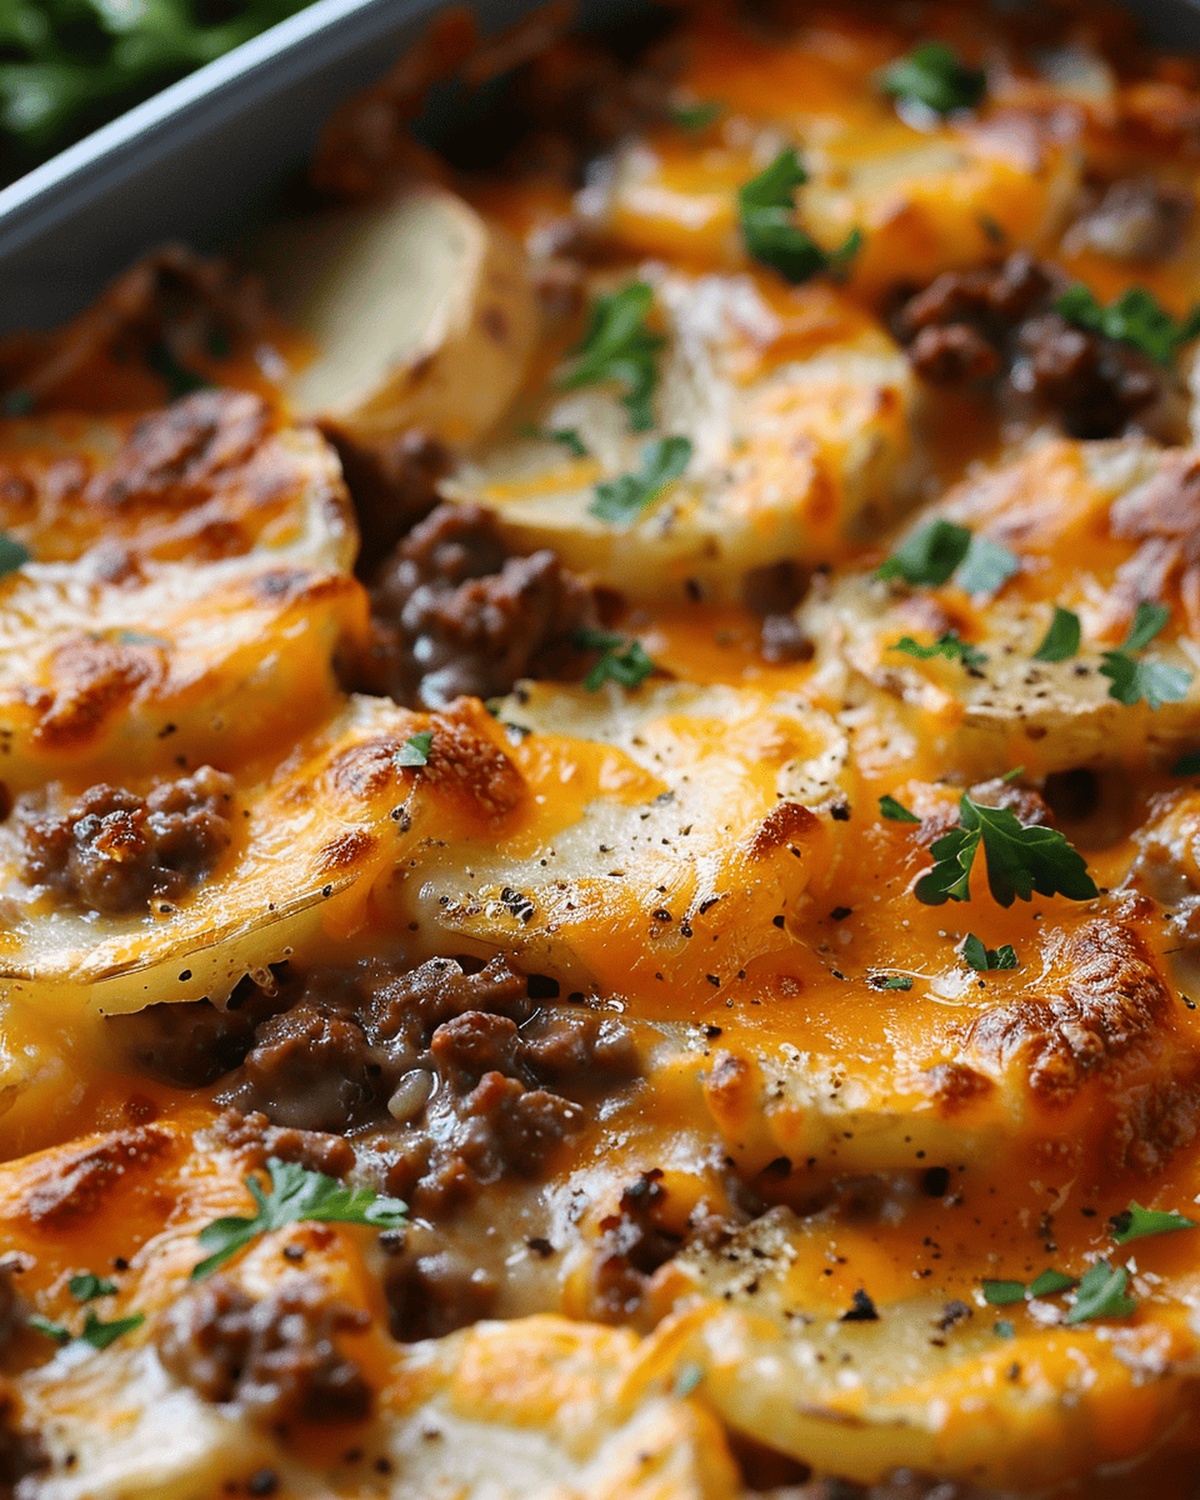
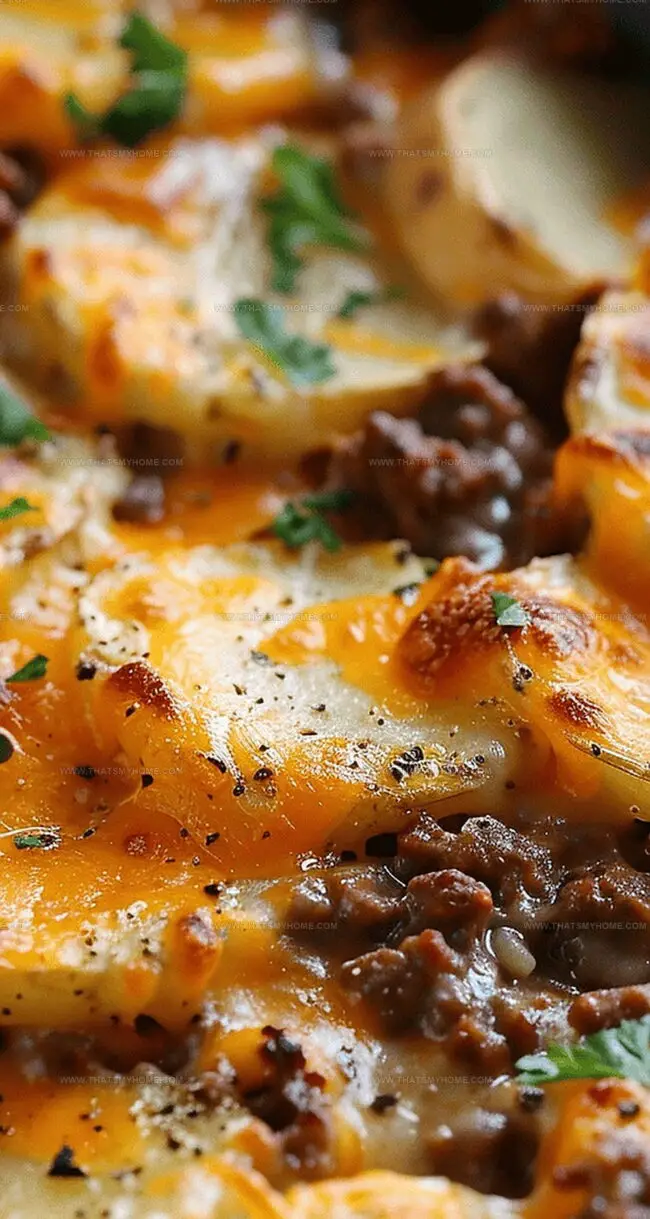
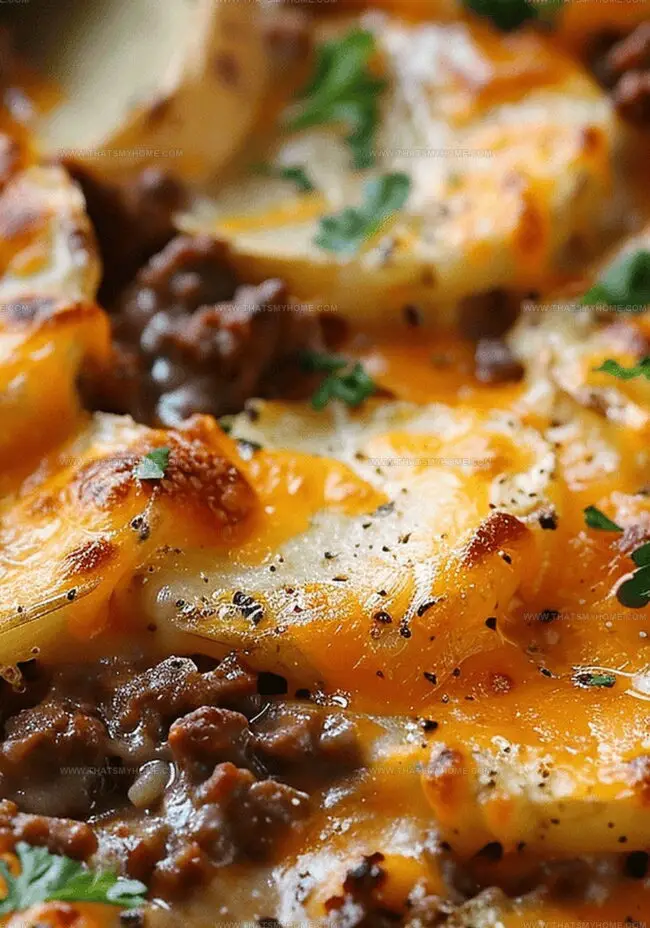
Layers of tender potatoes mingle with seasoned ground beef, creating a mouthwatering symphony of flavors.

Rich, melted cheese blankets the entire dish, adding a golden, crispy top that’ll make you swoon.

Each forkful delivers a perfect balance of savory meat and creamy potatoes, packed with robust seasonings.

The aroma alone will draw everyone to the kitchen, eager to dive into this classic one-pan wonder.

Simple ingredients come together effortlessly, making this bake a weeknight dinner champion.

Grab your skillet and get ready to impress with a meal that turns ordinary ingredients into an extraordinary feast.

Tools to Prep Cheesy Beef and Potato Bake Easily

  • Large skillet: Essential for browning ground beef and onions thoroughly.
  • 9×13 inch baking dish: Perfect size for creating layered casserole.
  • Aluminum foil: Covers dish during initial baking to retain moisture.
  • Small bowl: Used for whisking condensed soup and milk together.
  • Whisk: Helps blend soup and milk smoothly.
  • Cheese grater: Optional, if grating cheese from block.
  • Cutting board: For chopping onions and preparing ingredients.
  • Sharp knife: Needed to slice potatoes and chop onions.
  • Measuring cups: For accurate milk and cheese measurements.

Assembling Cheesy Beef and Potato Bake Step-by-Step

  • Oven Warmup Comfort zone for your culinary adventure starts with preheating to 350°F and lightly greasing a baking dish.
  • Beef Foundation Creating a flavorful base by browning ground beef with sweet onions until meat is perfectly caramelized and onions turn soft and translucent.
  • Seasoning Magic Infusing the beef mixture with a delightful blend of spices that will make taste buds dance with excitement.
  • Layer Love Crafting beautiful layers of hearty beef and tender potato slices, generously sprinkling cheese between each delectable stratum.
  • Creamy Liquid Gold Whisking together a silky sauce that will seep through the layers, adding moisture and richness to every single bite.
  • Baking Transformation Covering the dish and letting the oven work its magic, transforming simple ingredients into a mouthwatering masterpiece.
  • Cheesy Finale Unveiling the casserole, crowning it with an extra layer of melted cheese and baking until bubbly and golden brown.
  • Resting Moment Allowing the casserole to settle and develop deeper flavors before serving, garnished with a sprinkle of fresh herbs.

Tips & Upgrades for Cheesy Beef and Potato Bake

  • Slice potatoes uniformly to ensure even cooking and consistent texture throughout the casserole.
  • Use freshly grated cheese for superior melting and richer flavor compared to pre-shredded varieties.
  • Add a dash of Worcestershire sauce or red pepper flakes to the ground beef for an unexpected depth of taste.
  • Replace condensed soup with homemade white sauce and use low-sodium broth to control salt content while maintaining moisture and richness.

Plating Ideas for Cheesy Beef and Potato Bake

  • Serve with Fresh Green Salad: Complement the rich, cheesy casserole with a crisp mixed green salad tossed in a light vinaigrette to balance the hearty flavors.
  • Pair with Crusty Bread: Slice up a warm baguette or rustic bread to soak up the creamy sauce and add a delightful textural contrast to the dish.
  • Top with Sour Cream Dollop: Add a cool, tangy dollop of sour cream on top to cut through the richness and provide a creamy finish to each bite.
  • Sprinkle with Chopped Chives: Garnish with finely chopped fresh chives for a subtle onion flavor and a bright green pop of color that enhances the overall presentation.

Saving Cheesy Beef and Potato Bake for Later

  • Refrigerate Wisely: Store leftover Cheesy Beef and Potato Bake in an airtight container within two hours of cooking. Keeps fresh in the refrigerator for 3-4 days.
  • Freeze for Future Meals: Transfer cooled casserole to freezer-safe containers or wrap tightly with plastic wrap and aluminum foil. Stays delicious for up to 2 months when frozen properly.
  • Reheat with Care: Thaw overnight in the refrigerator before reheating. Warm in the oven at 350°F covered with foil to prevent drying out, typically 20-25 minutes until heated through completely.
  • Portion and Pack: Divide into individual servings before storing for easier grab-and-go lunches or quick weeknight dinners. Use microwave-safe containers for convenient reheating.

Quick Recipe Overview

Prep Time: 15 minutes

Cook Time: 90 minutes

Total Time: 1 hour 45 minutes

Calories: 478 kcal

Servings: 7

What Goes Into a Cheesy Beef and Potato Bake

For Protein Base:
  • Ground Beef: Rich and hearty protein that gives the dish its robust flavor, choose lean cuts for less greasiness and better texture.
  • Onion: Adds deep sweetness and aromatic base, select firm and glossy onions for maximum flavor punch.
For Creamy Binding:
  • Condensed Soup, Milk: Creates luxurious sauce that helps bind ingredients and adds silky smoothness, opt for low-fat milk for lighter version.
For Flavor Enhancers:
  • Salt, Pepper, Garlic Powder, Paprika: Elevate the dish's taste profile, providing warm, complex seasoning that complements the beef and potatoes.
For Cheesy Goodness:
  • Cheddar Cheese: Delivers rich, tangy melting quality that brings incredible depth, choose sharp variety for more intense flavor.
For Additional Elements:
  • Olive Oil: Helps prevent sticking and adds subtle richness, use extra virgin for best quality.
  • Fresh Parsley: Provides bright, fresh garnish with vibrant color and light herbal note.
  • Aluminum Foil: Essential for controlled baking and moisture retention during cooking process.
Print
clock clock iconcutlery cutlery iconflag flag iconfolder folder iconinstagram instagram iconpinterest pinterest iconfacebook facebook iconprint print iconsquares squares iconheart heart iconheart solid heart solid icon
Cranberry Feta Roll-Ups With Cream Cheese Recipe

Cranberry Feta Roll-Ups With Cream Cheese Recipe


5 Stars 4 Stars 3 Stars 2 Stars 1 Star

4.8 from 39 reviews

  • Total Time: 15 minutes
  • Yield: 8 1x

Description

Cranberry feta roll-ups blend tangy cheese with sweet cranberry spread across tortillas for a quick party appetizer. Creamy, zesty bites promise to delight guests with simple ingredients and elegant presentation that make snacking irresistible.


Ingredients

Scale

Main Ingredients:

  • 8 ounces (226 grams) cream cheese, softened
  • ½ cup (60 grams) crumbled feta cheese
  • 4 large flour tortillas (10-inch size)

Herb and Fruit Additions:

  • ½ cup (75 grams) dried cranberries, chopped
  • 1 tablespoon (4 grams) fresh parsley, chopped or 1 teaspoon (1 gram) dried
  • 1 tablespoon (4 grams) fresh chives, chopped or 1 teaspoon (1 gram) dried

Instructions

  1. Prepare the flavor-packed filling by blending softened cream cheese, crumbled feta cheese, finely chopped cranberries, minced parsley, and snipped chives in a medium mixing bowl until thoroughly combined and evenly distributed.
  2. Place a soft tortilla on a clean, flat surface and generously spread the creamy cheese mixture across the entire surface, ensuring complete coverage from edge to edge.
  3. Carefully roll the tortilla into a tight, compact log, applying gentle pressure to maintain a secure and uniform shape. Repeat the process with remaining tortillas and filling.
  4. Individually wrap each rolled tortilla in plastic wrap, creating a snug protective covering that will help maintain the roll’s structure.
  5. Refrigerate the wrapped rolls for a minimum of 60 minutes (1 hour), allowing the filling to set and the flavors to meld together, which will also make slicing easier.
  6. After chilling, remove the plastic wrap and slice each roll into neat pinwheel segments approximately 1 inch (2.54 centimeters) thick using a sharp knife.
  7. Arrange the colorful pinwheels on a serving platter, presenting them attractively for guests to enjoy as a delightful appetizer or party snack.

Notes

  • Prep these delightful appetizers ahead of time for stress-free party planning, as they can be refrigerated up to 24 hours before serving.
  • Ensure cream cheese and feta are at room temperature for smoother, easier mixing and a more consistent filling texture.
  • Choose soft, fresh tortillas that roll easily without cracking to achieve perfect pinwheel presentation.
  • Pat chopped cranberries dry before mixing to prevent excess moisture from making the filling runny.
  • Slice rolls with a sharp, clean knife for neat, precise pinwheel edges that look professionally prepared.
  • Experiment with different herb combinations like dill or thyme to customize the flavor profile and surprise your guests.
  • Prep Time: 15 minutes
  • Category: Appetizer, Snacks
  • Method: None
  • Cuisine: American

Nutrition

  • Serving Size: 8
  • Calories: 240 kcal
  • Sugar: 6 g
  • Sodium: 380 mg
  • Fat: 15 g
  • Saturated Fat: 8 g
  • Unsaturated Fat: 6 g
  • Trans Fat: 0.5 g
  • Carbohydrates: 22 g
  • Fiber: 1 g
  • Protein: 7 g
  • Cholesterol: 45 mg
Michael Rivera

Michael Rivera

Co-Founder & Culinary Instructor

Expertise

  • Classic French Cuisine
  • Artisanal Bread Baking
  • Plant-Based Culinary Innovation
  • Recipe & Menu Development
  • Interactive Online Instruction

Education

The French Culinary Institute (now part of the International Culinary Center)

  • Program: Classic Culinary Arts
  • Focus: An intensive curriculum rooted in classical French techniques, artisanal bread production, and contemporary culinary methods.

Michael Rivera is a seasoned chef and culinary instructor based in San Francisco, CA. Trained in Classic Culinary Arts at The French Culinary Institute, he refined his skills in Michelin-starred kitchens, mastering classic French techniques and artisanal bread baking. 

Passionate about making gourmet methods accessible, Michael co-founded thatsmyhome.com to share his expertise through interactive online lessons and innovative, plant-based recipes. He loves blending traditional techniques with modern ideas, encouraging home cooks to enjoy the art of cooking in a relaxed, fun environment.

Leave a Reply

Your email address will not be published. Required fields are marked *

Recipe rating 5 Stars 4 Stars 3 Stars 2 Stars 1 Star