
Little Debbie Heart Cakes: The Sweetest Homemade Recipe
Homemade Little Debbie heart cakes spark nostalgia with their delightful charm and whimsical design.
Sweet memories flood back when these miniature treats emerge from your kitchen, promising pure comfort.
Crafting homemade Little Debbie heart cakes reimagines an ordinary afternoon into something magical and memorable.
Each carefully prepared cake represents love baked into delicate, heart-shaped perfection.
Soft textures and delicate flavors dance together, creating a sensory experience that transcends simple desserts.
The process involves simple ingredients and passionate preparation, making these cakes more than just a recipe.
Baking becomes an act of culinary creativity that connects generations through shared sweetness.
Homemade Little Debbie Heart Cakes: A Nostalgic Treat
Essential Ingredients for Homemade Little Debbie Heart Cakes
Cake Base Ingredients:Frosting Ingredients:Coating and Decoration Ingredients:How to Make Homemade Little Debbie Heart Cakes
Step 1: Prepare Oven
Preheat the oven to 350°F and position a rack in the center.
Step 2: Mix Cake Batter
In a stand mixer, blend cake ingredients:Mix on low speed for 30 seconds, then scrape down bowl sides.
Step 3: Achieve Smooth Batter
Increase mixer speed to medium-high and beat for 2-3 minutes until batter becomes smooth and well combined.
Step 4: Prepare Baking Pan
Grease a ½ sheet pan thoroughly and line with parchment paper, ensuring complete coverage.
Step 5: Bake Cake
Pour batter into prepared pan, gently tap to remove air bubbles. Bake for 15-20 minutes until a toothpick inserted comes out clean.
Step 6: Cool Cake
Remove cake from oven and let cool completely at room temperature.
Step 7: Cut Heart Shapes
Use a heart-shaped cookie cutter to create cake hearts, cutting carefully and evenly.
Step 8: Create Marshmallow Buttercream
In a mixing bowl, beat together:Beat for 1-2 minutes until creamy.
Step 9: Finish Buttercream
Add vanilla extract and marshmallow fluff, continuing to beat for 3 minutes until light and fluffy.
Step 10: Prepare Cake Layers
Slice each heart horizontally to create two layers per cake.
Step 11: Fill Cake Layers
Pipe marshmallow buttercream onto bottom heart layer, then sandwich with top layer.
Step 12: Freeze Cakes
Place assembled hearts on a parchment-lined baking sheet and freeze for 30 minutes.
Step 13: Prepare Chocolate Coating
Melt 2/3 of white chocolate wafers, adding red food coloring for desired shade.
Step 14: Coat Heart Cakes
Remove frozen hearts and dip completely in melted chocolate, ensuring full coverage.
Step 15: Remove Excess Chocolate
Use a fork to lift coated hearts, allowing excess chocolate to drip back into bowl.
Step 16: Decorate
Place chocolate-coated hearts on parchment-lined sheet. Melt remaining chocolate and pipe decorative swirls.
Step 17: Store Properly
Refrigerate finished heart cakes in a covered container to maintain freshness.
Tips for Making the Perfect Little Debbie Heart Cakes
Storing and Reheating Homemade Little Debbie Heart Cakes
Pairing Homemade Little Debbie Heart Cakes with Drinks
Creative Variations of Little Debbie Heart Cakes
Print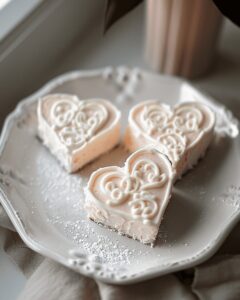
Homemade Little Debbie Heart Cakes Recipe
- Total Time: 1 hour 5 minutes
- Yield: 24 1x
Description
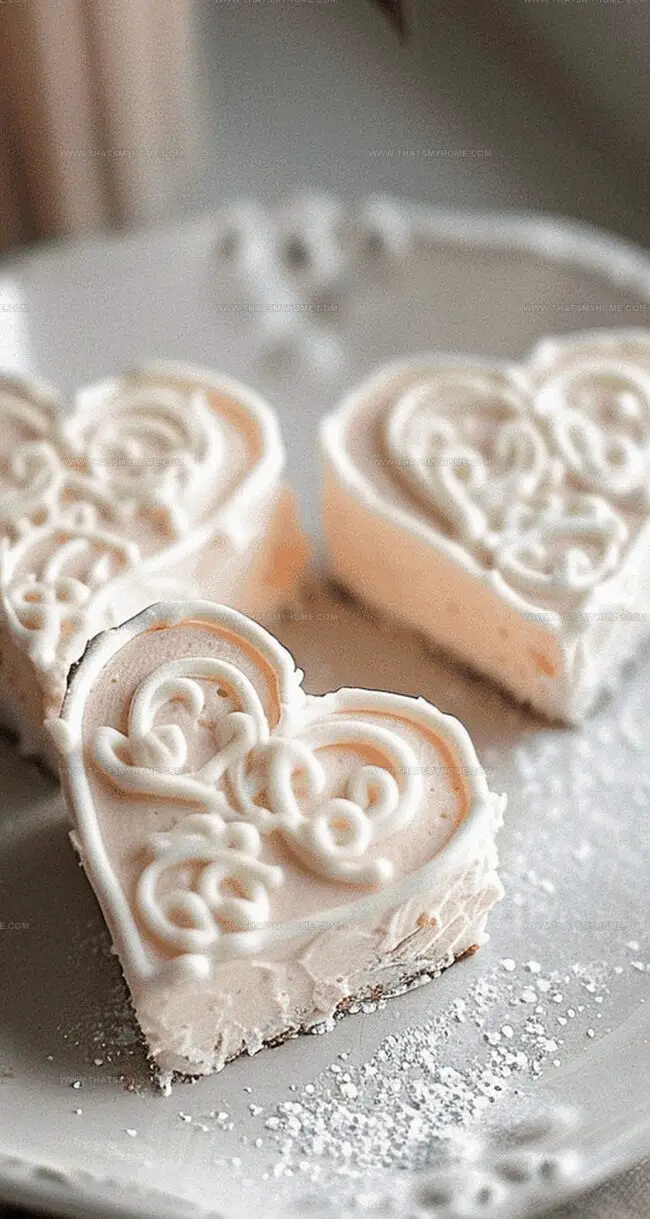
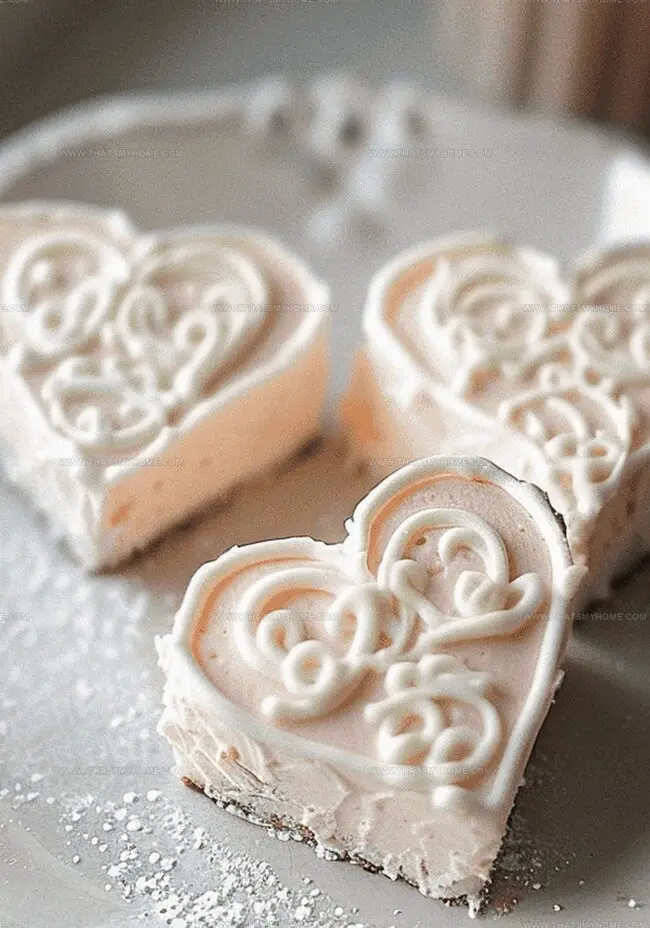
Little Debbie Heart Cakes bring nostalgic sweetness to Valentine’s celebrations with layers of tender vanilla cake and creamy frosting. Romantic bakers can recreate these iconic childhood treats, sharing love through each delightful heart-shaped bite.
Ingredients
Cake Base Ingredients:
- 1 box white Pillsbury cake mix
- ½ cup egg whites
- 1 cup water (237 milliliters)
- ½ cup flour (60 grams)
- ½ cup sugar (100 grams)
- ¼ teaspoon salt
- ½ cup sour cream (120 milliliters)
- ¼ cup oil (60 milliliters)
- 1 to 2 teaspoons pure vanilla extract
- ½ teaspoon almond extract
Marshmallow Buttercream:
- 10 ounces (283 grams) marshmallow fluff
- 3 cups powdered sugar (360 grams)
- 1 teaspoon pure vanilla extract
- 1 cup butter, softened (227 grams)
Coating and Decoration:
- 48 ounces (1.36 kilograms) Ghirardelli white melting wafers
- 4 to 6 tablespoons heavy cream or Crisco (60 to 90 milliliters)
- Red food dye
Instructions
- Warm the oven to 350°F (177°C) and position the rack in the center.
- Combine all cake ingredients in a stand mixer, blending initially on low speed for 30 seconds to incorporate dry and wet components.
- Increase mixer speed to medium-high and whip for 2-3 minutes until batter becomes smooth and homogeneous, periodically scraping down mixer bowl sides.
- Prepare a half sheet pan by generously greasing surfaces and lining completely with parchment paper, ensuring complete coverage.
- Gently pour cake batter into prepared pan, softly tapping against countertop to eliminate potential air pockets.
- Slide pan into preheated oven and bake approximately 15-20 minutes, checking doneness by inserting a clean toothpick which should emerge without raw batter.
- Remove cake and allow complete cooling at room temperature for roughly 45-60 minutes.
- Utilize a heart-shaped cookie cutter to carefully extract individual cake shapes from cooled sheet.
- Horizontally slice each heart cake into two equal layers using a serrated knife.
- Prepare marshmallow buttercream by whipping softened butter and powdered sugar until achieving a creamy, light consistency.
- Incorporate vanilla extract and marshmallow fluff into buttercream, continuing to beat until mixture becomes exceptionally fluffy.
- Transfer buttercream into a piping bag fitted with preferred decorating tip.
- Pipe a generous layer of marshmallow buttercream onto bottom heart layer, then gently position corresponding top layer.
- Place assembled heart cakes onto a parchment-lined baking sheet, then freeze for minimum 30 minutes to stabilize structure.
- Melt approximately two-thirds of white chocolate wafers, adding red food coloring to create desired shade.
- Remove frozen hearts and carefully dip each into melted chocolate, ensuring complete coverage using fork for drainage.
- Return chocolate-coated hearts to lined sheet and refrigerate until coating solidifies.
- Melt remaining chocolate and pipe delicate decorative swirls across chilled cakes.
- Store finished treats in sealed container within refrigerator, maintaining freshness for up to 5 days.
Notes
- Capture the nostalgic essence of childhood snack cakes with this homemade heart-shaped treat that’s both delightful and impressive.
- Precision matters when creating these delicate cakes, so follow each step carefully to achieve bakery-quality results.
- Freezing the cake hearts before chocolate coating ensures a smooth, professional-looking finish that prevents crumbling.
- Marshmallow buttercream adds a luxurious, cloud-like texture that elevates these copycat Little Debbie cakes beyond the store-bought version.
- White chocolate coating with a hint of red creates a romantic, eye-catching dessert perfect for Valentine’s Day or special celebrations.
- Storing these treats in the refrigerator helps maintain their structure and keeps the chocolate coating crisp and beautiful.
- Prep Time: 45 minutes
- Cook Time: 20 minutes
- Category: Desserts, Snacks
- Method: Baking
- Cuisine: American
Nutrition
- Serving Size: 24
- Calories: 350 kcal
- Sugar: 25 g
- Sodium: 200 mg
- Fat: 20 g
- Saturated Fat: 10 g
- Unsaturated Fat: 8 g
- Trans Fat: 0.5 g
- Carbohydrates: 40 g
- Fiber: <1 g
- Protein: 3 g
- Cholesterol: 30 mg
Mary Ellen
Founder, Pastry Chef & Recipe Developer
Expertise
Education
Savannah Technical College
Mary Ellen is the heart and soul of thatsmyhome.com. As the founder, pastry chef, and recipe developer, she refined her skills at Savannah Technical College with an Associate of Applied Science in Culinary Baking & Pastry Arts.
Mary blends classic techniques with modern twists to make artisanal breads, beautifully crafted pastries, and desserts full of unique flavor. Her passion is evident in every recipe, and she enjoys sharing her expertise through hands-on pastry workshops and insightful articles in local culinary magazines.