
Magical Holiday Chocolate Peppermint Surprise Cookies Recipe
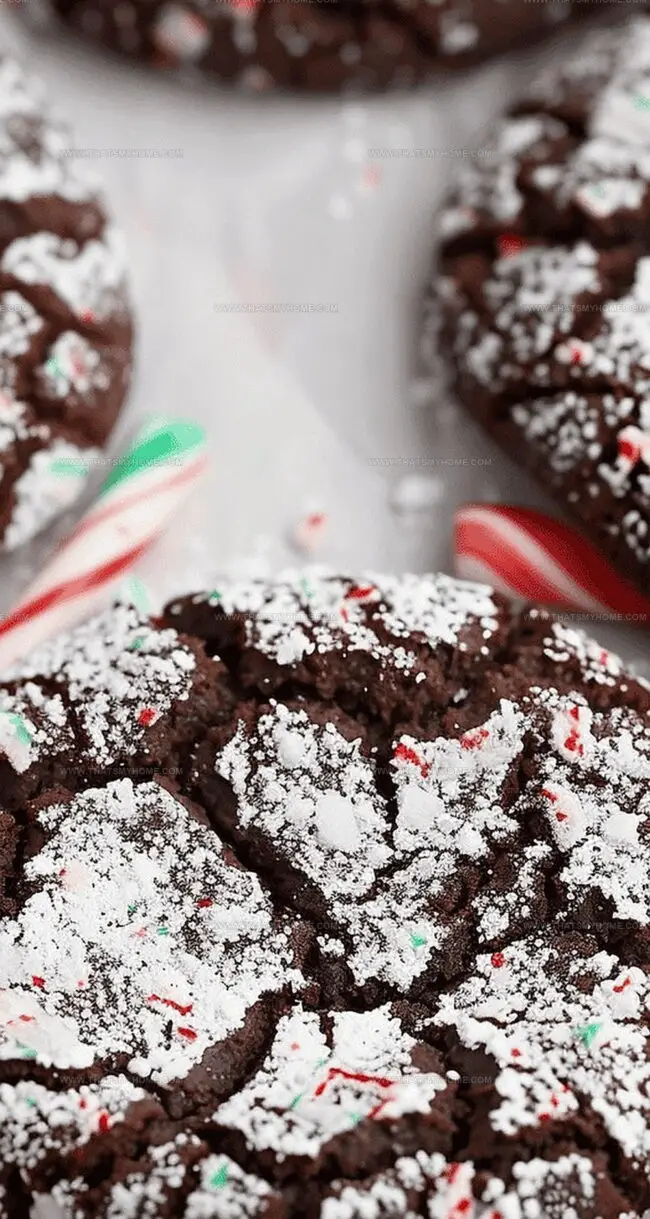
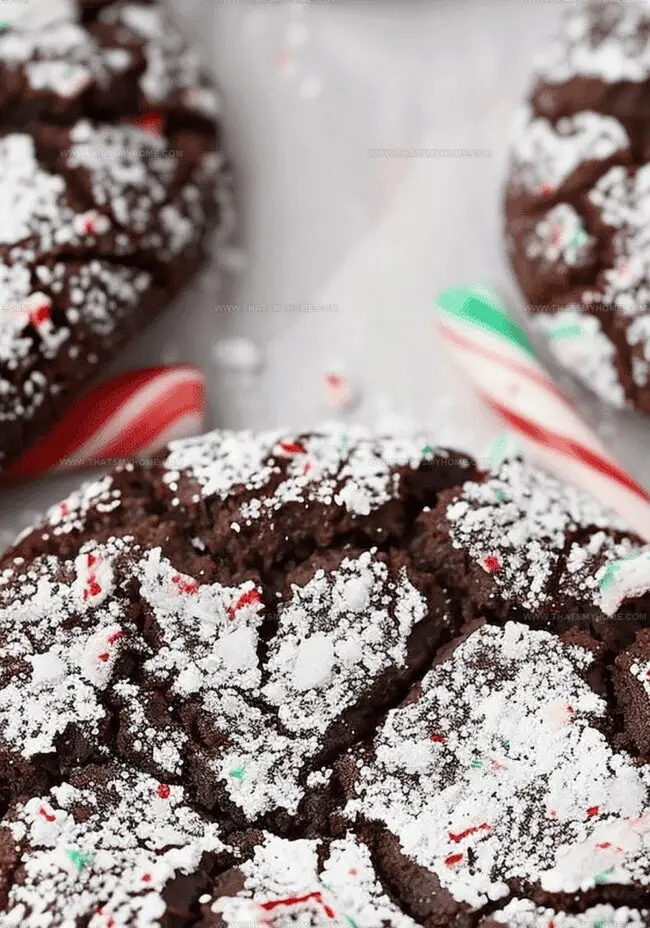
Decadent chocolate peppermint surprise cookies bring a delightful twist to traditional holiday baking.
These rich, chocolatey treats hide a magical minty center that melts in your mouth.
Soft, fudgy exteriors give way to a creamy peppermint filling that sparks pure joy.
The combination of deep chocolate and cool mint creates an irresistible flavor profile sure to impress.
Each cookie delivers a delectable shock of sweetness that dances across your taste buds.
Bakers of all skill levels can master this simple yet spectacular dessert.
Get ready to become the star baker with these crowd-pleasing chocolate peppermint surprise cookies that will have everyone asking for seconds.
Quick Recipe Overview
Chocolate Peppermint Surprise Cookies Ingredient
For Dry Base:For Sweet and Flavor Foundation:For Binding and Texture:Tools for Baking Chocolate Peppermint Surprise Cookies
How to Prepare Chocolate Peppermint Surprise Cookies
Gather all ingredients and mix wet components in a large bowl, blending sugar, oil, and cocoa until smooth. Crack eggs into the mixture one at a time, stirring gently and incorporating vanilla and peppermint flavors.
Softly fold flour mixture into wet ingredients, keeping some flour streaks visible. Sprinkle crushed candy canes throughout the dough, creating delightful peppermint bursts.
Wrap the bowl in plastic and place in refrigerator for several hours. This resting period allows flavors to meld and dough to firm up, enhancing cookie texture.
Heat oven to a warm 350°F. Line baking sheets with non-stick surface. Scoop chilled dough into round balls, generously coating each with powdery sugar.
Place cookies on prepared sheets, giving them space to spread. Bake until edges look slightly crisp but centers remain soft. Allow cookies to cool and set, developing their signature crackled exterior and rich chocolate-peppermint flavor profile.
Tips to Boost Flavor in Peppermint Surprise Cookies
Serving Chocolate Peppermint Surprise Cookies with Style
Chocolate Peppermint Cookies: Storage Tips That Work
Print
Indulgent Chocolate Peppermint Surprise Cookies Recipe
- Total Time: 35 minutes
- Yield: 22 1x
Description
Homemade chocolate peppermint surprise cookies offer a delightful winter treat with rich cocoa and cool mint flavors. Unexpected chocolate centers melt inside each cookie, creating delicious moments you’ll savor through festive gatherings.
Ingredients
- 4 eggs
- 160 g (⅔ cup) vegetable oil
- 300 g (1 ½ cups) granulated sugar
- 120 g (1 cup) confectioners’ sugar
- 2 tsps vanilla extract
- ½ tsp peppermint extract
- 270 g (2 ¼ cups) all-purpose flour
- 80 g (1 cup) cocoa powder
- 2 tsps baking powder
- 1 tsp salt
- 5 candy canes, crushed (about 75 g)
Instructions
- Preparation of Dry Components: Combine flour, baking powder, and salt in a mixing bowl, ensuring even distribution of dry ingredients.
- Wet Mixture Creation: Cream sugar, vegetable oil, and cocoa powder in a large bowl until achieving a silky, homogeneous consistency.
- Egg and Extract Integration: Incorporate eggs one at a time, thoroughly mixing after each addition. Blend vanilla and peppermint extracts throughout the batter for an aromatic infusion.
- Dough Assembly: Delicately fold dry ingredients into wet mixture, maintaining a light touch to preserve the dough’s tender structure. Gently mix in crushed candy canes, distributing the festive crimson pieces evenly.
- Chilling Phase: Wrap dough in plastic and refrigerate for 2-12 hours, allowing flavors to develop and dough to firm up.
- Preparation for Baking: Preheat oven to 350°F (177°C). Line baking sheets with parchment paper or silicone mats.
- Shaping and Coating: Scoop chilled dough and roll generously in confectioners’ sugar, creating a delicate, frost-like exterior. Position dough balls on prepared sheets, leaving ample space between cookies.
- Baking Process: Bake for 11 minutes, noting that cookies will appear slightly soft but will solidify during cooling.
Notes
- Chill the Dough Properly: Refrigerate for at least 2 hours to enhance flavor development and prevent excessive spreading during baking.
- Handle Candy Cane Inclusion: Crush candy canes finely and distribute evenly to ensure consistent peppermint flavor throughout each cookie.
- Master Sugar Coating Technique: Roll dough balls generously in confectioners’ sugar for a beautiful crackled, snow-like exterior that adds visual appeal and subtle sweetness.
- Watch Baking Time Carefully: Remove cookies when edges are set but centers appear slightly soft, as they’ll continue firming up while cooling to prevent overdrying.
- Prep Time: 20 minutes
- Cook Time: 15 minutes
- Category: Desserts, Snacks
- Method: Baking
- Cuisine: American
Nutrition
- Serving Size: 22
- Calories: 158
- Sugar: 14 g
- Sodium: 109 mg
- Fat: 7 g
- Saturated Fat: 1 g
- Unsaturated Fat: 5 g
- Trans Fat: 0 g
- Carbohydrates: 23 g
- Fiber: 1 g
- Protein: 2 g
- Cholesterol: 32 mg
Michael Rivera
Co-Founder & Culinary Instructor
Expertise
Education
The French Culinary Institute (now part of the International Culinary Center)
Michael Rivera is a seasoned chef and culinary instructor based in San Francisco, CA. Trained in Classic Culinary Arts at The French Culinary Institute, he refined his skills in Michelin-starred kitchens, mastering classic French techniques and artisanal bread baking.
Passionate about making gourmet methods accessible, Michael co-founded thatsmyhome.com to share his expertise through interactive online lessons and innovative, plant-based recipes. He loves blending traditional techniques with modern ideas, encouraging home cooks to enjoy the art of cooking in a relaxed, fun environment.