
Jolly Red Velvet Oreo Truffles Recipe: Party-Ready Treats
Indulge in a decadent dessert that blends classic red velvet Oreo truffles with pure chocolate bliss.
These elegant bite-sized treats capture the essence of rich, velvety goodness in every single morsel.
Creamy and smooth, they melt perfectly on your tongue with a delightful crunch.
The vibrant red color makes these truffles a stunning centerpiece for any gathering or special occasion.
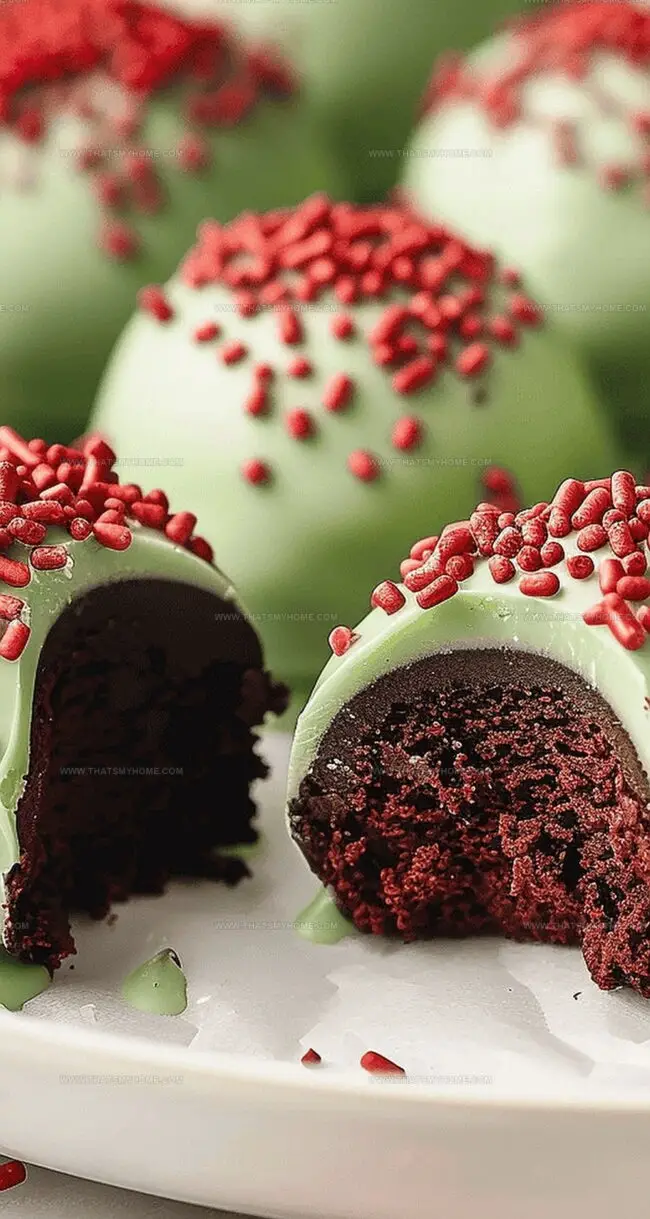
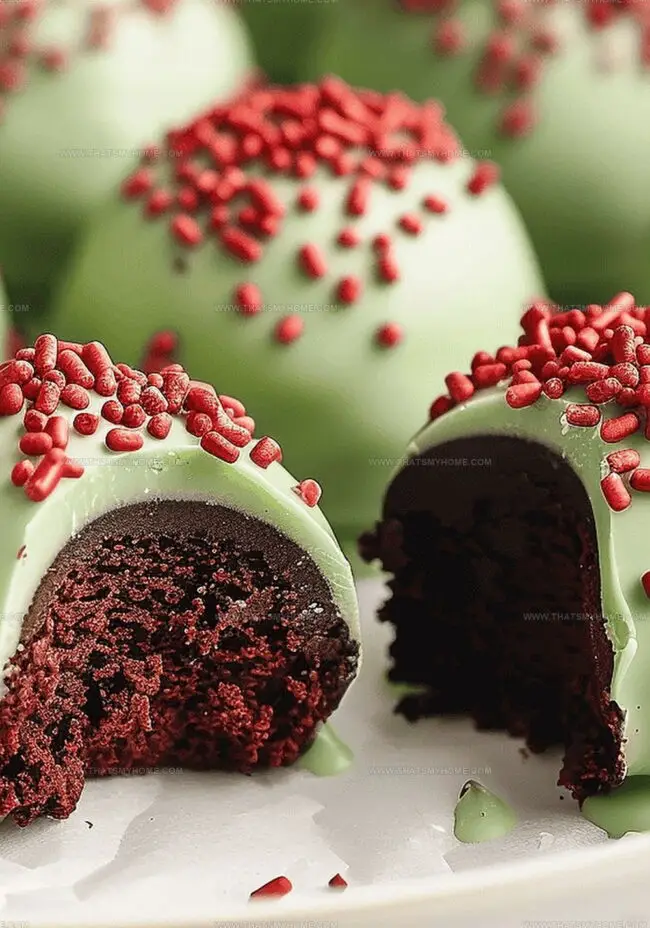
Coated in luxurious white chocolate and sprinkled with delicate red crumbs, these truffles are both visually striking and irresistibly delicious.
With just a few simple ingredients, you can whip up these show-stopping desserts that will have everyone asking for the recipe.
Get ready to impress your guests with these irresistible, mouthwatering truffles that promise pure indulgence.
Quick Recipe Overview
Festive Red Velvet Oreo Truffles: What’s Inside
For Base and Binding:For Coating and Decoration:For Optional Garnish:Tools for Assembling Red Velvet Oreo Truffles
How to Make Red Velvet Oreo Truffles with Ease
Crush Oreo cookies into fine powder using a food processor or rolling pin, creating a delightful base for your truffles.
Blend softened cream cheese with Oreo crumbs until smooth, forming a luscious mixture that promises rich flavor.
Gently roll the mixture into delicate round balls, creating uniform treats that look professionally crafted.
Chill the formed balls in the refrigerator, allowing them to firm up and become easier to coat with candy melts.
Melt candy coating in a double boiler, carefully dipping each ball to create a glossy exterior that sparkles with festive charm.
Drizzle contrasting candy melts over the truffles and add a sweet heart decoration, transforming simple cookies into elegant dessert bites.
Return decorated truffles to the refrigerator, letting them set completely and develop their ultimate texture and taste.
Truffle Tips for Flavor and Texture Enhancements
How to Serve Red Velvet Oreo Truffles at Parties
Red Velvet Truffle Storage Tips for Gifting
Print
Indulgent Red Velvet Oreo Truffles For Any Celebration Recipe
- Total Time: 3 hours 45 minutes
- Yield: 21 1x
Description
Rich red velvet oreo truffles merge classic cookie flavors with luxurious chocolate coating. Guests will savor each delightful bite of this simple yet elegant dessert that brings sweet celebration to any gathering.
Ingredients
- 24.4 oz (692 g) red velvet oreos
- 8 oz (227 g) cream cheese, softened to room temperature
- 15 oz (425 g) light green candy melts
- red candy hearts
Instructions
- Preparation: Line a large baking sheet with parchment paper to prevent sticking and create a clean workspace for truffle assembly.
- Crumb Creation: Pulverize Oreo cookies into fine, uniform crumbs using a food processor or sealed plastic bag with a rolling pin, ensuring a consistent texture throughout the mixture.
- Cream Cheese Fusion: Whip room-temperature cream cheese until smooth, then incorporate Oreo crumbs, mixing thoroughly to create a cohesive, moldable truffle base with no dry ingredients remaining.
- Truffle Shaping: Portion the mixture using a small cookie scoop, rolling between palms to form smooth, uniform balls approximately 1 inch in diameter, placing them carefully on the prepared baking sheet.
- Chilling Phase: Refrigerate the truffles for 2-3 hours to firm up, facilitating easier handling and coating process.
- Coating Technique: Melt green candy coating using a double boiler, maintaining a smooth consistency. Dip each chilled truffle completely, using a fork to ensure even coverage and tap off excess coating.
- Decorative Finishing: Transfer remaining coating to a piping bag for precise drizzling, then embellish each truffle with a red candy heart before the coating sets completely.
- Final Set: Refrigerate the decorated truffles for 15-20 minutes to achieve a glossy, firm finish and enhance flavor melding.
Notes
- Chill for Success: Refrigerate truffles before and after coating to ensure firm texture and easier handling, preventing messy crumbling during preparation.
- Crush Carefully: Create uniform Oreo crumbs by processing or crushing in a sealed bag, ensuring no large chunks remain for smooth, consistent truffle mixture.
- Coat with Precision: Use a fork when dipping truffles in candy coating to achieve even coverage and remove excess, creating a professional, clean appearance.
- Decorate Quickly: Add decorative elements like candy hearts immediately after coating while the chocolate is still slightly wet, ensuring they stick perfectly.
- Prep Time: 30 minutes
- Cook Time: 3 hours 15 minutes
- Category: Desserts, Snacks
- Method: Blending
- Cuisine: American
Nutrition
- Serving Size: 21
- Calories: 150
- Sugar: 10 g
- Sodium: 80 mg
- Fat: 7 g
- Saturated Fat: 4 g
- Unsaturated Fat: 2 g
- Trans Fat: 0 g
- Carbohydrates: 20 g
- Fiber: 1 g
- Protein: 1 g
- Cholesterol: 10 mg
Michael Rivera
Co-Founder & Culinary Instructor
Expertise
Education
The French Culinary Institute (now part of the International Culinary Center)
Michael Rivera is a seasoned chef and culinary instructor based in San Francisco, CA. Trained in Classic Culinary Arts at The French Culinary Institute, he refined his skills in Michelin-starred kitchens, mastering classic French techniques and artisanal bread baking.
Passionate about making gourmet methods accessible, Michael co-founded thatsmyhome.com to share his expertise through interactive online lessons and innovative, plant-based recipes. He loves blending traditional techniques with modern ideas, encouraging home cooks to enjoy the art of cooking in a relaxed, fun environment.