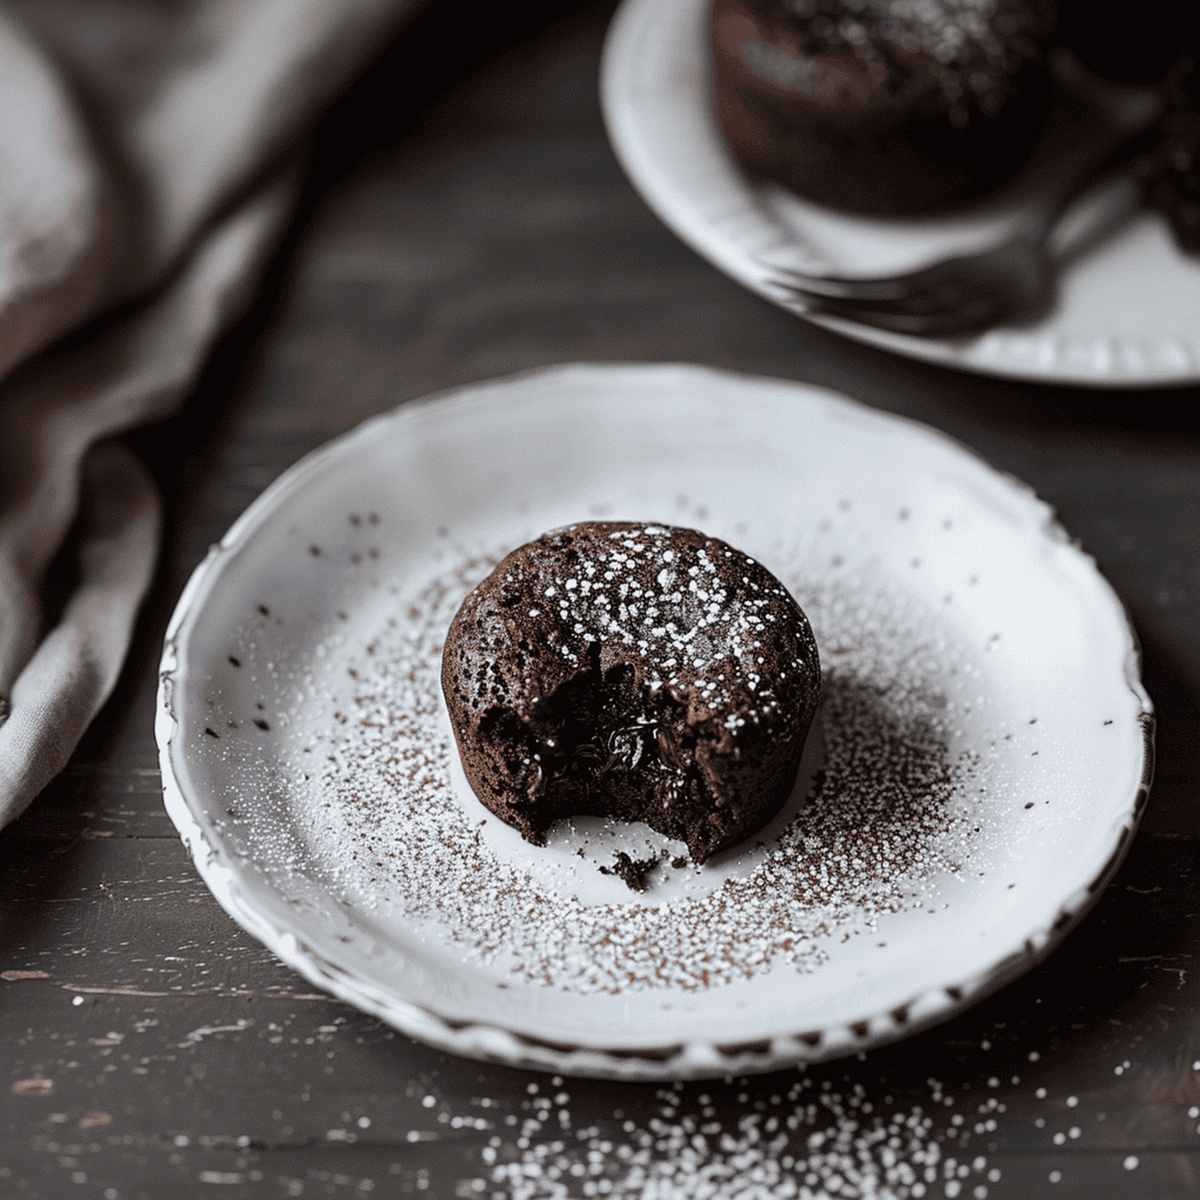
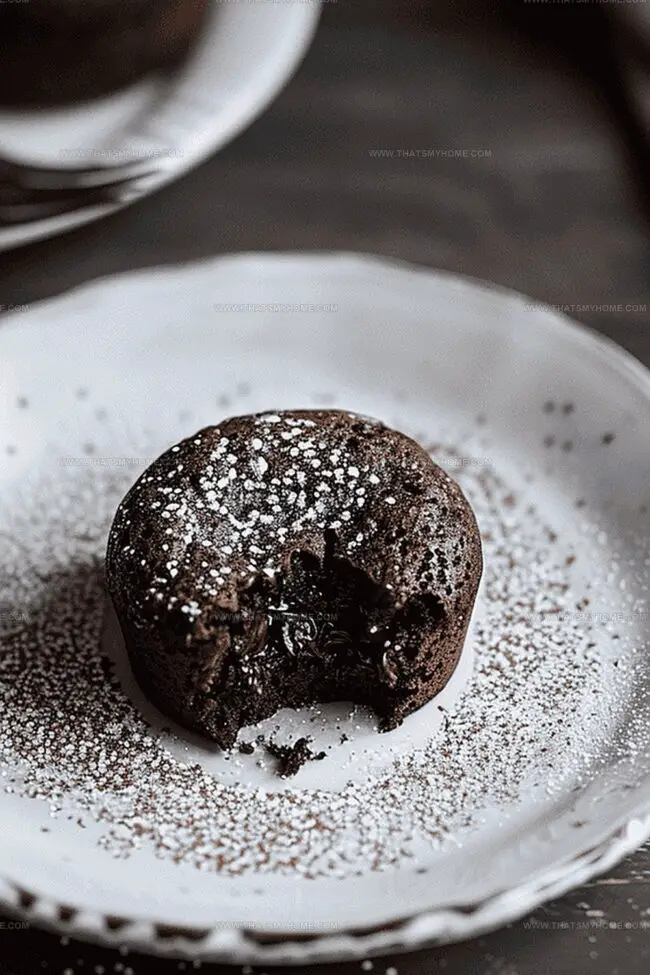
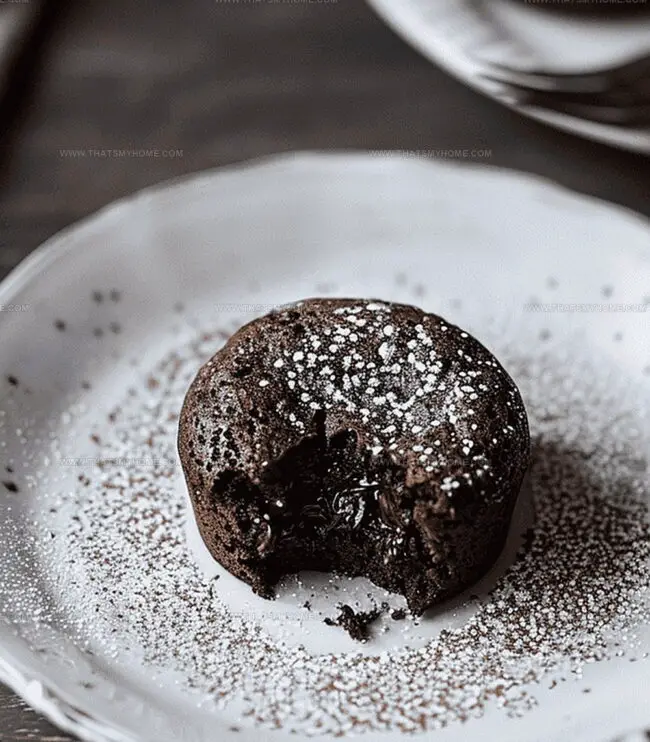
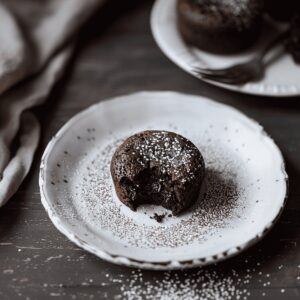
Molten chocolate lava cakes send taste buds on a rich, velvety adventure that melts hearts instantly.
These decadent chocolate lava cakes emerge from the oven like culinary magic, oozing with intense chocolate goodness.
Luxurious and surprisingly simple to create, they promise a restaurant-worthy dessert in your own kitchen.
The inner core of warm, flowing chocolate feels like a delightful surprise waiting to be unleashed.
Professional pastry chefs might make these look complicated, but you can master this elegant treat with just a few basic ingredients.
Each bite promises a symphony of textures – crisp exterior giving way to a silky, liquid center that dances on your palate.
Grab your ramekins and let’s turn an ordinary evening into an extraordinary chocolate celebration.
Quick Recipe Overview
Prep Time: 15 minutes
Cook Time: 15 minutes
Total Time: 30 minutes
Calories: 498 kcal
Servings: 5
Ingredients to Make Chocolate Lava Cakes Shine
For Chocolate Base:
Dark Chocolate Chunks: Rich, velvety chocolate that creates the luxurious molten center and provides deep, intense flavor.
Unsalted Butter: Adds silky smoothness and helps create the cake’s tender, melt-in-your-mouth texture.
For Binding and Structure:
Eggs: Crucial for binding ingredients and creating a light, airy texture with remarkable structure.
Granulated Sugar: Sweetens the dessert and helps create a glossy, smooth batter that contributes to the cake’s delicate crumb.
All-Purpose Flour: Provides necessary structure and helps stabilize the delicate chocolate mixture.
Salt: Enhances the chocolate’s rich flavor and balances the sweetness of the dessert.
For Serving and Preparation:
Butter (for ramekins): Ensures easy cake removal and prevents sticking while adding a subtle rich undertone.
Bakeware & Tools for Lava Cake Goodness
Double Boiler or Microwave: Essential for gently melting chocolate and butter without burning.
Mixing Bowls: Sturdy, medium-sized bowls for combining ingredients smoothly.
Whisk: Perfect for creating a silky, pale egg and sugar mixture.
Ramekins or Muffin Pan: Crucial for shaping and baking individual lava cakes.
Measuring Cups and Spoons: Precise tools for accurate ingredient quantities.
Spatula: Helps scrape and fold ingredients together seamlessly.
Oven: Necessary for baking the chocolate lava cakes to gooey perfection.
How to Make Chocolate Lava Cakes at Home
Chocolate Preparation Gently melt chocolate and butter using a double boiler or microwave, creating a smooth, glossy mixture that will be the foundation of your decadent dessert.
Egg and Sugar Fusion Whisk sugar and eggs together until the mixture transforms into a light, creamy texture that looks almost like a silky pale cloud.
Batter Blending Slowly incorporate the melted chocolate into the egg mixture, stirring continuously to create a rich, velvety base. Fold in flour and a touch of salt to complete the batter.
Chilling Moment Pour the batter into buttered ramekins and let it rest in the refrigerator, allowing the flavors to meld and the texture to set perfectly.
Oven Magic Preheat the oven to a high temperature. Bake the cakes for a short time, watching carefully until the edges become firm but the center remains wonderfully molten and gooey.
Moment of Indulgence Serve the cakes immediately after baking, while they’re warm and the center oozes with intense chocolate goodness.
Tips to Nail the Gooey Center Every Time
Adjust baking time by 1-2 minutes to control lava center’s runniness – shorter time means more liquid chocolate, longer time creates slightly firmer center.
Use high-quality dark chocolate with 60-70% cocoa content for rich, intense flavor that elevates the dessert’s decadence and creates a professional-level taste profile.
Butter and lightly dust ramekins with cocoa powder instead of flour to prevent sticking while maintaining the cake’s deep chocolate appearance without white residue.
Prepare batter up to 24 hours in advance, store covered in refrigerator, and bake directly from cold state – perfect for dinner party planning and stress-free dessert preparation.
Experiment with adding a pinch of espresso powder, orange zest, or a splash of liqueur like Grand Marnier to transform the classic chocolate lava cake into a unique, gourmet experience.
Presenting Lava Cakes with a Fancy Touch
Garnish with Elegance: Dust powdered sugar over the warm lava cakes for a delicate, snow-like finish that adds a touch of sophistication.
Pair with Creamy Companions: Serve alongside a scoop of vanilla bean ice cream or a dollop of whipped cream to balance the rich chocolate intensity.
Create a Fruity Contrast: Add fresh raspberries or strawberry slices on the side to provide a tart, refreshing complement to the decadent chocolate dessert.
Drizzle with Delightful Sauces: Enhance the presentation by drizzling caramel or raspberry coulis around the cake for an extra layer of flavor and visual appeal.
Store & Warm The Cake Without Losing Texture
Refrigerate Wisely: Store unbaked lava cake batter in sealed containers for up to 24 hours before baking, ensuring maximum freshness and texture preservation.
Freeze for Later: Prepare individual ramekins with raw batter, wrap tightly in plastic film, and freeze for up to 3 weeks. Bake directly from frozen state, adding 2-3 extra minutes to cooking time.
Cool Carefully: Let baked lava cakes rest for 1-2 minutes after removing from oven, allowing them to set slightly without losing their gooey chocolate center.
Reheat Gently: Warm leftover lava cakes in microwave for 10-15 seconds at 50% power to maintain their molten texture and prevent overcooking.
Chocolate lava cakes combine rich, molten centers with delicate cake exteriors for an indulgent dessert. Gourmets savor these elegant French-inspired treats that melt effortlessly on palates seeking pure chocolate pleasure.
Ingredients
Scale
4 eggs
135 grams (4.8 oz) dark chocolate (55 to 70% cocoa)
120 grams (4.2 oz) unsalted butter
140 grams (4.9 oz) sugar
45 grams (1.6 oz) flour
1 pinch salt (optional)
Instructions
Chocolate Melting: Create a smooth chocolate base by gently melting dark chocolate and unsalted butter in a double boiler or microwave, stirring to prevent burning and achieve a glossy consistency.
Egg Preparation: Whisk sugar and eggs together until the mixture becomes pale and slightly volumized, creating a rich, creamy foundation for the lava cakes.
Batter Fusion: Integrate the melted chocolate mixture into the egg blend, stirring continuously to develop a uniform and silky batter that promises a luxurious texture.
Dry Ingredient Incorporation: Delicately fold sifted flour and a hint of salt into the chocolate mixture, maintaining the batter’s light and airy characteristics.
Ramekin Preparation: Generously coat ramekins with butter, ensuring complete coverage to guarantee effortless cake release after baking.
Chilling and Resting: Fill ramekins three-quarters full with batter and refrigerate for 45-60 minutes, allowing flavor development and optimal texture formation.
Oven Preheating: Position the oven rack centrally and heat to 200°C (390°F), creating the perfect environment for lava cake perfection.
Baking Precision: Transfer chilled ramekins to the preheated oven and bake for 8-11 minutes, watching for a set exterior with a tantalizingly molten center.
Serving Artistry: Immediately invert cakes onto serving plates, letting them rest briefly before revealing their decadent chocolate core, optionally garnishing with powdered sugar or a scoop of vanilla ice cream.
Notes
Chocolate Quality Matters: Use high-percentage dark chocolate (70% cocoa) for rich, intense flavor that elevates the entire dessert.
Chill Before Baking: Refrigerating the batter helps create the signature molten center by stabilizing the cake’s structure and preventing overcooking.
Timing is Critical: Watch the baking time carefully – even 30 seconds can transform a perfect lava cake into an overdone dessert.
Serve Immediately: These cakes lose their magical molten center quickly, so plate and serve the moment they come out of the oven for maximum deliciousness.
The French Culinary Institute (now part of the International Culinary Center)
Program: Classic Culinary Arts
Focus: An intensive curriculum rooted in classical French techniques, artisanal bread production, and contemporary culinary methods.
Michael Rivera is a seasoned chef and culinary instructor based in San Francisco, CA. Trained in Classic Culinary Arts at The French Culinary Institute, he refined his skills in Michelin-starred kitchens, mastering classic French techniques and artisanal bread baking.
Passionate about making gourmet methods accessible, Michael co-founded thatsmyhome.com to share his expertise through interactive online lessons and innovative, plant-based recipes. He loves blending traditional techniques with modern ideas, encouraging home cooks to enjoy the art of cooking in a relaxed, fun environment.
Michael Rivera
Co-Founder & Culinary Instructor
Expertise
Education
The French Culinary Institute (now part of the International Culinary Center)
Michael Rivera is a seasoned chef and culinary instructor based in San Francisco, CA. Trained in Classic Culinary Arts at The French Culinary Institute, he refined his skills in Michelin-starred kitchens, mastering classic French techniques and artisanal bread baking.
Passionate about making gourmet methods accessible, Michael co-founded thatsmyhome.com to share his expertise through interactive online lessons and innovative, plant-based recipes. He loves blending traditional techniques with modern ideas, encouraging home cooks to enjoy the art of cooking in a relaxed, fun environment.