
Rich No-Bake Chocolate Tart Recipe for Effortless Elegant Entertaining
No-bake chocolate tart.
A decadent no-bake chocolate tart promises pure indulgence with minimal effort.
Silky smooth chocolate elevates simple ingredients into an elegant dessert that radiates sophistication.
Cool kitchen temperatures become an advantage when crafting this luxurious treat without heating an oven.
Contrasting textures of crisp cookie crust and velvety filling create a sensory experience that delights the palate.
Each slice represents a moment of pure chocolate bliss, balancing richness with subtle nuanced flavors.
Minimal preparation ensures you can whip up this impressive dessert quickly, even for last-minute gatherings.
This chocolate masterpiece delivers maximum pleasure with minimal complexity.
Why No-Bake Chocolate Tart Is a Sweet Game-Changer
What You’ll Need for a Silky, No-Oven Treat
Crust Ingredients:Filling Ingredients:Garnish Ingredients:How to Make This Rich Dessert with Zero Fuss
Step 1: Crush Oreo Cookies
Grab your food processor or pastry cutter and break down the Oreo cookies into fine crumbs, creating a smooth and consistent texture.
Step 2: Create Crust in Tart Pan
Press the Oreo crumbles firmly into a 9-inch tart pan, covering the bottom and sides evenly to form a solid crust foundation.
Step 3: Chill Crust
Place the prepared crust in the refrigerator while preparing the chocolate filling.
Step 4: Prepare Chocolate Filling
In a pot, combine the chocolate filling ingredients:Heat the mixture on medium-low heat, stirring continuously until all ingredients are completely dissolved.
Step 5: Adjust Filling Flavor
Taste the chocolate filling and add extra sugar if needed to achieve your desired sweetness level.
Step 6: Pour Filling into Crust
Remove the filling from heat and carefully pour it over the chilled Oreo crust, ensuring an even distribution.
Step 7: Set and Refrigerate
Allow the tart to cool at room temperature for 10 minutes, then refrigerate for 4 hours or overnight until the filling is fully set.
Step 8: Garnish and Serve
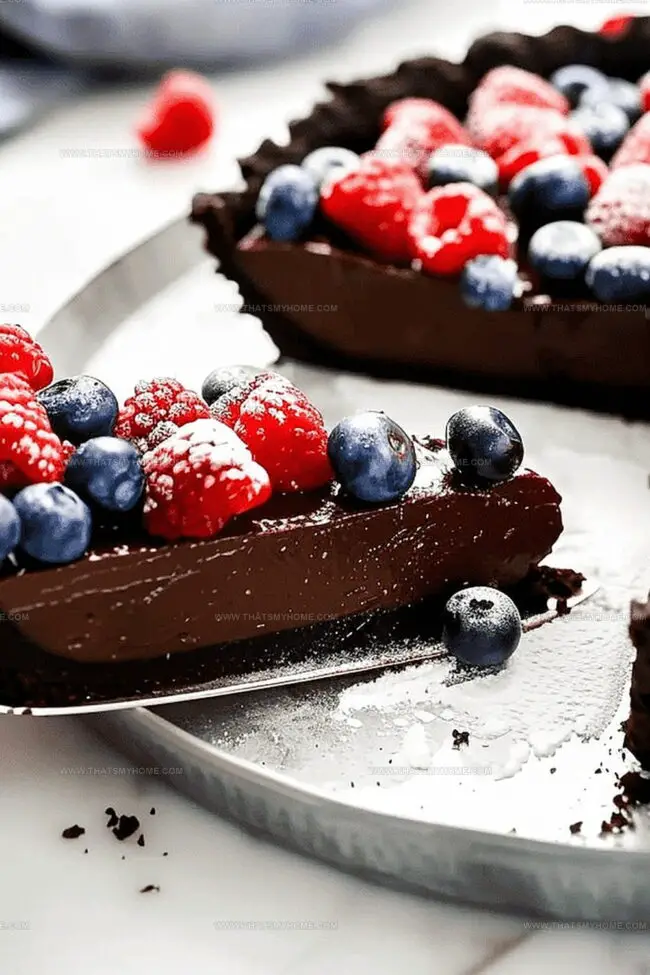
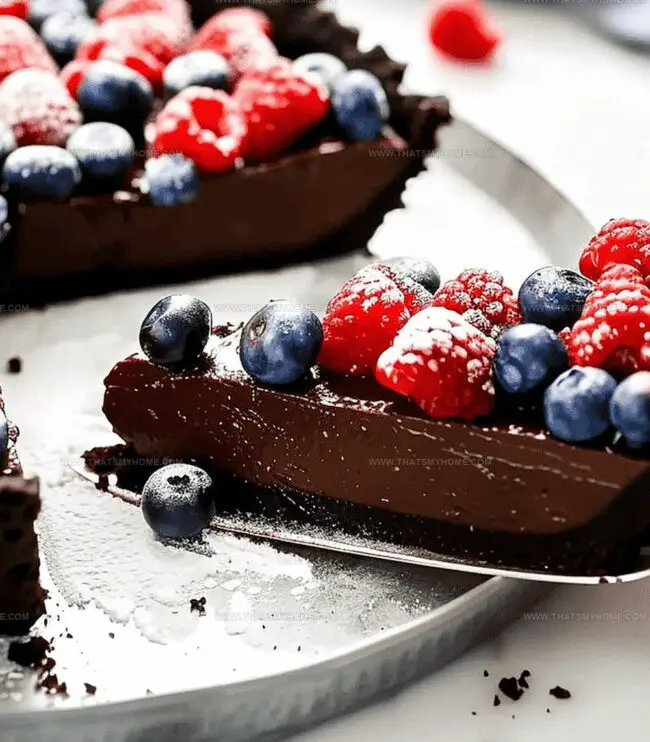
Top the chilled tart with fresh berries and dust with powdered sugar for an elegant finish.
Step 9: Enjoy Your Dessert
Slice and serve the decadent no-bake chocolate tart, delighting in its rich and creamy texture.
Tips for a Crisp Crust and Lush Filling
Store Smart for a Slice That Stays Divine
Dessert Pairings That Complement the Chocolate
New Twists to Elevate This Tart Every Time
Print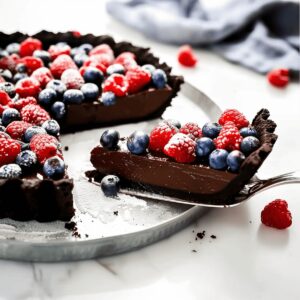
No-Bake Chocolate Tart Recipe
- Total Time: 4 hours 15 minutes
- Yield: 8 1x
Description
Silky No-Bake Chocolate Tart whispers Mediterranean elegance with its rich ganache and crisp oreo cookie base. Chocolate lovers savor this luxurious dessert that blends intense cocoa notes with smooth cream, promising a delightful indulgence you cannot resist.
Ingredients
Main Ingredients:
- 1.5 cups (360 ml) semi-sweet chocolate chips
- 25 Oreo cookies
- 1 cup (240 ml) heavy cream
Supplementary Ingredients:
- 7 tablespoons (105 ml) unsalted butter
- 2 tablespoons (30 ml) granulated sugar
Garnish:
- 1 cup (240 ml) mixed berries (blueberries, raspberries, or strawberries)
- 1 teaspoon (5 ml) powdered sugar
Instructions
- Crush chocolate sandwich cookies into fine, uniform crumbs using a food processor or pastry cutter until texture resembles coarse sand.
- Transfer cookie crumbs into a 9-inch (23 centimeters) tart pan, pressing firmly and evenly across the bottom and sides to create a compact, smooth crust.
- Place prepared crust in refrigerator to chill and set while preparing the filling.
- In a medium saucepan, combine heavy cream (240 milliliters), dark chocolate (), unsalted butter (), and granulated sugar () over low heat.
- Stir chocolate mixture constantly with a silicone spatula until ingredients melt completely and blend into a smooth, glossy consistency.
- Remove chocolate filling from heat and let it cool for 5-7 minutes, allowing temperature to slightly decrease.
- Gently pour warm chocolate mixture over the chilled Oreo cookie crust, ensuring even distribution across the surface.
- Refrigerate the tart for 3-4 hours or preferably overnight until filling becomes firm and sets completely.
- Before serving, garnish with fresh raspberries or strawberries and dust lightly with powdered sugar for an elegant presentation.
- Slice and serve chilled, enjoying the rich, creamy texture of this decadent dessert.
Notes
- Crushing Oreos transforms them into a delectable, crumbly foundation for this decadent tart.
- Gentle heating ensures chocolate and cream blend seamlessly without burning or separating.
- Chilling allows the tart to set perfectly, creating a silky-smooth texture that melts in your mouth.
- Fresh berries add a vibrant, tangy contrast to the rich chocolate filling.
- Powdered sugar dusting provides an elegant, professional finishing touch that elevates the dessert’s visual appeal.
- Prep Time: 15 minutes
- Cook Time: 4 hours
- Category: Desserts
- Method: Blending
- Cuisine: American
Nutrition
- Serving Size: 8
- Calories: 360 kcal
- Sugar: 22g
- Sodium: 180mg
- Fat: 24g
- Saturated Fat: 14g
- Carbohydrates: 32g
- Fiber: 3g
- Protein: 5g
- Cholesterol: 50mg
Mary Ellen
Founder, Pastry Chef & Recipe Developer
Expertise
Education
Savannah Technical College
Mary Ellen is the heart and soul of thatsmyhome.com. As the founder, pastry chef, and recipe developer, she refined her skills at Savannah Technical College with an Associate of Applied Science in Culinary Baking & Pastry Arts.
Mary blends classic techniques with modern twists to make artisanal breads, beautifully crafted pastries, and desserts full of unique flavor. Her passion is evident in every recipe, and she enjoys sharing her expertise through hands-on pastry workshops and insightful articles in local culinary magazines.