
Quick No-Bake Buckeye Cheesecake Bars Recipe That Wows Everyone
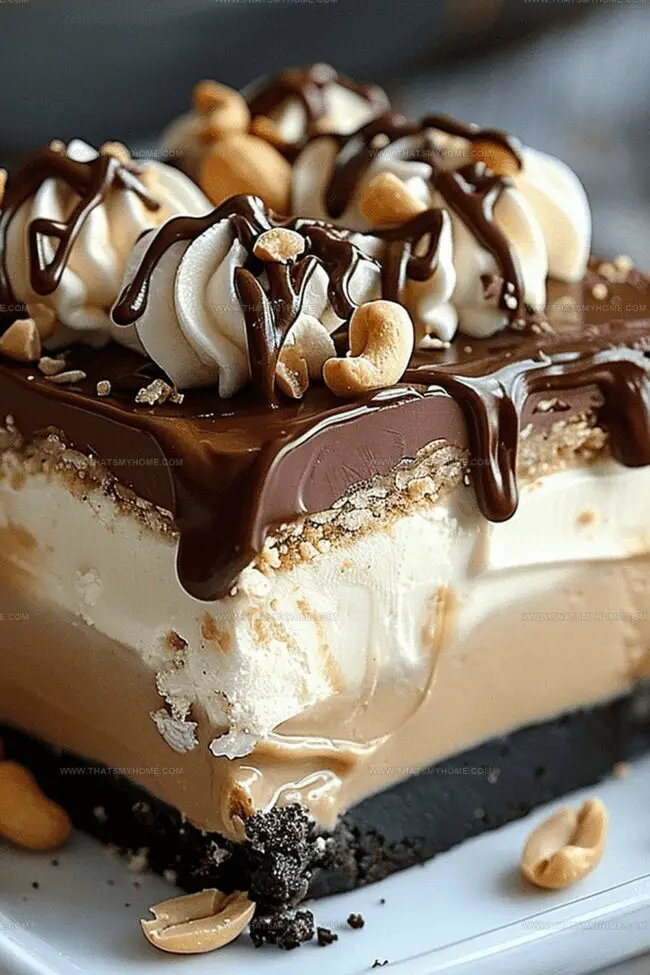
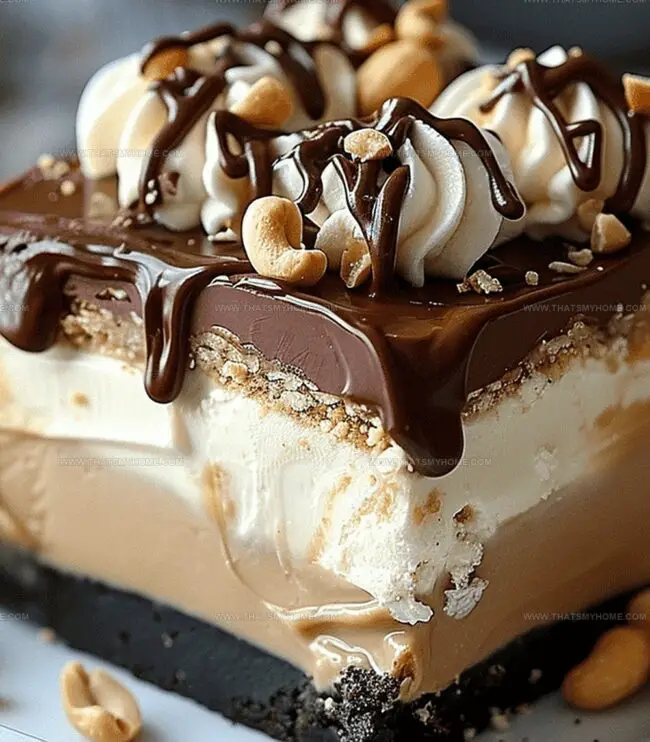
Indulgent no-bake buckeye cheesecake bars dance between creamy chocolate and peanut butter perfection.
These dreamy dessert bars blend rich, velvety textures that melt in your mouth.
Inspired by the classic Ohio buckeye candy, this recipe takes a luxurious cheesecake twist without ever touching an oven.
Smooth peanut butter layers intermingle with decadent chocolate for a sinfully delicious treat.
The combination promises to wow anyone who takes a bite.
Each bar delivers a cool, silky experience that feels both nostalgic and innovative.
Grab your ingredients and get ready to create a dessert that will become an instant favorite.
Quick Recipe Overview
Ingredients for No-Bake Buckeye Cheesecake Bars
For Crust:For Filling:For Topping and Garnish:Tools You’ll Need for Buckeye Cheesecake Bars
Directions for No-Bake Buckeye Cheesecake Bars
Set up a cozy workspace with an 8×8 inch baking dish. Line it with parchment paper, creating easy lifting handles for later serving.
Crush chocolate graham crackers into fine crumbs. Mix with melted butter, pressing firmly to create a solid, delicious foundation. Slide the dish into the refrigerator to firm up while preparing the creamy center.
Blend cream cheese with smooth peanut butter until perfectly combined. Gently fold in fluffy whipped topping and a touch of vanilla, creating a cloud-like mixture that whispers decadence.
Melt chocolate chips with a dollop of peanut butter. Stir until glossy and spread evenly across the chilled filling, creating a luxurious chocolate blanket.
Refrigerate for several hours until the bars set completely. When ready, lift the entire creation from the dish using parchment paper handles. Slice into tempting squares and garnish with a sprinkle of chopped peanuts for extra crunch.
Tips & Mix-Ins for Buckeye Cheesecake Bars
Best Ways to Serve Buckeye Cheesecake Bars
Storing Buckeye Cheesecake Bars for Later
Print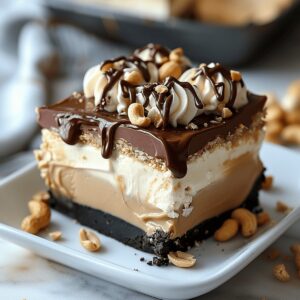
Silky Buckeye Cheesecake Bars Recipe
- Total Time: 24 minutes
- Yield: 17 1x
Description
Chocolate peanut butter no-bake buckeye cheesecake bars blend creamy indulgence with classic Midwestern flavors. Rich graham cracker crust and silky filling will satisfy chocolate and peanut butter cravings you cannot resist.
Ingredients
- 16 oz (454 g) cream cheese, softened
- 1 cup (240 ml) creamy peanut butter
- 1 cup (240 ml) whipped topping
- 2 cups (256 g) chocolate graham cracker crumbs
- 1 cup (170 g) semi-sweet chocolate chips
- 1 cup (120 g) powdered sugar
- 1 teaspoon vanilla extract
- ½ cup (113 g) unsalted butter, melted
- 2 tablespoons (30 ml) peanut butter
- Whole peanuts for garnish
Instructions
- Crust Preparation: Line an 8×8 inch baking dish with parchment paper, allowing excess paper to hang over edges for effortless removal.
- Crust Formation: Blend chocolate graham cracker crumbs with melted butter, pressing the mixture firmly and uniformly into the dish bottom, creating a solid foundation.
- Filling Creation: Whip cream cheese, peanut butter, powdered sugar, and vanilla extract until achieving a silky-smooth consistency, then gently incorporate whipped topping to create a light, airy texture.
- Layering Process: Spread the peanut butter cheesecake filling evenly over the chilled crust, ensuring a uniform layer.
- Chocolate Topping: Melt chocolate chips and peanut butter together until achieving a glossy, seamless mixture, then carefully pour and spread over the chilled filling.
- Chilling and Setting: Refrigerate the dessert for a minimum of 4 hours or overnight to allow complete solidification.
- Serving Presentation: Remove from dish using parchment paper overhang, slice into precise squares, and garnish with additional whipped topping and whole peanuts for enhanced texture and visual appeal.
Notes
- Chill for Perfect Texture: Refrigerate the crust and filling for optimal firmness and easy slicing, ensuring a clean and professional-looking dessert.
- Smooth Filling Technique: Beat cream cheese and peanut butter thoroughly to eliminate lumps, creating a silky-smooth cheesecake consistency.
- Prevent Sticking Hack: Use parchment paper overhang for effortless removal and clean cutting of bars without damaging the delicate layers.
- Chocolate Topping Pro Tip: Melt chocolate and peanut butter carefully to avoid burning, stirring frequently for a glossy, even coating.
- Prep Time: 20 minutes
- Cook Time: 4 hours
- Category: Desserts, Snacks
- Method: None
- Cuisine: American
Nutrition
- Serving Size: 17
- Calories: 380
- Sugar: 24 g
- Sodium: 230 mg
- Fat: 27 g
- Saturated Fat: 13 g
- Unsaturated Fat: 11 g
- Trans Fat: 0 g
- Carbohydrates: 34 g
- Fiber: 1 g
- Protein: 6 g
- Cholesterol: 40 mg
Michael Rivera
Co-Founder & Culinary Instructor
Expertise
Education
The French Culinary Institute (now part of the International Culinary Center)
Michael Rivera is a seasoned chef and culinary instructor based in San Francisco, CA. Trained in Classic Culinary Arts at The French Culinary Institute, he refined his skills in Michelin-starred kitchens, mastering classic French techniques and artisanal bread baking.
Passionate about making gourmet methods accessible, Michael co-founded thatsmyhome.com to share his expertise through interactive online lessons and innovative, plant-based recipes. He loves blending traditional techniques with modern ideas, encouraging home cooks to enjoy the art of cooking in a relaxed, fun environment.