Tantalizing No-Fuss Kiwi Cheesecake Recipe Everyone Will Adore
Creamy, dreamy cheesecakes meet their match in this delightful easy kiwi cheesecake recipe that promises pure indulgence.
Summer’s sweetest fruit adds a vibrant twist to the classic dessert.
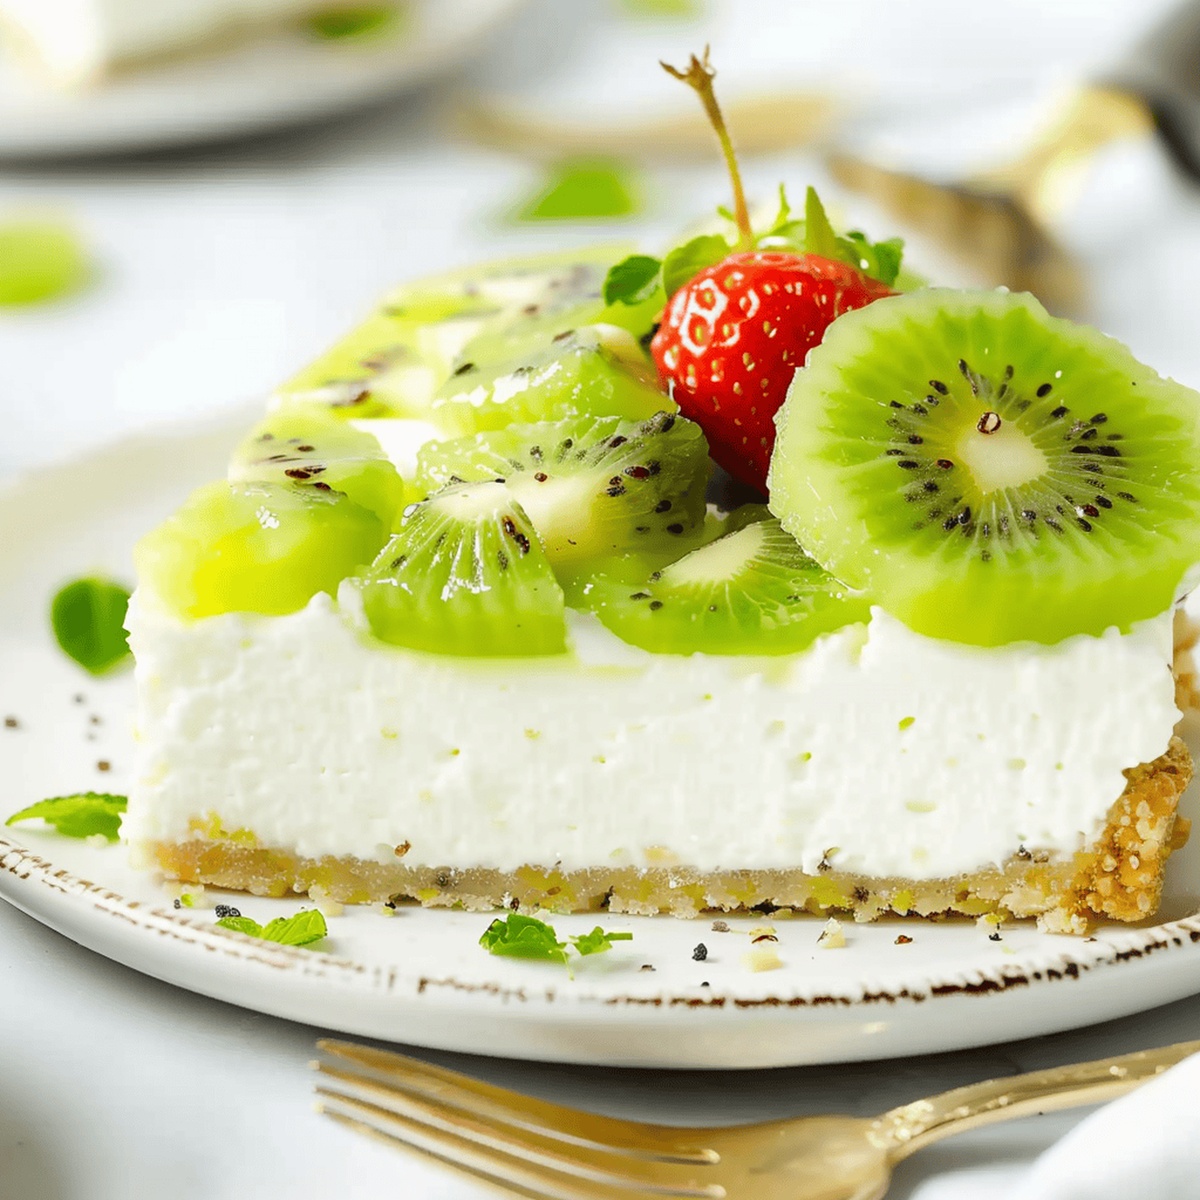
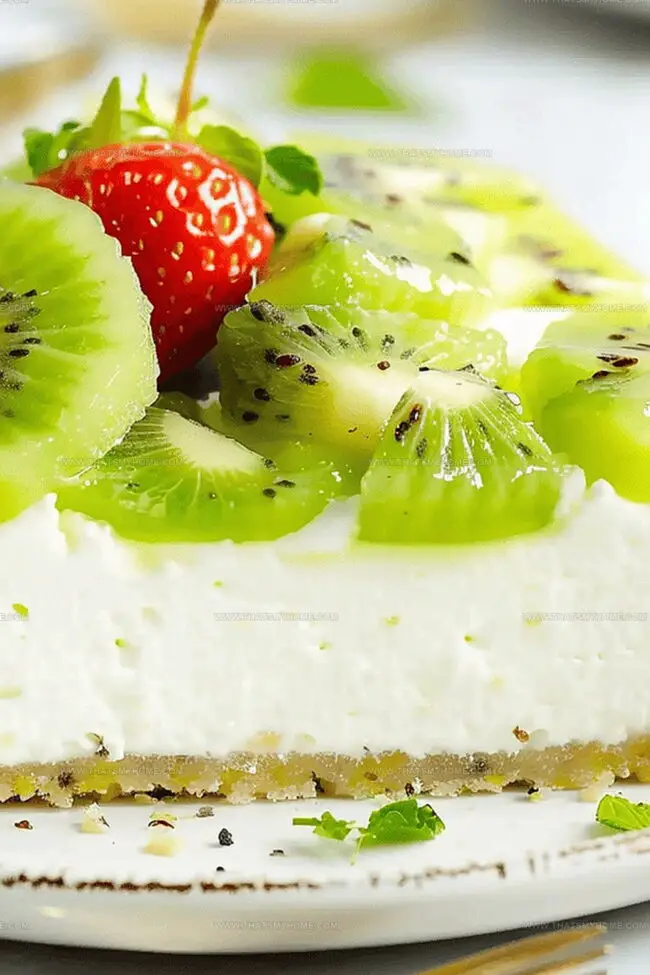
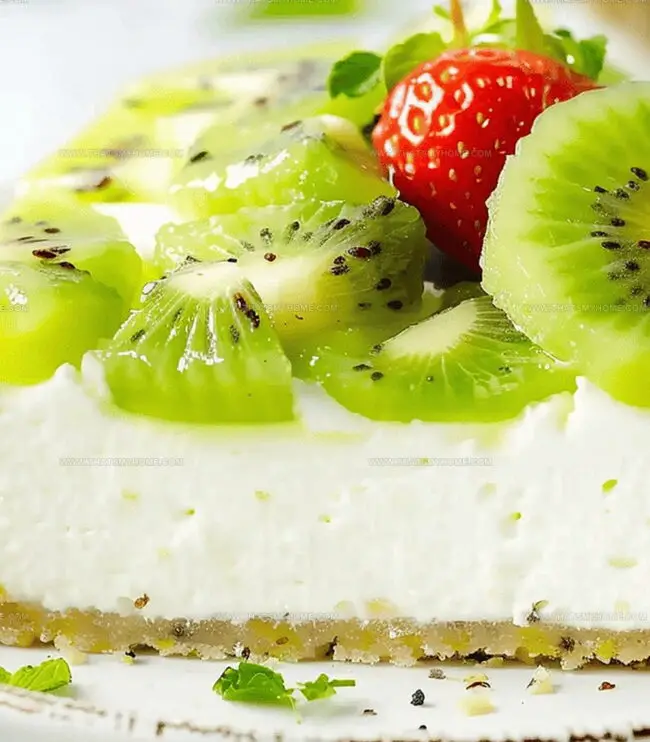
Tangy kiwi slices nestle perfectly atop a smooth, velvety filling that melts in your mouth.
The graham cracker crust provides a delicious crunch that complements the silky texture.
No fancy baking skills required—this dessert comes together in minutes with simple ingredients.
Kiwis bring a refreshing pop of color and tropical flavor that makes every slice irresistible.
Grab your mixing bowl and get ready to wow everyone with this show-stopping treat that’s sure to become a new favorite.
Quick Recipe Overview
What Goes in Easy Kiwi Cheesecake
For Crust:For Cheesecake Filling:For Kiwi Jelly Topping:Must-Have Tools for Easy Kiwi Cheesecake
Making the Perfect Easy Kiwi Cheesecake
Craft a buttery base using graham cracker crumbles pressed firmly into a springform pan. Bake until golden and aromatic, creating a crisp foundation for the creamy layers ahead.
Whip cream cheese into a silky smooth mixture, gently folding in billowy whipped cream. Incorporate a touch of vanilla for depth and richness, ensuring a luxurious texture that melts on the tongue.
Activate gelatin with a splash of cream, transforming the mixture into a stabilizing agent that helps the cheesecake hold its elegant shape. Blend carefully into the creamy base.
Crush fresh kiwis into a vibrant emerald puree. Simmer with a hint of sweetness and a natural thickening agent, creating a glossy jewel-like layer that crowns the dessert.
Allow the cheesecake to rest and set in the refrigerator, letting flavors meld and texture become perfectly smooth. Decorate with delicate kiwi slices for a final touch of freshness.
Kiwi Cheesecake Variations & Kitchen Tips
How to Present Your Easy Kiwi Cheesecake
Store and Plan Ahead: Easy Kiwi Cheesecake Tips
Print
Silky Kiwi Cheesecake Recipe
- Total Time: 42 minutes
- Yield: 9 1x
Description
Creamy New Zealand kiwi cheesecake blends tangy fruit with rich cream cheese in a delightful dessert. Light graham cracker crust and fresh kiwi topping invite you to savor each luscious bite.
Ingredients
- 16 oz (454 g) cream cheese, softened to room temperature
- 6–7 kiwis
- 1.5 cups graham cracker crumbs
- 1 cup heavy whipping cream (double cream)
- ⅔ cup sugar
- 6 tbsps butter, melted
- ½ cup water
- 1 tbsp unflavored gelatin
- 1 tsp agar agar powder
- 1 tsp vanilla extract
- 2 drops green food coloring (optional)
Instructions
- Crust Preparation: Blend graham cracker crumbs with melted unsalted butter, pressing firmly into a 10-inch springform pan. Bake at 350°F for 12 minutes until golden, then cool completely.
- Gelatin Activation: Sprinkle gelatin over heavy cream, let sit for 5 minutes, then microwave for 30 seconds until dissolved. Set aside to cool.
- Cream Mixture: Whip heavy cream to stiff peaks. In a separate bowl, beat cream cheese and sugar until creamy and smooth. Gently fold whipped cream, vanilla extract, and cooled gelatin into the cream cheese mixture.
- Initial Chilling: Pour the filling over the prepared crust, smoothing the surface. Refrigerate for 8 hours or overnight to set completely.
- Kiwi Jelly Creation: Puree kiwi fruits, then combine with water, sugar, agar agar powder, and green food coloring in a saucepan. Simmer for 2-3 minutes, stirring constantly.
- Final Assembly: Once the cheesecake is thoroughly chilled, carefully pour the slightly cooled kiwi jelly over the surface. Refrigerate for an additional 30 minutes to set the topping.
- Garnishing: Decorate the top with delicate, thinly sliced fresh kiwi rounds to enhance visual appeal and add a burst of fresh flavor.
Notes
- Crust Consistency Check: Press graham cracker mixture firmly to create a compact, stable base that prevents crumbling and ensures clean slices.
- Gelatin Activation Tip: Sprinkle gelatin evenly over cold cream and let sit exactly 5 minutes for proper thickening without clumping.
- Whipping Cream Technique: Beat heavy cream to stiff peaks carefully, stopping just when peaks hold shape to maintain optimal volume and texture.
- Chilling Critical: Allow minimum 8 hours refrigeration to guarantee cheesecake sets completely, developing rich, smooth consistency and allowing flavors to meld perfectly.
- Prep Time: 30 minutes
- Cook Time: 12 minutes
- Category: Desserts
- Method: Baking
- Cuisine: New Zealand
Nutrition
- Serving Size: 9
- Calories: 335
- Sugar: 23 g
- Sodium: 182 mg
- Fat: 24 g
- Saturated Fat: 14 g
- Unsaturated Fat: 9 g
- Trans Fat: 0 g
- Carbohydrates: 27 g
- Fiber: 1 g
- Protein: 4 g
- Cholesterol: 88 mg
Michael Rivera
Co-Founder & Culinary Instructor
Expertise
Education
The French Culinary Institute (now part of the International Culinary Center)
Michael Rivera is a seasoned chef and culinary instructor based in San Francisco, CA. Trained in Classic Culinary Arts at The French Culinary Institute, he refined his skills in Michelin-starred kitchens, mastering classic French techniques and artisanal bread baking.
Passionate about making gourmet methods accessible, Michael co-founded thatsmyhome.com to share his expertise through interactive online lessons and innovative, plant-based recipes. He loves blending traditional techniques with modern ideas, encouraging home cooks to enjoy the art of cooking in a relaxed, fun environment.