Sweet & Fluffy No-Bake Strawberry Delight Recipe
Sweet summer nights call for a delightful no-bake strawberry delight recipe that dances on your taste buds with pure, refreshing magic.
Layers of creamy goodness and fruity freshness blend together effortlessly in this simple dessert.
Strawberries burst with vibrant flavor, creating a luscious treat that requires zero oven time.
Cool and smooth, this dessert comes together in minutes with just a few pantry staples.
The silky texture and bright red hues make every spoonful feel like a celebration of seasonal goodness.
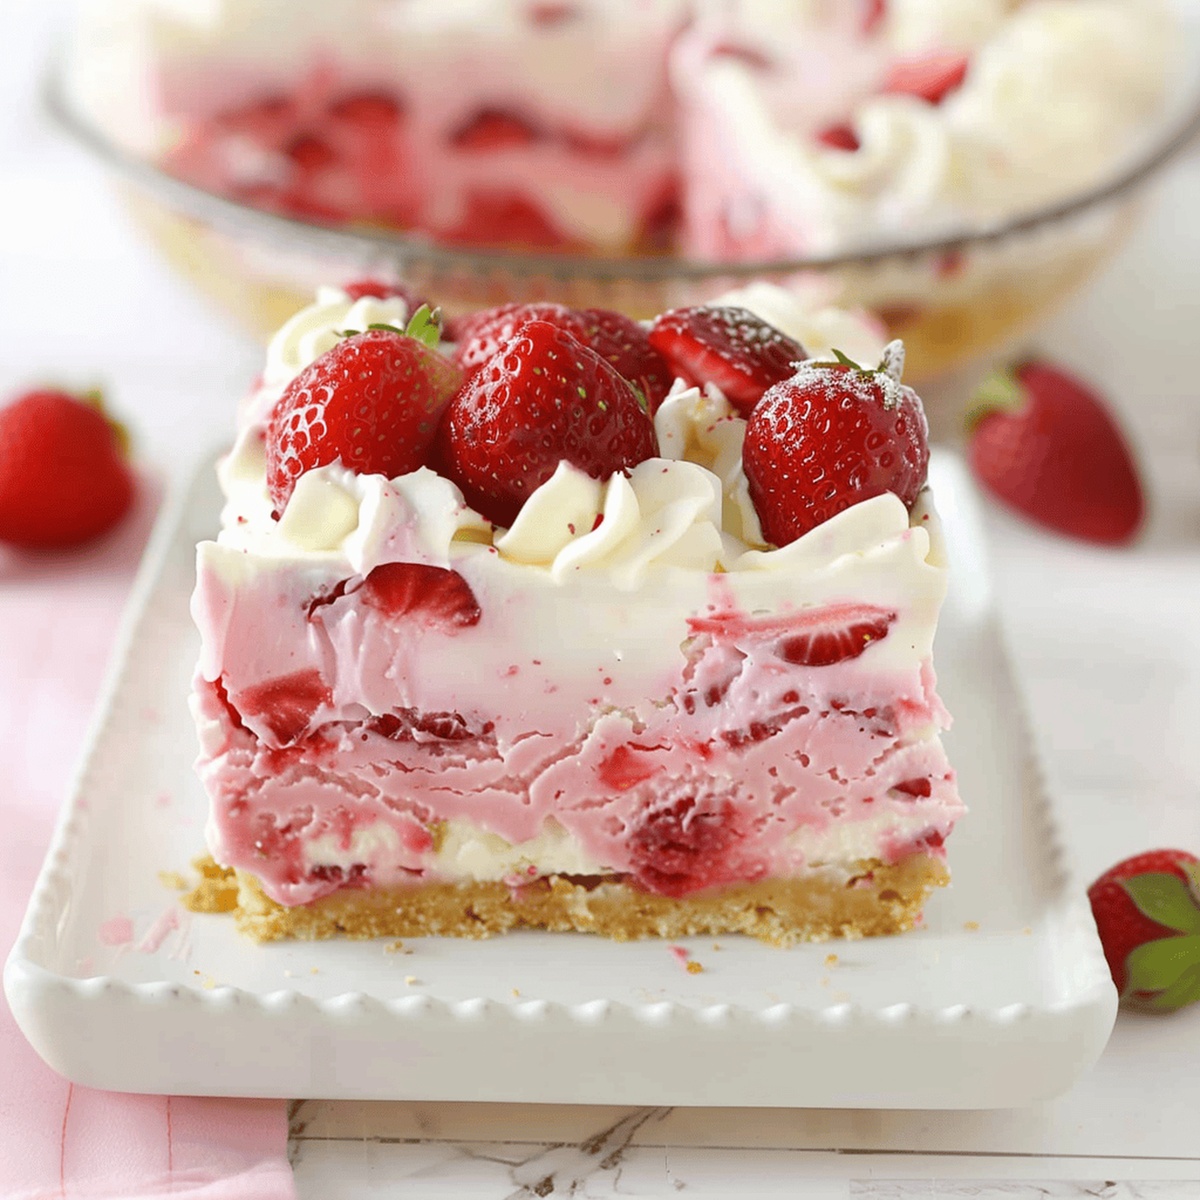
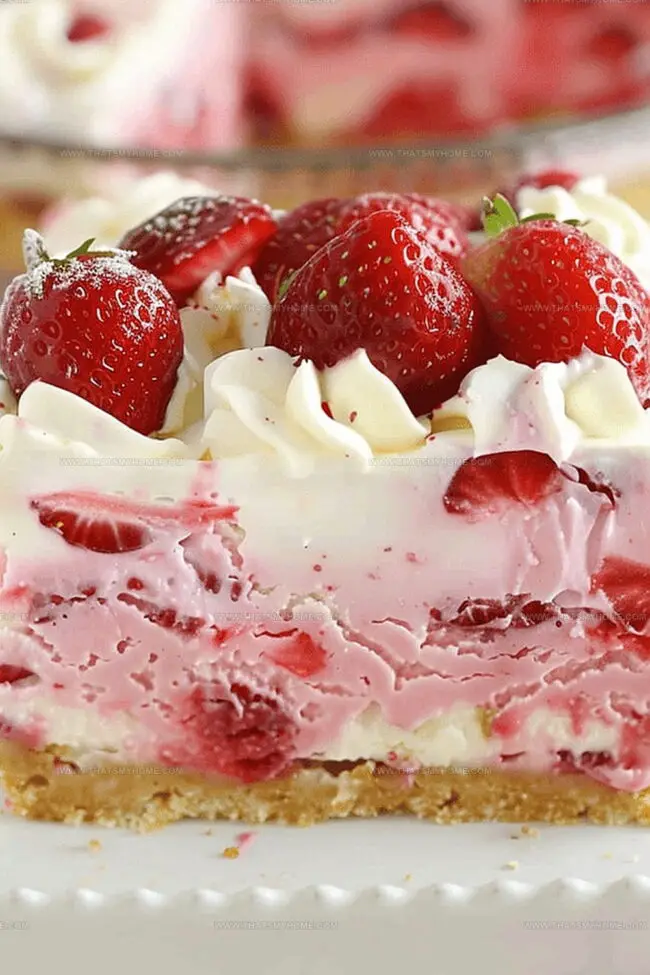
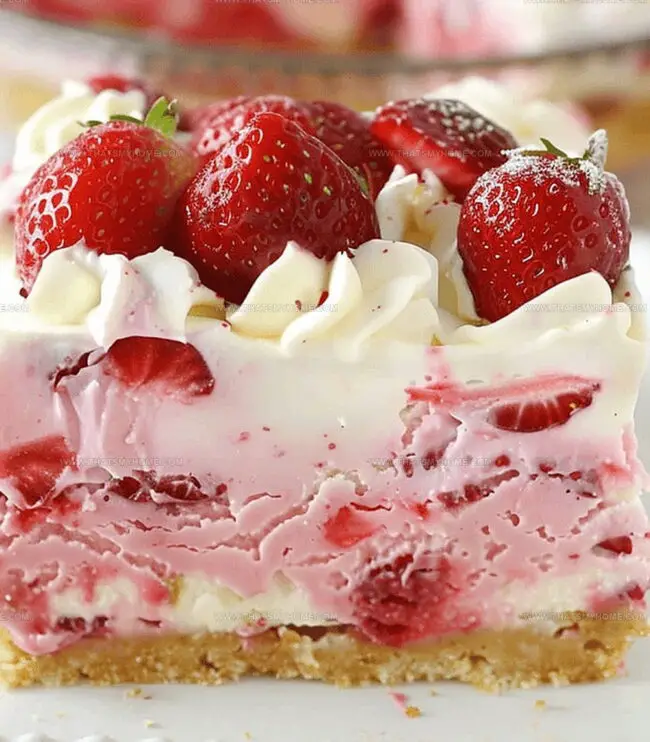
Rich cream cheese and graham cracker base provide a perfect foundation for the strawberry-infused topping.
Grab your mixing bowl and get ready to savor a dessert that promises summer joy in every single bite.
Quick Recipe Overview
Ingredients for No-Bake Strawberry Delight
For Crust Base:For Creamy Layers:For Fruity Enhancements:Tools You’ll Need to Assemble With Ease
How to Make a Chilled Strawberry Treat
Create a crumbly base by mixing graham cracker bits with melted butter. Press this mixture firmly into a square pan, creating a smooth foundation that will cradle the luscious layers.
Whip fresh cream into fluffy peaks, folding in delicate sweetness. Blend cream cheese until silky smooth, combining it with gentle hints of lemon and vanilla for a luxurious texture.
Slice ruby-red strawberries into delicate ribbons. Incorporate these gems into the creamy mixture, adding vibrant bursts of fruity excitement. Swirl strawberry essence throughout to create a mesmerizing pattern.
Crown your creation with billowy clouds of whipped cream. Scatter a few fresh strawberry slices on top for a stunning visual finish that promises pure delight.
Tuck your masterpiece into the refrigerator, allowing the flavors to mingle and dance. After a few hours, your no-bake wonder will be ready to enchant taste buds and create moments of pure joy.
Topping Ideas & Cool Layering Tricks
Pretty Ways to Serve Strawberry Delight
Store in the Fridge Like a Pro
Print
Silky Strawberry Sensation Recipe
- Total Time: 34 minutes
- Yield: 9 1x
Description
Sweet summer strawberry delight merges creamy layers with fresh fruit in a chilled dessert perfect for warm afternoons. Crisp graham cracker base and silky cream cheese filling make refreshing magic that welcomes cool pleasure on your plate.
Ingredients
- 2 lb (907 g) strawberries, fresh, washed, dried, stemmed
- 16 oz (452 g) cream cheese, full-fat, room temperature
- 1 cup (236 ml) heavy whipping cream
- 1 cup (236 ml) heavy whipping cream, for topping
- 2 tbsps strawberry jello mix
- 2 cups (240 g) graham cracker crumbs
- ½ cup (113 g) butter, unsalted, melted
- ¼ cup (48 g) sugar, granulated
- ½ cup (65 g) sugar, powdered
- ½ cup (65 g) sugar, powdered, for topping
- 1 tbsp lemon juice, fresh
- 1 tsp (5 ml) vanilla extract, pure
Instructions
- Crust Preparation: Combine graham cracker crumbs with melted butter, pressing the mixture firmly and evenly into a 9×9-inch pan to create a solid foundation, then chill while preparing subsequent layers.
- Strawberry Preparation: Dice and slice strawberries, patting them dry to ensure optimal texture and prevent excess moisture from compromising the dessert’s structure.
- Cream Components: Whip heavy cream until soft peaks form, gradually incorporating powdered sugar to achieve a glossy, stiff consistency. In a separate bowl, blend cream cheese, granulated sugar, lemon juice, and vanilla extract until smooth and silky.
- Filling Integration: Gently fold whipped cream into the cream cheese mixture, maintaining its delicate airiness. Separate the mixture, folding strawberry Jello and diced strawberries into one portion to create a vibrant, fruity layer.
- Layer Assembly: Arrange sliced strawberries in an overlapping pattern across the chilled crust. Spread the plain cream cheese filling evenly, then carefully distribute the strawberry-infused layer for a visually appealing and flavorful result.
- Topping Finale: Whip remaining cream with powdered sugar until stiff peaks form, then apply as a smooth topping or create decorative piped patterns across the dessert’s surface.
- Chilling and Setting: Refrigerate the assembled dessert for 4-6 hours, allowing flavors to meld and the texture to set completely before serving a refreshing, elegant treat.
Notes
- Chill Before Serving: Refrigerate for at least 4-6 hours to ensure the dessert sets perfectly and flavors meld together, creating a harmonious taste experience.
- Moisture Management: Pat strawberry slices dry to prevent excess liquid from making the crust soggy, maintaining the dessert’s ideal texture.
- Whipping Technique: Use a chilled mixing bowl when whipping cream to achieve faster, more stable peaks with better volume and structure.
- Layering Precision: Spread each layer carefully and evenly to create a visually appealing and consistent dessert that looks as good as it tastes.
- Prep Time: 30 minutes
- Cook Time: 4-6 hours
- Category: Desserts, Snacks
- Method: Blending
- Cuisine: American
Nutrition
- Serving Size: 9
- Calories: 370
- Sugar: 25 g
- Sodium: 150 mg
- Fat: 30 g
- Saturated Fat: 18 g
- Unsaturated Fat: 12 g
- Trans Fat: 0 g
- Carbohydrates: 29 g
- Fiber: 1 g
- Protein: 4 g
- Cholesterol: 90 mg
Michael Rivera
Co-Founder & Culinary Instructor
Expertise
Education
The French Culinary Institute (now part of the International Culinary Center)
Michael Rivera is a seasoned chef and culinary instructor based in San Francisco, CA. Trained in Classic Culinary Arts at The French Culinary Institute, he refined his skills in Michelin-starred kitchens, mastering classic French techniques and artisanal bread baking.
Passionate about making gourmet methods accessible, Michael co-founded thatsmyhome.com to share his expertise through interactive online lessons and innovative, plant-based recipes. He loves blending traditional techniques with modern ideas, encouraging home cooks to enjoy the art of cooking in a relaxed, fun environment.