
Sweet Magic: Swirling Peanut Butter Oreo Truffles Recipe
Silky chocolate and creamy peanut butter oreo truffles dance together in a decadent no-bake dessert that promises pure indulgence.
These bite-sized treats blend the classic sandwich cookie with rich, smooth peanut butter for an irresistible confection.
Each truffle packs a punch of intense flavor that melts seamlessly on your tongue.
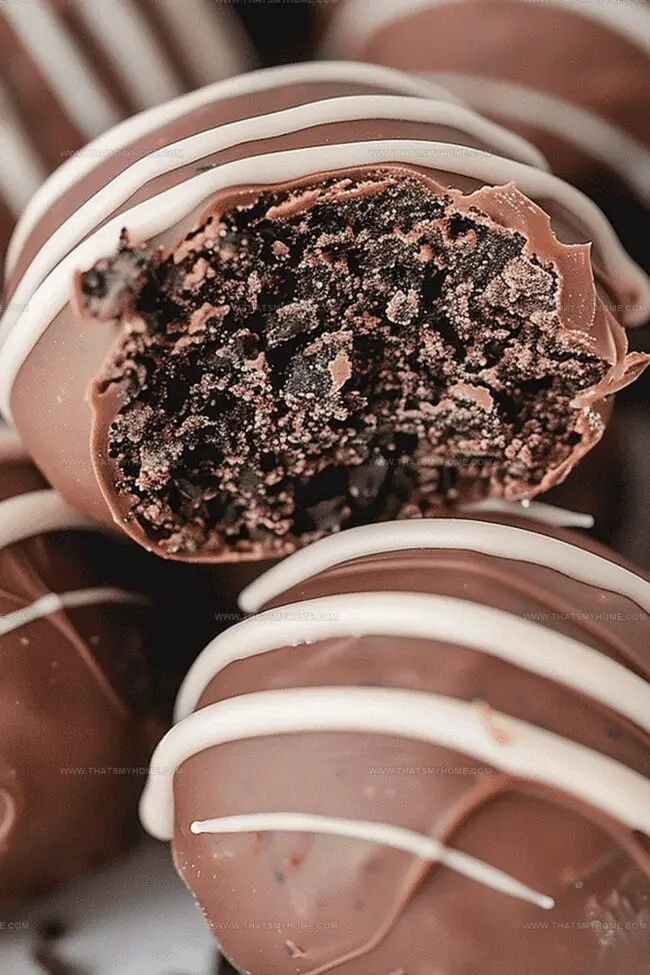
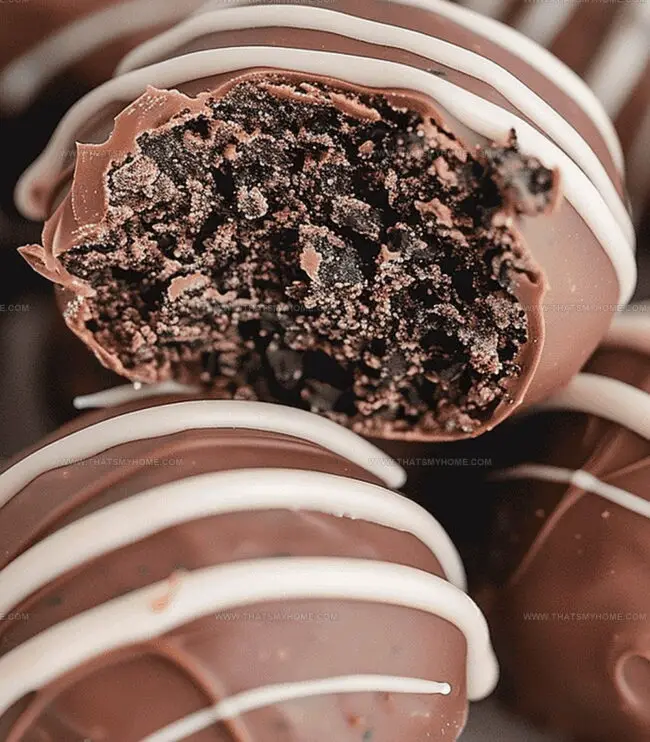
Crushing oreos into fine crumbs creates the perfect base for these luxurious sweets.
The combination of crushed cookies, cream cheese, and peanut butter forms a luscious mixture that comes together effortlessly.
Rolling these truffles in melted chocolate gives them a glossy, professional finish that looks like a gourmet bakery creation.
With just a few simple ingredients and minimal effort, you can whip up a batch of these heavenly truffles that will vanish in moments.
Quick Recipe Overview
Peanut Butter Oreo Truffles Ingredient Breakdown
For Base Ingredients:For Sweetening Ingredients:For Coating Ingredients:Tools That Simplify Peanut Butter Oreo Truffle Prep
Instructions for Making Peanut Butter Oreo Truffles
Crush Oreo cookies into fine powder using a food processor. Ensure the texture is uniform and smooth, creating a perfect base for the delightful truffles.
Combine crushed Oreos with peanut butter in a mixing bowl. Stir until the mixture becomes a consistent and rich combination that holds together easily.
Fold in powdered sugar to enhance the flavor and help the mixture become moldable. The sugar will provide the right consistency for shaping your treats.
Scoop small portions of the mixture and roll between your hands to create smooth, round balls. Place these delicate spheres on a parchment-lined tray.
Melt chocolate using gentle microwave techniques or a double boiler. Carefully dip each chilled truffle into the melted chocolate, allowing excess to drip off.
Sprinkle crushed Oreos or decorative elements on top of the chocolate-coated truffles. Let them set at room temperature until the chocolate hardens completely.
Serve these decadent treats immediately or store in an airtight container. They’re perfect for sharing with friends or enjoying as a personal indulgence.
Flavor Tips for Customizing Peanut Butter Oreo Truffles
Best Ways to Present Peanut Butter Oreo Truffles
Proper Storage for Peanut Butter Oreo Truffles
Print
Sinful Peanut Butter Oreo Truffles Recipe
- Total Time: 45 minutes
- Yield: 21 1x
Description
Rich chocolate and creamy peanut butter oreo truffles merge classic flavors into irresistible bite-sized treats. Chilled chocolate-dipped delights offer a perfect balance of sweet and indulgent textures you’ll crave.
Ingredients
- 2 cups (470 ml) peanut butter
- 33 Oreo cookies (about 3 cups crumbs), crushed
- 1.5 cups (180 g) powdered sugar
- 20 oz (567 g) milk chocolate or dark chocolate for melting
Instructions
- Preparation: Pulverize Oreo cookies into ultra-fine crumbs using a food processor, ensuring complete uniformity without any substantial fragments.
- Mixture Creation: Blend processed Oreo crumbs with peanut butter and powdered sugar using an electric mixer, generating a cohesive, smooth consistency that easily forms into compact shapes.
- Truffle Formation: Employ a cookie scoop to create precise, uniform spheres, methodically rolling each portion between palms to craft immaculate, round truffles with seamless surfaces.
- Chilling Phase: Arrange truffles on a parchment-lined baking sheet and freeze for approximately 30 minutes, solidifying their structural integrity and preparing them for chocolate enrobing.
- Chocolate Coating: Gradually melt chocolate in microwave-safe container, stirring between 30-second intervals to achieve a silky, glossy finish without thermal damage.
- Dipping Process: Carefully immerse each chilled truffle into molten chocolate, allowing excess coating to elegantly cascade off before positioning on parchment paper.
- Embellishment and Setting: Optionally garnish with crushed Oreo fragments while chocolate remains liquid, then permit complete solidification at ambient temperature before transferring to an airtight storage container.
Notes
- Crumb Consistency Matters: Pulse Oreos thoroughly to achieve fine, uniform crumbs without large chunks for smooth, even truffle texture.
- Chill Before Coating: Freezing truffles for 30 minutes helps them maintain shape and prevents crumbling during chocolate dipping process.
- Chocolate Melting Technique: Use short microwave intervals and stir between each to prevent chocolate from burning and ensure glossy, smooth coating.
- Storage Secrets: Keep truffles in airtight container at room temperature for 3-5 days or refrigerate for up to a week to maintain optimal freshness and taste.
- Prep Time: 15 minutes
- Cook Time: 30 minutes
- Category: Desserts, Snacks
- Method: Blending
- Cuisine: American
Nutrition
- Serving Size: 21
- Calories: 202
- Sugar: 10 g
- Sodium: 50 mg
- Fat: 12 g
- Saturated Fat: 5 g
- Unsaturated Fat: 7 g
- Trans Fat: 0 g
- Carbohydrates: 24 g
- Fiber: 1 g
- Protein: 3 g
- Cholesterol: 0 mg
Michael Rivera
Co-Founder & Culinary Instructor
Expertise
Education
The French Culinary Institute (now part of the International Culinary Center)
Michael Rivera is a seasoned chef and culinary instructor based in San Francisco, CA. Trained in Classic Culinary Arts at The French Culinary Institute, he refined his skills in Michelin-starred kitchens, mastering classic French techniques and artisanal bread baking.
Passionate about making gourmet methods accessible, Michael co-founded thatsmyhome.com to share his expertise through interactive online lessons and innovative, plant-based recipes. He loves blending traditional techniques with modern ideas, encouraging home cooks to enjoy the art of cooking in a relaxed, fun environment.