Tropical Paradise: Homemade Pineapple Bliss Bars Recipe
Dessert lovers rejoice as these pineapple bliss bars melt hearts with tropical sweetness and creamy decadence.
Rich, buttery layers combine unexpected flavors that dance across your palate.
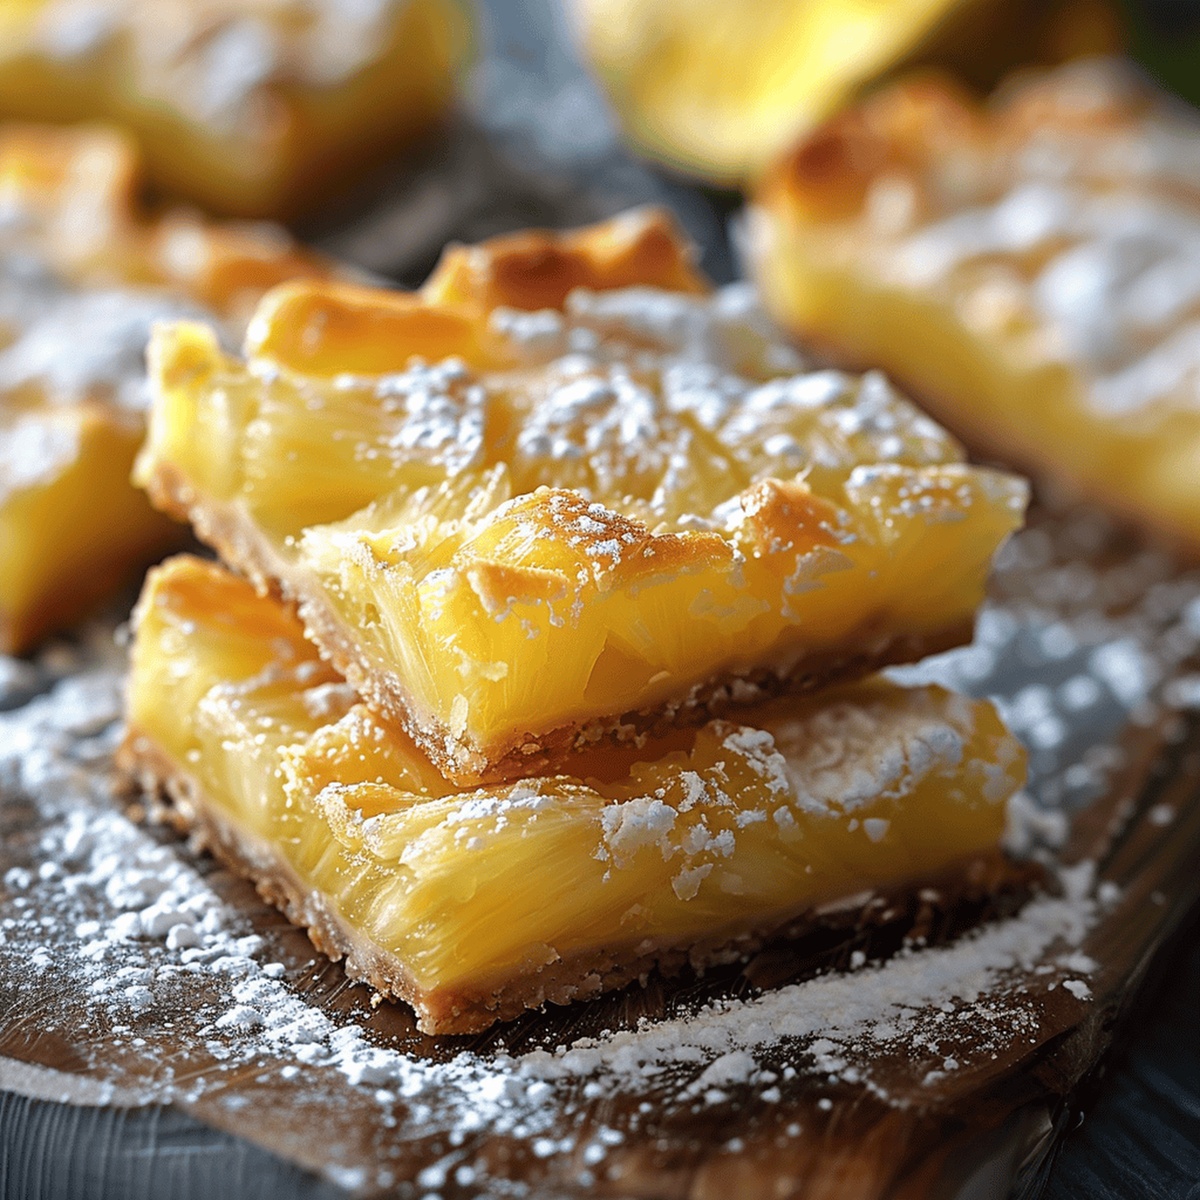
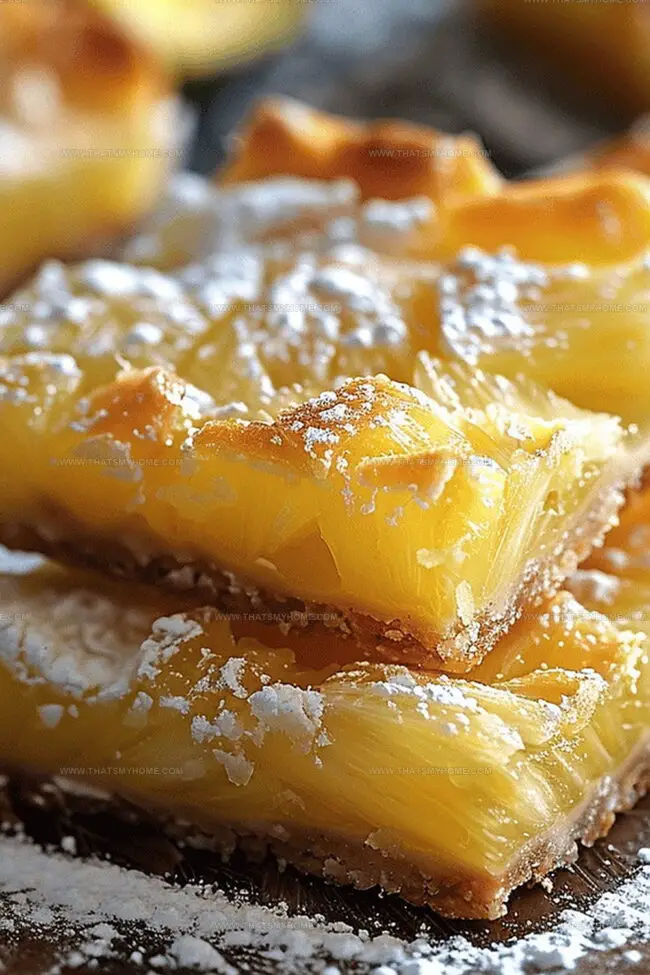
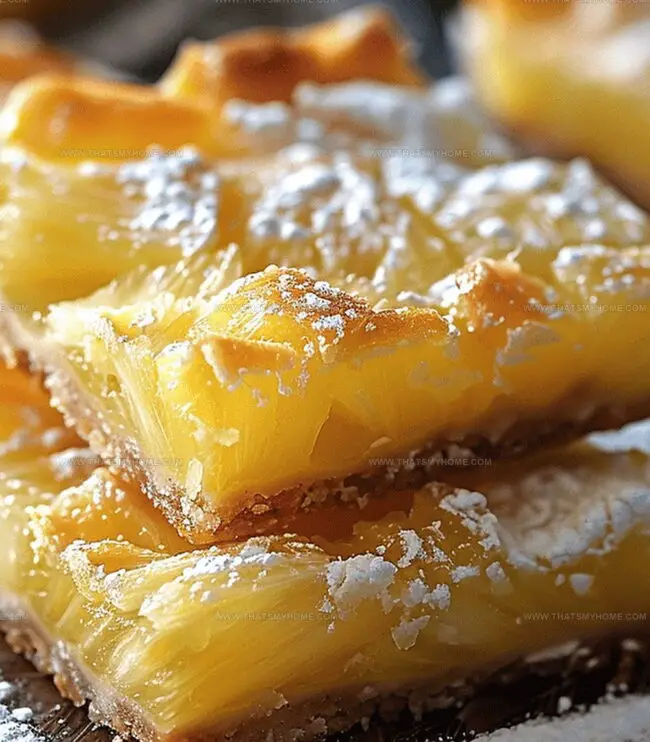
Tangy pineapple chunks nestled between velvety cream cheese and a golden graham cracker crust create pure culinary magic.
Each bite promises a delightful escape from ordinary treats, whisking you to a sunny paradise of deliciousness.
The simple ingredients mask an extraordinary dessert that feels like a luxurious indulgence.
Smooth, refreshing, and irresistibly addictive, these bars will become your new favorite summer sensation.
Grab your mixing bowl and let’s turn ordinary ingredients into an extraordinary dessert experience.
Quick Recipe Overview
Pineapple Bars: What You’ll Need
For The Buttery Foundation:For The Luscious Filling:For The Finishing Touch:Equipment for Baking These Tropical Treats
How to Make Pineapple Bars with a Crumbly Top
Create a buttery base by combining dry ingredients and pressing into a baking dish. Bake until golden and crisp, forming a delightful foundation for the tropical treat.
Blend creamy ingredients into a smooth, luxurious filling that captures the essence of sunny island flavors. Ensure a silky consistency that promises a melt-in-your-mouth experience.
Gently pour the tropical cream over the golden crust, allowing the layers to marry in the warmth of the oven. Bake until the filling sets with a gentle wobble, signaling perfect doneness.
Let the bars cool completely, transforming into a perfect canvas. Dust with a delicate snow of powdered sugar, creating an elegant finish that hints at the deliciousness within.
Tips for Sweetness, Texture, and Swaps
Serving Pineapple Bars for Any Occasion
How to Store Pineapple Bars and Keep Them Soft
Print
Tropical Pineapple Bliss Bars Recipe
- Total Time: 55 minutes
- Yield: 13 1x
Description
Rich chocolate pineapple bliss bars offer a tropical dessert paradise with layers of creamy sweetness and tangy fruit. Coconut and macadamia nuts provide delightful crunch, making these bars an irresistible treat you’ll savor to the last bite.
Ingredients
- 2 cups (470 ml) all-purpose flour
- 1 can (20 oz / 567 g) crushed pineapple, well-drained
- 1 cup (240 ml) sour cream
- 2 large eggs
- ½ cup (113 g) unsalted butter, softened
- ½ cup (100 g) granulated sugar
- ¼ cup (50 g) granulated sugar
- 1 tsp vanilla extract
- Powdered sugar for dusting
Instructions
- Prepare Workspace: Preheat oven to 350°F (175°C) and lightly grease a 9 x 13 inch baking dish to prevent sticking.
- Craft Crust Foundation: Blend all-purpose flour and granulated sugar, then cut in cold butter until the mixture forms coarse, uneven crumbs that will create a crisp base.
- Shape and Pre-Bake Crust: Press the crumbly mixture evenly across the baking dish bottom, then bake for 15 minutes until edges turn golden brown, establishing a sturdy foundation for the dessert.
- Create Luxurious Filling: Thoroughly drain pineapple chunks, then whisk sour cream, sugar, eggs, and vanilla extract into a silky-smooth mixture, folding in the pineapple chunks to distribute evenly.
- Assemble and Bake: Pour the pineapple-cream filling over the pre-baked golden crust, spreading uniformly, and return to the oven for 25-30 minutes until the center shows a slight wobble, indicating perfect doneness.
- Final Touches: Remove from oven and cool completely at room temperature, allowing the filling to set; generously dust with powdered sugar using a fine-mesh sieve for an elegant finish.
- Serve with Style: Slice into clean rectangular bars with a sharp knife, presenting at room temperature to maximize flavor and texture.
Notes
- Drain Pineapple Thoroughly: Remove excess moisture completely to prevent soggy crust and ensure a firm, crisp texture in your bars.
- Room Temperature Ingredients: Allow eggs and sour cream to sit at room temperature for 30 minutes before mixing to create a smoother, more uniform filling.
- Check Crust Carefully: Watch the crust edges closely during pre-baking to avoid burning, aiming for a light golden-brown color.
- Cooling is Crucial: Let bars cool completely at room temperature to help filling set properly and develop optimal flavor and texture.
- Prep Time: 10 minutes
- Cook Time: 45 minutes
- Category: Desserts, Snacks
- Method: Baking
- Cuisine: American
Nutrition
- Serving Size: 13
- Calories: 217
- Sugar: 14 g
- Sodium: 100 mg
- Fat: 9 g
- Saturated Fat: 5 g
- Unsaturated Fat: 4 g
- Trans Fat: 0 g
- Carbohydrates: 30 g
- Fiber: 1 g
- Protein: 3 g
- Cholesterol: 40 mg
Michael Rivera
Co-Founder & Culinary Instructor
Expertise
Education
The French Culinary Institute (now part of the International Culinary Center)
Michael Rivera is a seasoned chef and culinary instructor based in San Francisco, CA. Trained in Classic Culinary Arts at The French Culinary Institute, he refined his skills in Michelin-starred kitchens, mastering classic French techniques and artisanal bread baking.
Passionate about making gourmet methods accessible, Michael co-founded thatsmyhome.com to share his expertise through interactive online lessons and innovative, plant-based recipes. He loves blending traditional techniques with modern ideas, encouraging home cooks to enjoy the art of cooking in a relaxed, fun environment.