Zesty Garlic Cheddar Biscuits Recipe: Fluffy Homemade Joy
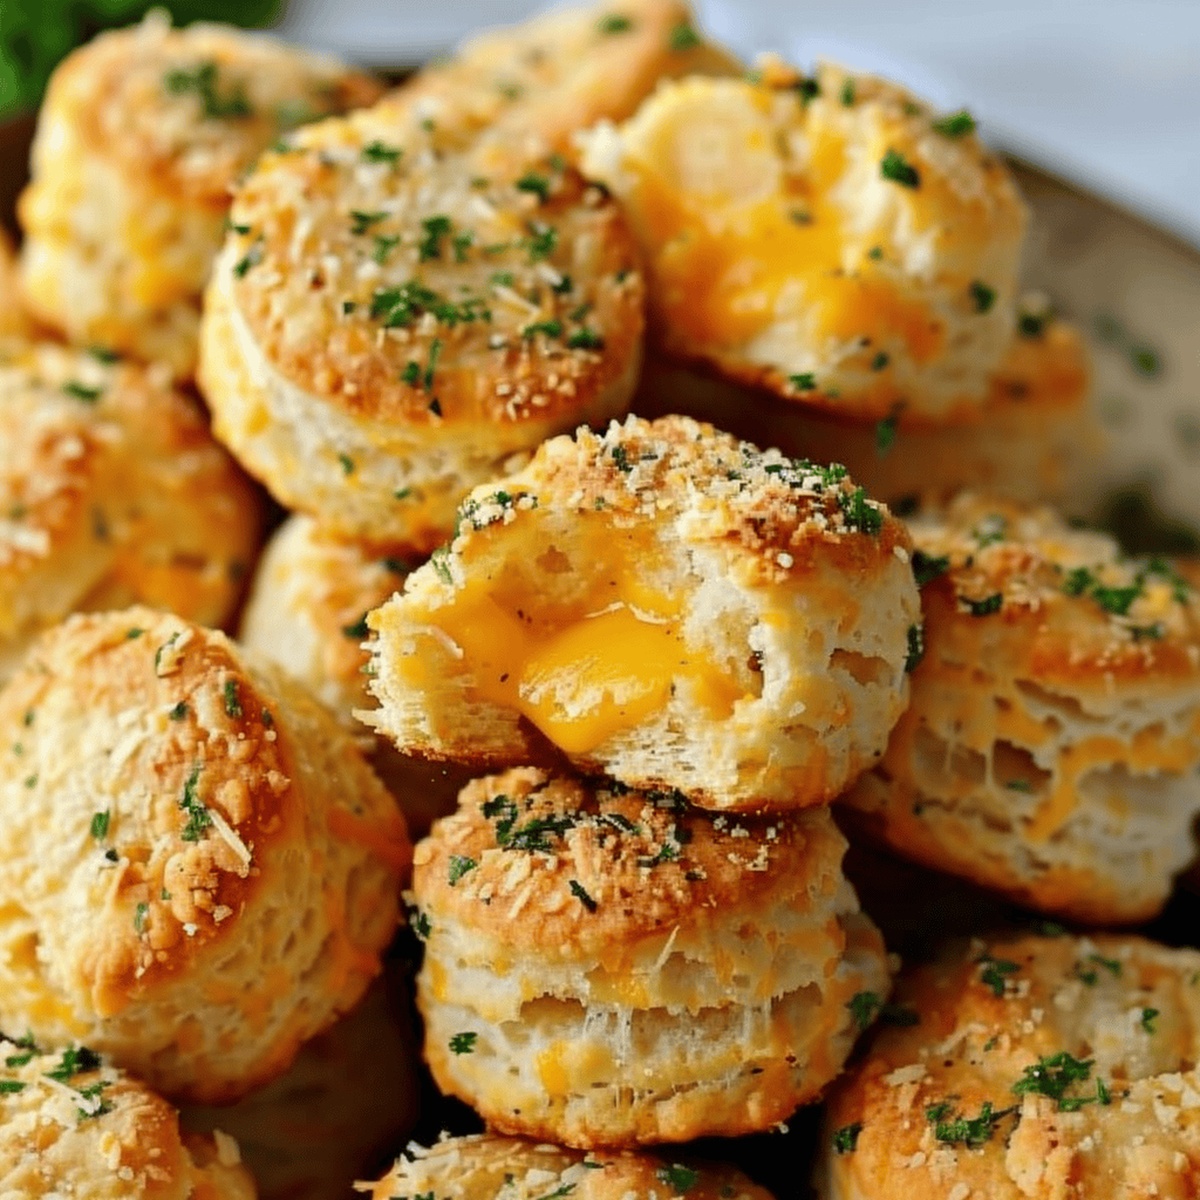
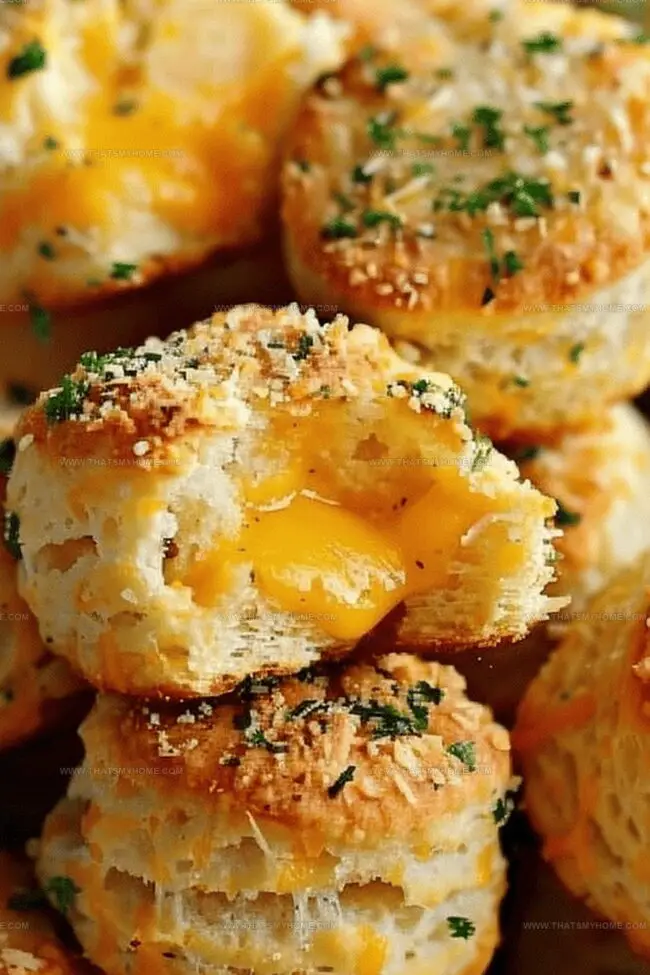
Golden, flaky biscuits with a garlic cheddar recipe burst with buttery, cheesy goodness that makes mouths water instantly.
These savory delights come together in minutes with simple ingredients from your pantry.
Every bite delivers a rich, hearty flavor that warms the soul.
The combination of sharp cheddar and aromatic garlic creates an irresistible aroma that fills the kitchen.
Tender and soft on the inside, with a slightly crisp exterior, these biscuits complement soups, stews, or stand perfectly alone as a delectable snack.
Quick to mix and even faster to devour, they’re sure to become a staple at your table.
Grab your mixing bowl and let’s bake something deliciously unforgettable.
Quick Recipe Overview
Ingredients for Garlic Cheddar Biscuits
For Base Ingredients:For Coating Mixture:For Finishing Ingredients:Tools for Garlic Cheddar Biscuits
Garlic Cheddar Biscuits Step-by-Step

Invite your oven to a toasty 375°F adventure, creating the perfect welcoming environment for delicious baking magic.
Gently slice each biscuit, creating a soft canvas for a hidden cheesy surprise. Carefully nestle a cheese cube in the center, lovingly wrapping the dough around it like a warm hug, ensuring no cheesy secret can escape.
Melt butter and garlic together in a quick microwave dance, creating a fragrant liquid gold that will make taste buds tingle with excitement.
Mix fresh parsley and parmesan into a delightful mountain of flavor. Playfully dunk each dough pocket into the buttery mixture, then roll it through the cheesy landscape, creating a delectable armor of deliciousness.
Arrange these flavor-packed pockets on a parchment-lined stage, letting them bake for 10-12 minutes until they transform into golden-brown treasures with crispy edges and melty centers.
Flavor Tips for Garlic Cheddar Biscuits
Serving Garlic Cheddar Biscuits
Storage and Reheat Tips for Garlic Cheddar Biscuits
Print
Buttery Garlic Cheddar Biscuits Recipe
- Total Time: 25 minutes
- Yield: 11 1x
Description
Savory garlic cheddar biscuits combine sharp cheese and aromatic herbs into a mouthwatering Southern side dish. Flaky layers and golden edges make these biscuits irresistible for weekend brunches or family dinners you’ll want to share.
Ingredients
- 1 can refrigerated biscuits (10 pieces, Country Style recommended)
- 20 cubes cheddar cheese (1.27 cm x 1.91 cm x 1.91 cm, approximately 4 oz)
- ⅓ cup (80 mL) parmesan cheese
- 3 tbsps (45 mL) butter
- 2 tsp (10 mL) dried parsley
- 1 clove garlic, crushed
Instructions
- Preparation: Preheat oven to 375°F (190°C) and line a baking sheet with parchment paper, creating an ideal surface for baking.
- Dough Transformation: Slice refrigerated biscuits in half, rolling each into a thin circle, preparing them for cheese-filled magic.
- Cheese Encasing: Center a cheddar cheese cube on each biscuit round, meticulously folding and sealing the dough to create a complete cheese-filled package.
- Flavor Coating: Whisk melted butter with minced garlic, then blend fresh parsley and parmesan in a separate dish to create a zesty exterior coating.
- Assembly: Immerse each cheese-stuffed dough ball into the garlic butter, then roll thoroughly in the herb-cheese mixture, ensuring complete coverage.
- Baking Process: Arrange coated biscuit balls on the prepared baking sheet, maintaining adequate spacing for even heat distribution.
- Finishing Touch: Bake for 10-12 minutes, monitoring until the exterior achieves a perfectly golden-brown hue, signaling their delectable readiness.
Notes
- Cheese Sealing Technique: Ensure edges are completely sealed to prevent cheese from leaking during baking, using gentle pinching motions to close any potential openings.
- Butter Coating Pro Tip: Warm garlic butter helps create a rich, aromatic flavor and promotes even browning of the biscuit exterior.
- Parsley-Parmesan Trick: Roll biscuits immediately after butter coating to help the herb-cheese mixture adhere perfectly and create a crispy, flavorful crust.
- Baking Precision: Watch biscuits closely during final minutes of baking to achieve a golden-brown color without overcooking, as each oven varies slightly in temperature and performance.
- Prep Time: 15 minutes
- Cook Time: 10 minutes
- Category: Breakfast, Snacks, Appetizer
- Method: Baking
- Cuisine: American
Nutrition
- Serving Size: 11
- Calories: 182
- Sugar: 1 g
- Sodium: 490 mg
- Fat: 10 g
- Saturated Fat: 6 g
- Unsaturated Fat: 4 g
- Trans Fat: 0 g
- Carbohydrates: 19 g
- Fiber: 1 g
- Protein: 5 g
- Cholesterol: 30 mg
Michael Rivera
Co-Founder & Culinary Instructor
Expertise
Education
The French Culinary Institute (now part of the International Culinary Center)
Michael Rivera is a seasoned chef and culinary instructor based in San Francisco, CA. Trained in Classic Culinary Arts at The French Culinary Institute, he refined his skills in Michelin-starred kitchens, mastering classic French techniques and artisanal bread baking.
Passionate about making gourmet methods accessible, Michael co-founded thatsmyhome.com to share his expertise through interactive online lessons and innovative, plant-based recipes. He loves blending traditional techniques with modern ideas, encouraging home cooks to enjoy the art of cooking in a relaxed, fun environment.